Arduino Eclipse IDE and Plugin V2.2 installation
To get this to work on Windows, checkout: http://eclipse.baeyens.it/rlogiacco/installAdvice.shtml – Windows Comments
These installation instructions are written for users that are already familiar with the Arduino IDE. While these are written for Linux and Mac users, other than the file locations and slight OS dependent differences in the Eclipse User interface.
Also these are written particularly for the new version of the Arduino Eclipse Plugin version 2.2. and the new Arduino Eclipse IDE which provides integration of the Teensy processor family, including the new Teensy3 and Teensy 3.1. These are Arduino compatible boards utilizing an ARM Cortex M4 32-bit micro controller.
Arduino Eclipse IDE
The plugin is still the same “thing” however the Arduino Eclipse IDE is new. It does not require a separate download of the Eclipse C/C++ IDE and then a separate installation of the plugin. It combines Eclipse Kepler and the Plugin (and then some). If you have not previously installed Eclipse and /or the plugin then it is recommended to use this. Should you have worked with the previous version of the plugin but would like to upgrade to Eclipse Kepler, the Arduino Eclipse IDE and the Plugin V2.2 are compatible with projects created to maintained with Plugin V2.1.0.4. Teensy users will will need to go, into the project properties and re-select the boards.txt file.
1. Download the Arduino Eclipse IDE appropriate for your OS following this LINK
2. Un-zip the file and move the folder to your preferred location. On my iMac it is located it the Applications folder.
3. Download and and install Arduino 1.5.2 beta (preferred) or Arduino 1.5.5. Do NOT use Arduino 1.5.4!
4. If you want to program Teensy boards you will possibly already have Arduino 1.0.5 and Teensyduino installed and will need to create a Teensy Extension file as described HERE. Otherwise please skip this step.
5. Proceed to step 9 of the Plugin installation sequence, set your preferences and you’re done.
Arduino Eclipse Plugin V2.2
1. Download and install Eclipse IDE for C/C++ Developers. It needs to be he 32bit version of Eclipse Juno or Kepler. The lug in will not work with older versions.
2. Download and and install Arduino 1.5.2 beta (preferred) or Arduino 1.5.5. Do NOT use Arduino 1.5.4!
3. If you want to program Teensy boards you will possibly already have Arduino 1.0.5 and Teensyduino installed and will need to create a Teensy Extension file as described HERE. Otherwise please skip this step.
4. Start Eclipse. The first time it will ask you to select a workspace. For an Arduino work environment I’d suggest you select the place where you have all your Arduino Projects/Sketches. You can always change to another workspace if you have several of such directories.
5. From the Eclipse menu bar Eclipse select “Help” –> “Install new software”.
6. Make sure to uncheck the five check boxes in the above screen as otherwise you will not see the plugin in the selection window.
7. Select “Add” to add the download site for the Arduino Eclipse plugin : http://www.baeyens.it/eclipse/V2
8. A simple alternative to steps 5,6 and 7, is to go to “Help” -> “Eclipse Marketplace…” and search for “Arduino eclipse IDE”, and click “Install”
9. Eclipse will show which versions are available (Make sure to keep the “Group items by category” unchecked). Select the 2.1.0.4 version and click on “Finish”. You will be asked to restart Eclipse. Accept and follow the rest of the installation steps. The Plugin installs the usual Arduino button icons into the menu bar .
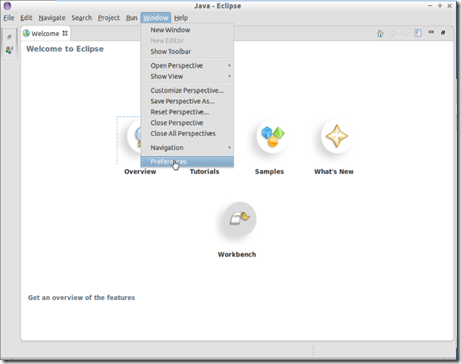
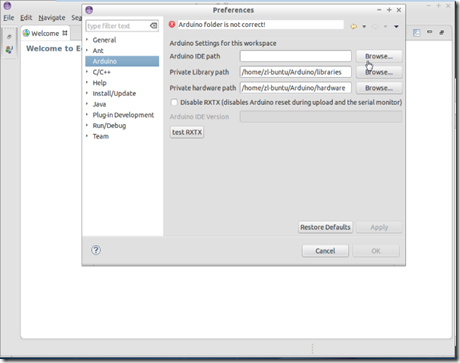
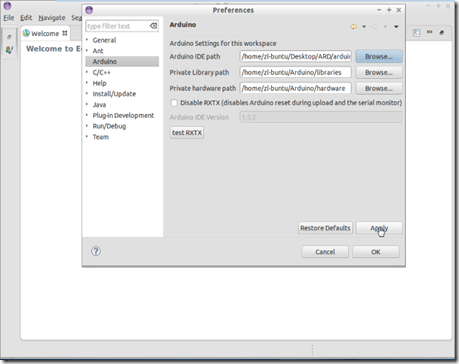
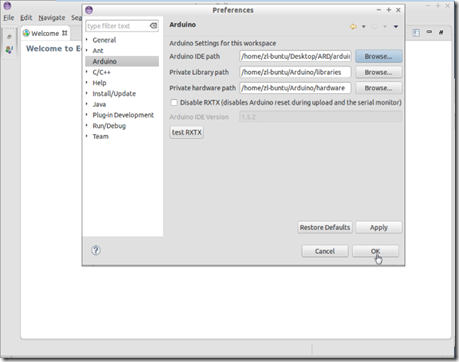
10. Now that the plugin is installed, from the Eclipse menu bar select “Eclipse” –> “Preferences”. In the preferences pane select “Arduino” and fill in the appropriate fields for “Arduino IDE path”, “Private library path” and “Private hardware path”. The example below shows where these directories located on my machine. Obviously this may be different on each users machine.
11. D.O.N.E. This concludes the installation. And now you can start with your first project using the Arduino Eclipse Plugin
I would also recommend for new users to read the info that Jantje has provided on his web site . There is a video demonstrating some of the above and while it is not reflecting the latest version of the plugin it still may provide some helpful hints.
Arduino Eclipse IDE – Setup and Test with Blink
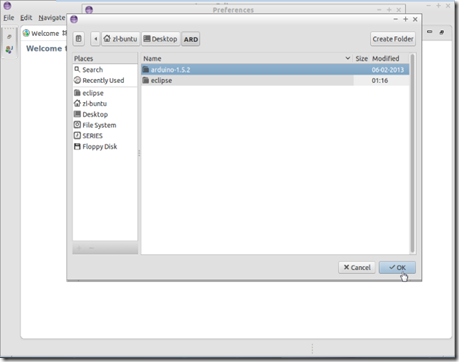
Select the Arduino IDE Folder (it needs some stuff from there)
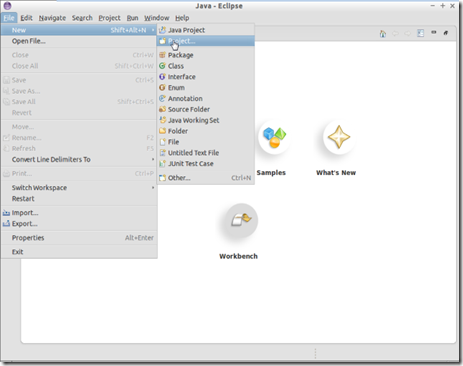
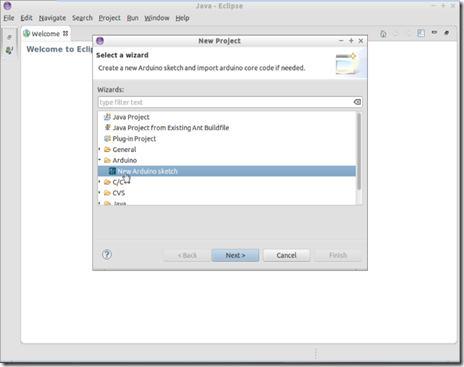
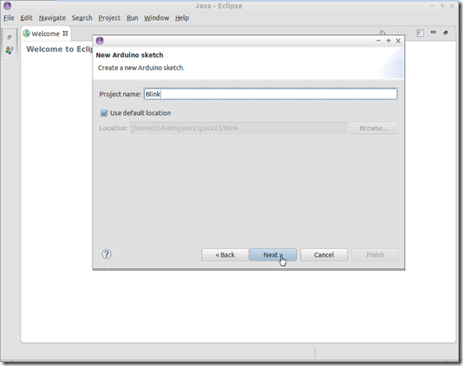
Creating an Arduino Project
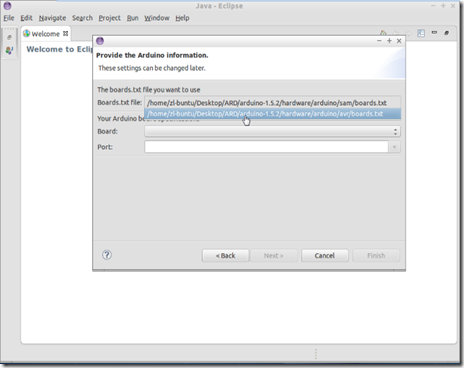
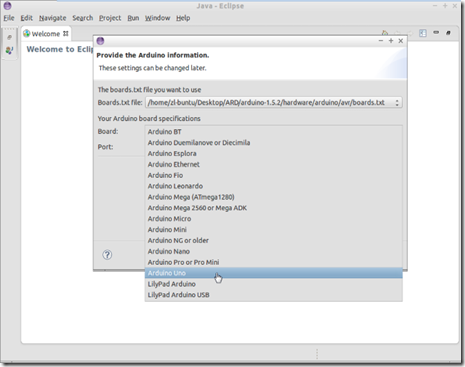
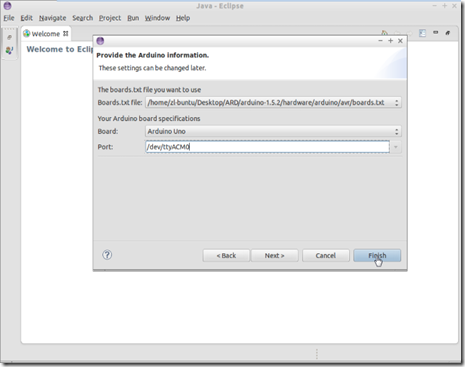
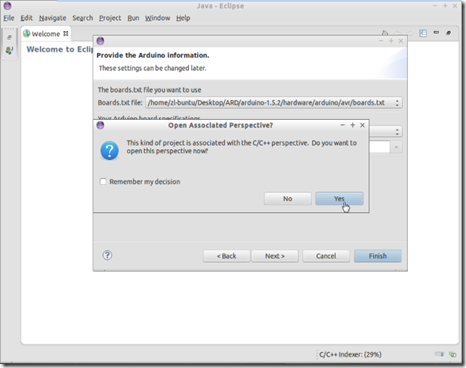
Arduino Board Setup
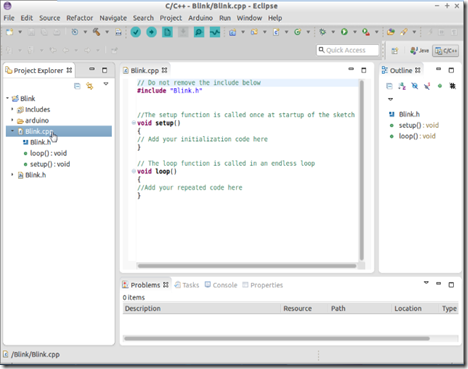
Blank Project
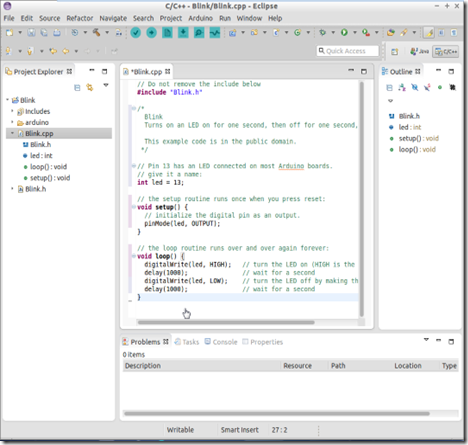
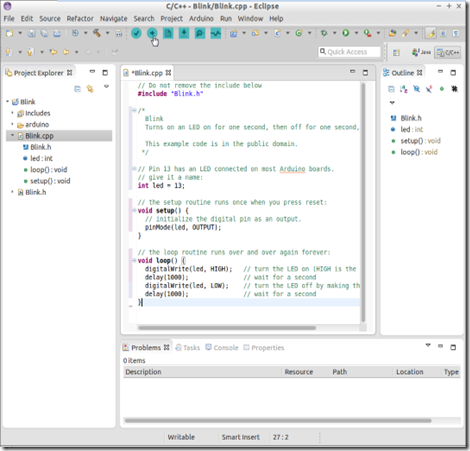
Coded Project (Blink in this case)
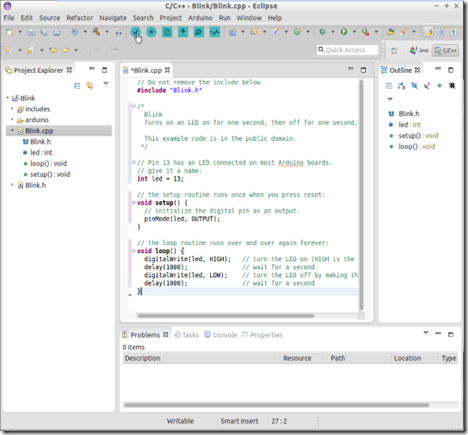
Verify and compile code (same icon that on the Arduino IDE)
Upload the compile code to Arduino (Same icons that on the Arduino IDE)
And that’s it, your code is now runing on your Arduino.
This post was made specially for the BragaLab online community, please support it on: https://www.facebook.com/BragaLab
Based On:
- http://trippylighting.com/teensy-arduino-ect/arduino-eclipse-plugin/arduino-eclipse-ide-and-plugin-v2-2-installation/
- http://trippylighting.com/teensy-arduino-ect/arduino-eclipse-plugin/arduino-eclipse-plugin-installation-2/
- http://marketplace.eclipse.org/content/arduino-eclipse-ide#.U5QUBPldXz8
- http://www.baeyens.it/eclipse
1 comment:
thanks for sharing information,good blog..
Passive Networking
Structured Cabling
Post a Comment