I was recently on the market for a new Desktop, I wanted a powerfull machine but on a budget, and also had the ability of becoming as ESXi host (aka ESXi whitebox).
So I started looking at AMD CPUs because of the lower price, I had always heard that Intel was the way to go for vitualization, but I soon found out that the AMD CPUs where very virtualization friendly suporting even the most advanced features, tha are normally only found on Intel’s high end Desktop CPUs or server CPUs.
One of these advanced features is:
- AMD-Vi - Directed Path I/O / IOMMU / Passthrough
that only found on Intel on non "k" series i5, i7 (high end Deskop), and xeon CPUs (server). On intel this features it’s called:
- VT-d - Directed Path I/O / IOMMU / Passthrough
This feature allows you to pass real hardware (PCI hardware), like a grafics card to a VM, so you can have for example a VM using your GPU directly and being displayed on you monitor like it was a real Desktop.
So If you can pass to the VM the following real hardware to the VM:
- USB Ports (Keyboard/Mouse)
- Grafics Card
- Sound Card
you have yourself a VM working as a Real Desktop, while having a ESXi host, where you can run aditional VMs.
To do this you also need a MOTHERBOARD that suports it, I thought this was going to be quite hard, but once again I found that this was well suported on many AMD motherboards like the ones based on the 970 chipset, which are really cheap mother boards.
Aditionally you also need a GRAFICS CARD that is supported on IOMMU, I found that AMD/ATI grafics cards are very easily suported even the really cheap ones (like mine AMD R5 230 or my older ATI 5540) as for NVIDIA only very high end cards support it:
- Cards that work
AMD Radeon R9 280
AMD Radeon R7 250
AMD Radeon HD 7970
NVIDIA Quadro K2000
- Cards that don't work
NVIDIA GeForce GTX 780 Ti
NVIDIA GeForce 660 Ti
NVIDIA GeForce 560
AMD Radeon R9 295x2
You can find a list of hardware that suports IOMMU here:
I found that gamers have been using this to make multiple gaming desktops out of only one computer with multiple grafics cards,as you can see at:
Index
- My Whitebox (for Passthrough / IOMMU)
- Downloading ESXi and Getting the Free License Key
- Making The ESXi Installer Flash Drive
- BIOS - Configuring The BIOS for Virtualization and IOMMU (Passthrough)
- ESXi – Instalation
- ESXi - Configuring The ESXi Management Network (Static IP)
- ESXi – Adding a Data Storage (aka VMs Storage Disk)
- ESXi - Passthrough (IOMMU) Configuration
- ESXi – HDs Passthrough (Mapping Physical HDs to Virtual)
- Desktop VM - Installing Windows with Passthrough
- Desktop VM - Adding Real HDDs (Virtual Representation)
- Desktop VM - Configuring AutoStart
- Desktop VM - Making The Desktop Hole Again
- ESXi - Adding The Free ESXi License
My Whitebox (for Passthrough / IOMMU)
After some research I bougth the following:
- 1x ASROCK 970A-G/3.1 SKT AM3+
- 1x AMD FX-8350 4.0 GHz Vishera 8-Core Black Edition
- 1x ASUS RADEON R5 230 Silent 2GB GDDR3
- 1x Intel 8492MT PRO/1000MT Dual Port Server (PCI)
At the time I didn’t had confirmation that the my specific:
- CPU
- Motherboard
- Grafics cards
worked with IOMMU/Passthrough, but they worked perfectly.I found it amazing that all this hardware from less expensive/alternative brands all worked without a problem.
The only thing that didn’t work on VMWare ESXi was the integrated NIC on my motherboard (Realtek Chipset), and you need a NIC that is supported on VMWare ESXi otherwise It will not install, so I bougth the:
- Intel 8492MT PRO/1000MT Dual Port Server (PCI) – 14$ on ebay
previously I used a desktop NIC that I already had:
- Intel 8390MT PRO/1000MT Desktop Adapter (PCI) – 10$ on ebay
this NIC gives a warning when instaling of ESXi about unsuported hardware but It let’s you install and it works perfectly (on VMware ESXi 6.0.0 Update2), but you should buy the first because it’s a server NIC and it will probably will be suported for more time on ESXi.
Downloading ESXi and Getting the Free License Key
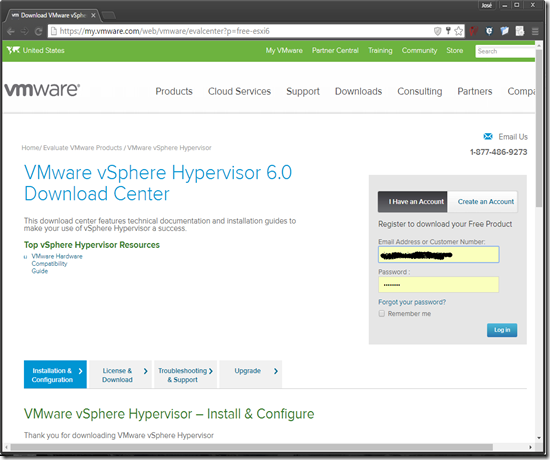
In order to download the ESXi Hypervisor (aka vSphere), just go to:
if you don’t have an account you have to register. After being registered, login:
the ESXi you are going to download is the same as the paid version, the only diference is the license, we are going to use the free license wich is more limited.
You can use ESXi without the license for 60 days, during this period you all the features on ESXi available to you.
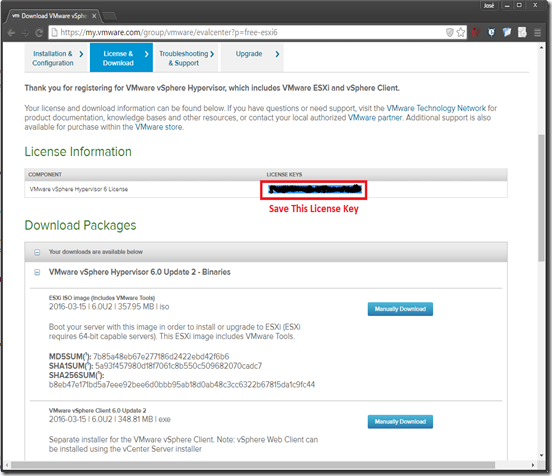
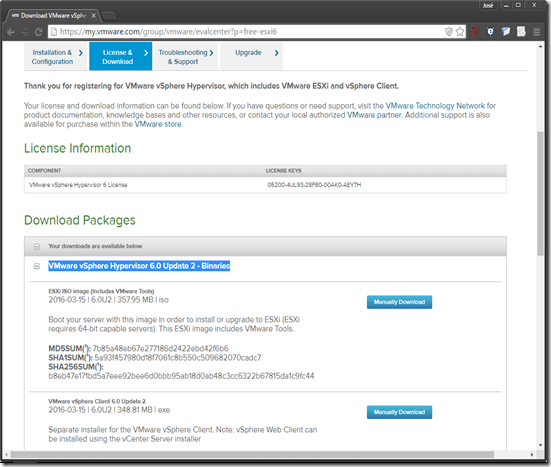
After the trial period you must enter a license, so you need to save this free license for later (or just come to this site again):
Download the most recent ESXi ISO installer image which the time I’m writing this post is vSphere 6.0.0 Update 2:
Making The ESXi Installer Flash Drive
Now that you have the image, you can either burn it on a CD (wich is very old school), or you can convert it to an USB PEN Drive wich is what I’m going to show here.
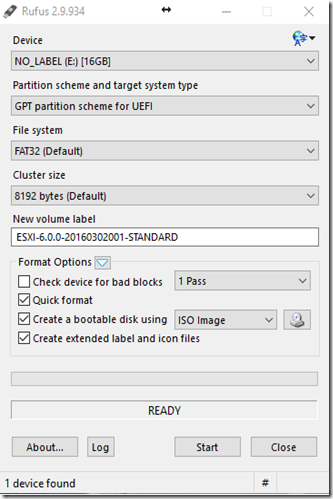
Get Rufus, which is probably the simplest tool to make bootable USB Pen Drives from ISOs:
Open it, select you USB Pen Drive, select “ISO Image” and then select the ESXi ISO, and press Start.
BIOS - Configuring The BIOS for Virtualization and IOMMU
(Passthrough)
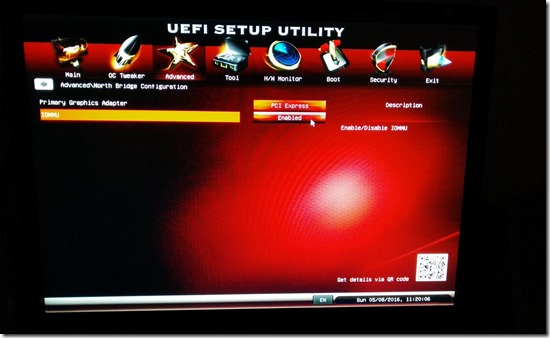
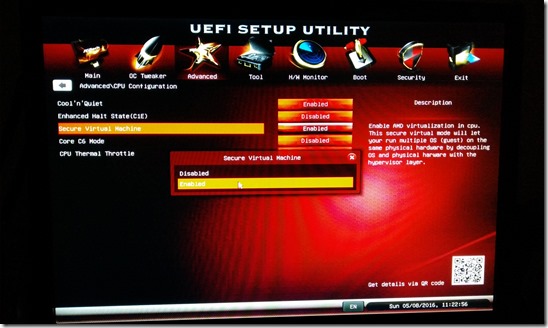
The BIOS config is specific to my motherboard (ASROCK 970A-G/3.1), but basically you just have to enable all the virtualization features you can find.
In my mother board you have the specific option to enable IOMMU, but I have seen other motherboards that suport IOMMU where you don’t have the specific option, and you just enable the virtualization extensions.
Enabling IOMMU (Directed Path I/O aka Passthrough)
Enabling the Normal Virtualization Extensions
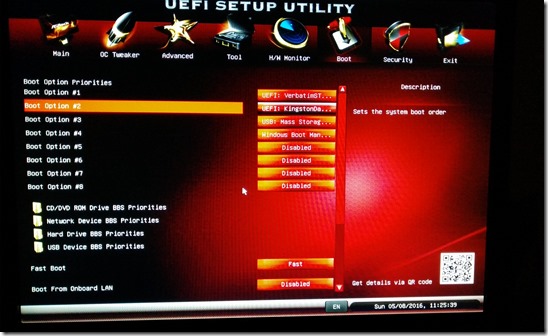
Selecting the Boot Pen
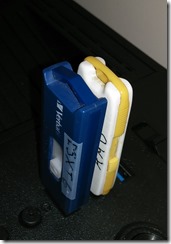
The Blue Flash Drive (Verbatin) is my ESXi installer (it’s the boot flash drive I made with Rufus), and the Yellow (Kingston) is where I’m going to install the ESXi (aka vSphere), but you can install it on a normal hard drive.
I used a USB because ESXi wipes repartitions de disk where It is installed making it unusable for almost anything else while It only occupies 2-3 GB wich fits well in a Flash Drive.
On usage is to use it as a Datastore, but that is not recommended, because when you install a new version it wipes the hole drive and when it upgrade It the is always the possibility off something going wrong.
ESXi – Instalation
Now that we have the boot pen selected as the first boot option, lets start installing VMWare ESXi (aka vSphere)
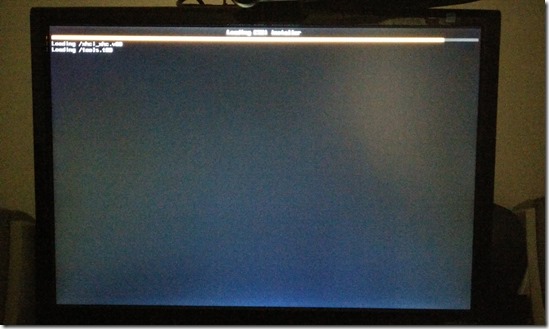
VMware ESXi Installer Booting
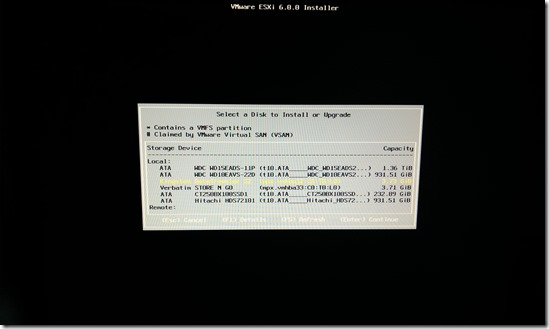
Selecting the Instalation Hard Drive
Here you select where you want to install ESXi, in my case I’m going to install it on another USB Pen Drive (Yellow – Kingston), because ESXi will wipe you target disk (see repartition warning bellow).
Starting the Instalation Process
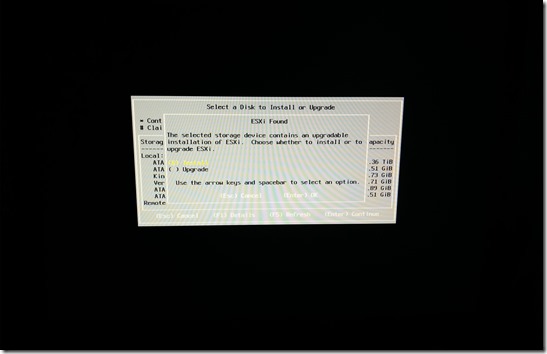
If you already had a previous ESXi on the target instalation disk you could Upgrade it.
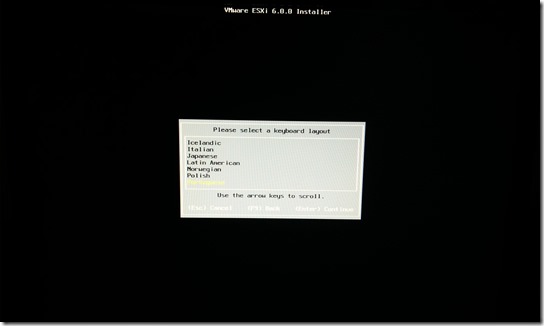
Selecting the Keyboard Layout
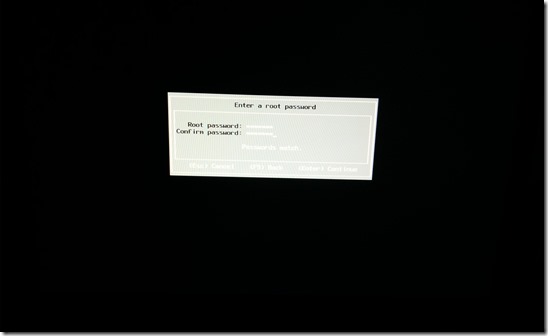
Setting the root Password
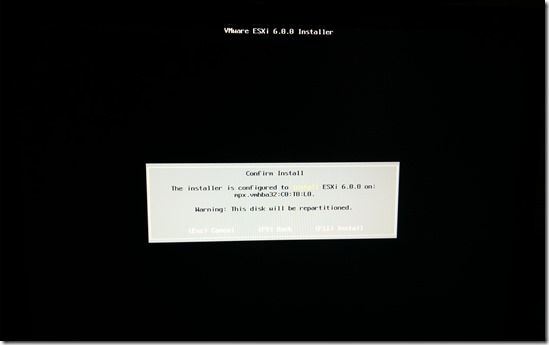
Warning – Your Disk Will Be Repartitioned
This is a very important warning and it’s the main reason for me to install ESXi on a USB Pen Drive. What is going to happen is that you disk will repartitioned, which will make you loose all the data that where on the previous partitions.
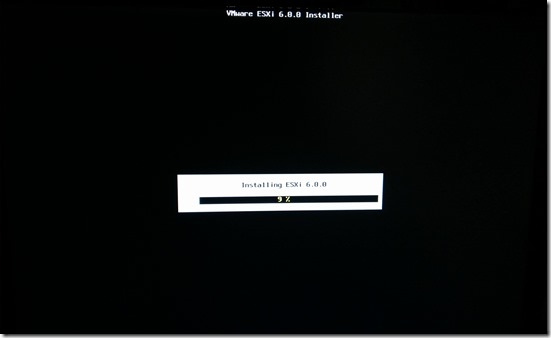
Installing ESXi…
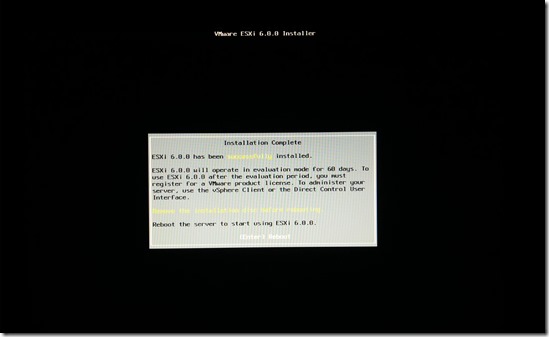
Instalation Done
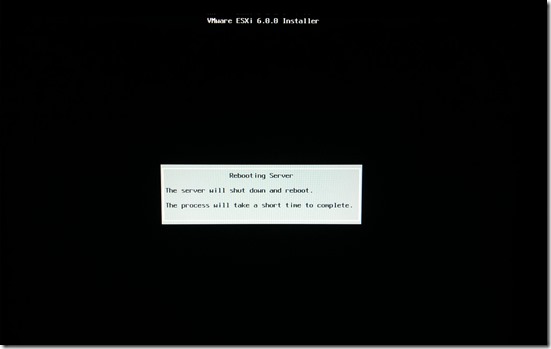
Reboot to Boot the Installed VMWare ESXi
Here is where I remove the instalallation Pen Drive (Blue – Verbatin), and leave the target Pen Drive (Yellow – Kingston), in order to boot from my second boot option (Yellow – Kingston).
You can always go to your BIOS and select the disk where you installed VMWare ESXi, as the first boot option.
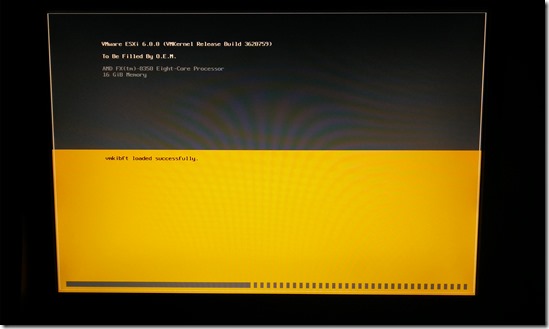
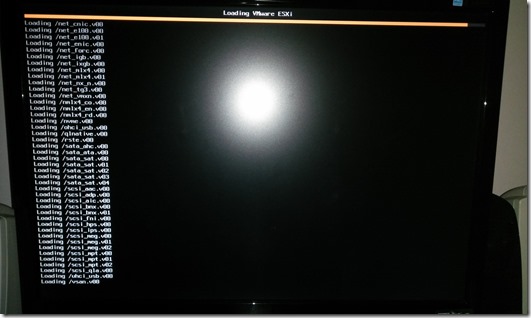
The Newly Installed ESXi Booting
This looks a lot like the instalation process boot.
In my case this is my Yellow Pen Drive Booting (Kingston)
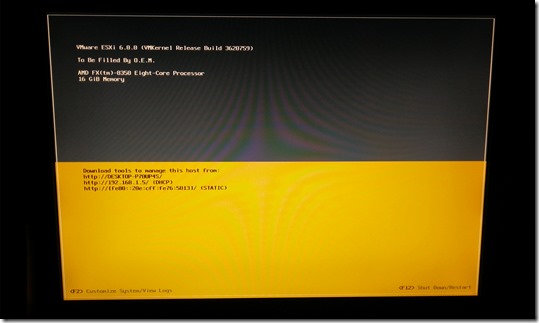
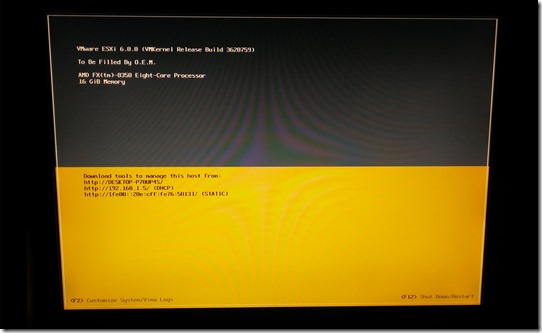
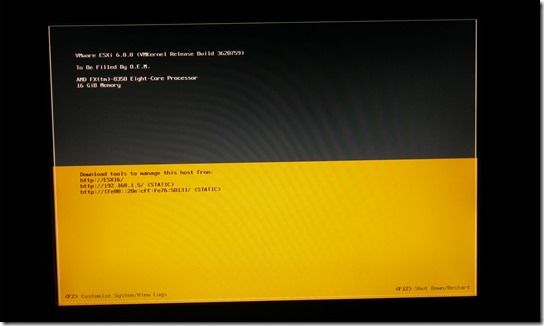
Boot Done
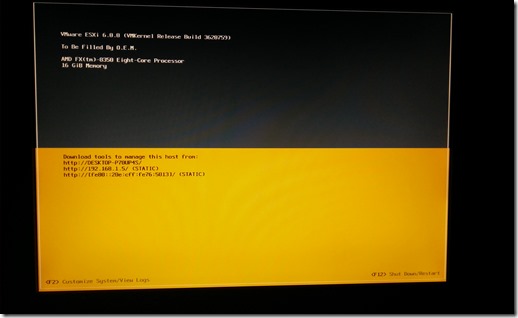
At this stage the boot is done and VMWare ESXi, as gained it’s network configuration via DHCP, and you can already access it, the link is the one shown on the image, in my case:
- http//192.168.1.5
In the next step we are going to make the network config static so it doesn’t change over time.
ESXi - Configuring The ESXi Management Network (Static IP)
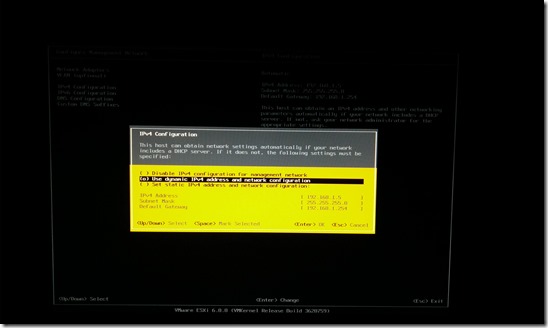
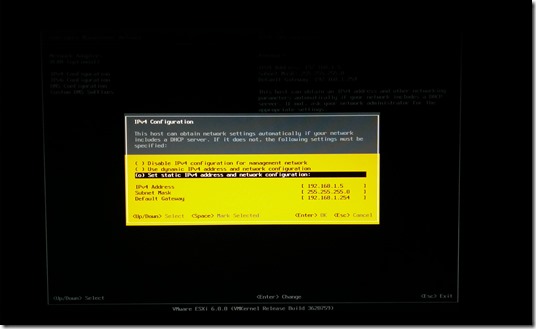
You can leave you network config via DHCP but each time you reboot you migth get a different IP, wich will prevent you from accessing your ESXi server (aka ESXi host)
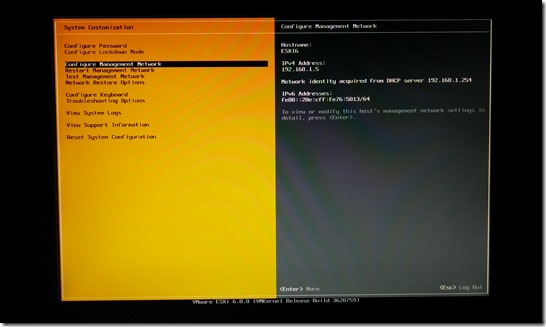
Management IP Configuration via DHCP (default)
Let’s Access the Management Network IP Configuration
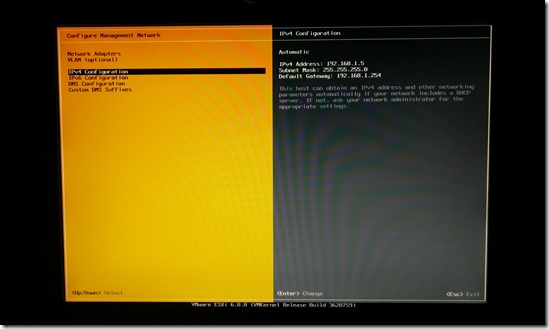
Let’s Change it to Static
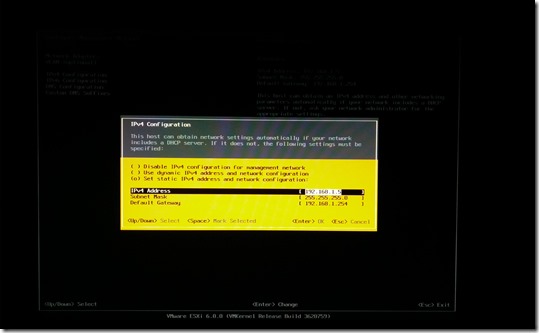
Let’s Define the Static Management IP
It assumes taht the static IP is the same IP that it got via DHCP but you can change It, and you probably should, for now I’m mantaining the same IP.
ESXi – Adding a Data Storage (aka VMs Storage Disk)
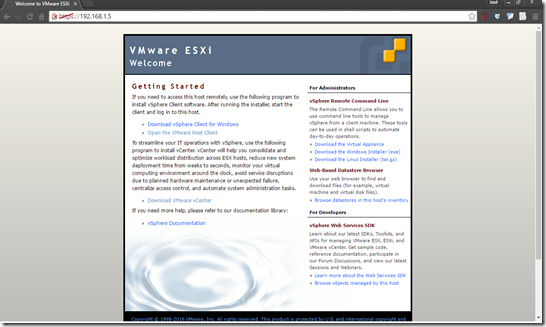
Now let’s start using ESXi, for that you just input your ESXi Host IP on a browser, and you will see the following page:
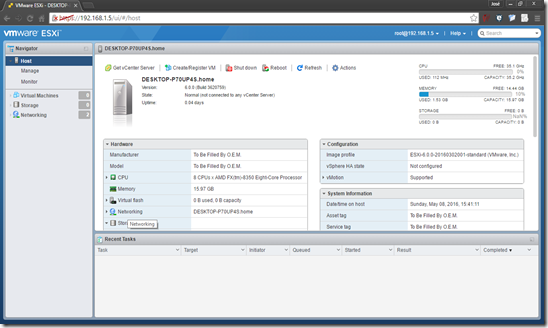
Up until know we only had the vSphere Client for Windows, now you also use a webpage (VMWare Host Client), that looks like this:
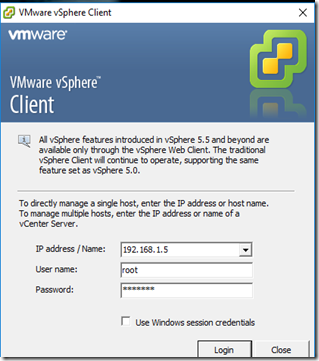
all the new feature are being implement in this webpage, which I found to be super intuitive, but because it’s only available in recent updates of versions 5.5 and 6.0, I’m going to use the vSphere Client for Windows because It’s available in all the versions.
Logging In…
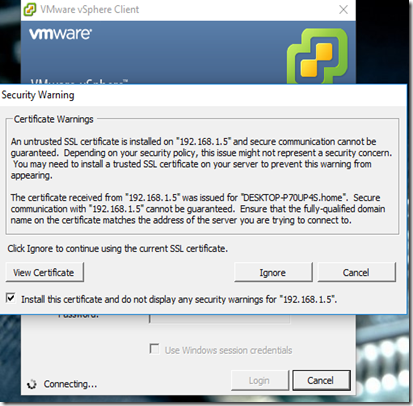
Check Install this certificate and press Ignore:
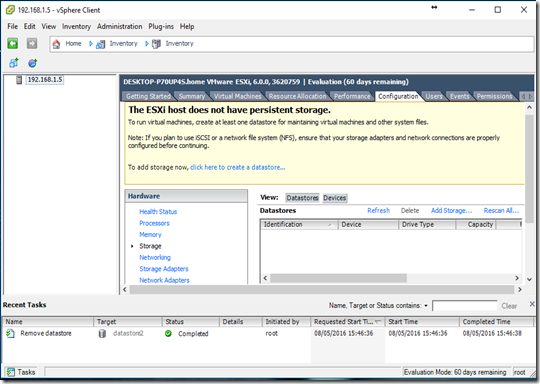
Now we are in ESXI for the first time… Hurray…
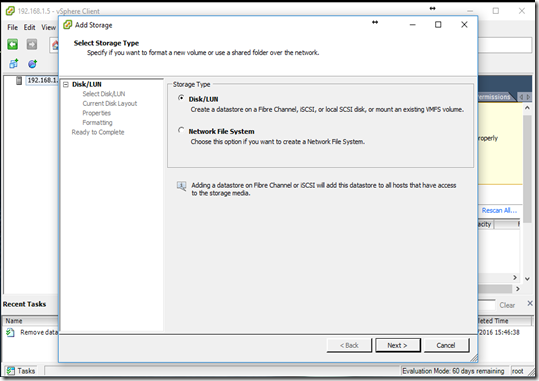
Now let’s add a Datastorage, wich is a disk formated with the VMFS filesystem, where you are store the Virtual Machines.
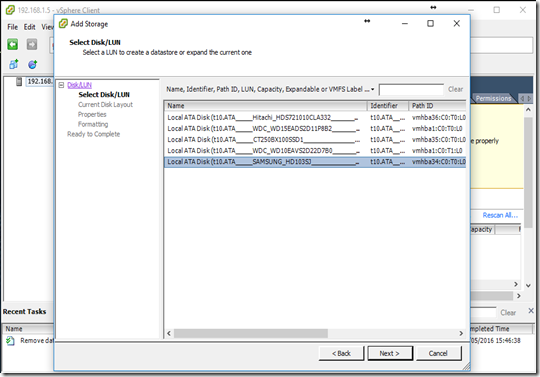
Select the HD you want to use as a Datastore:
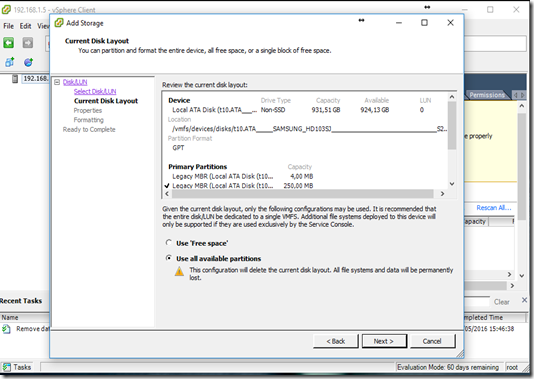
Normally people use a dedicated disk as a Datastore, as shown bellow, but you can use a disk with partitions on It, for that just leave some empty space and chose the “Use free space”’option:
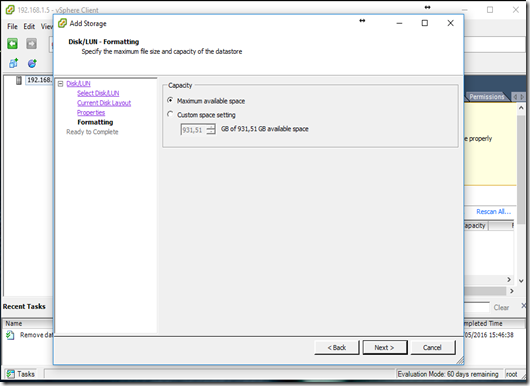
chose the size from the available space:
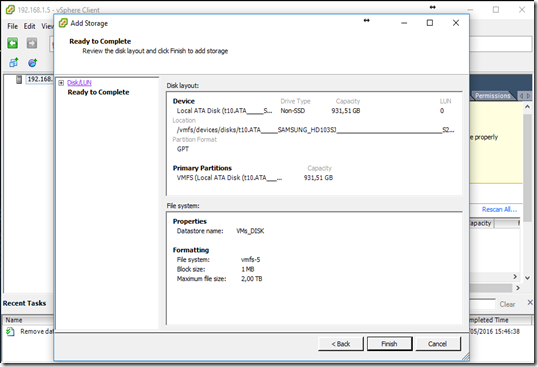
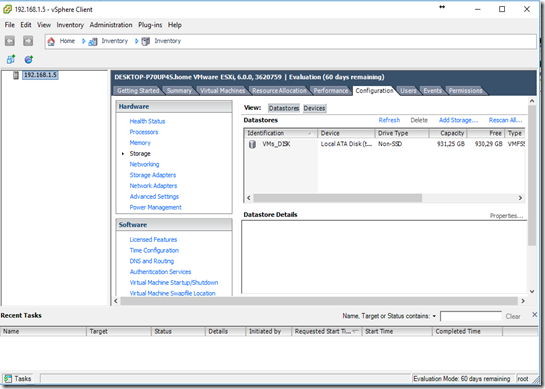
And that’s it, you know have a Datastore to store your Virtual Machines
ESXi - Passthrough (IOMMU) Configuration
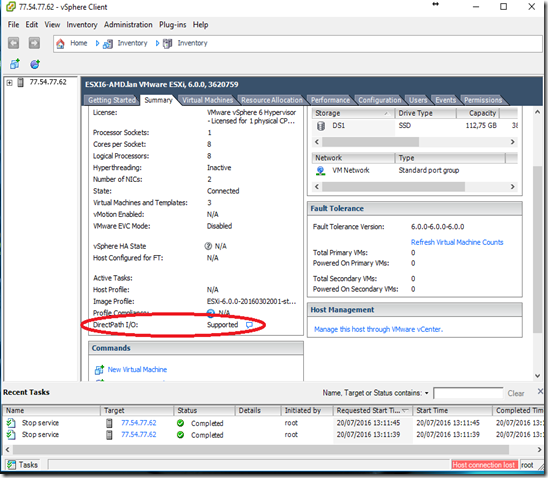
First you need to check if you hardware has Passthrough (IOMMU) suport, for that on the vSphere Client, just go to Summary, and check the DirectPath I/O, if you harware suports it it will say “Supported”, like in the picture bellow.
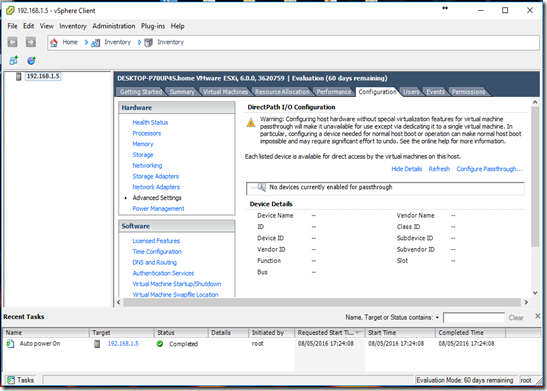
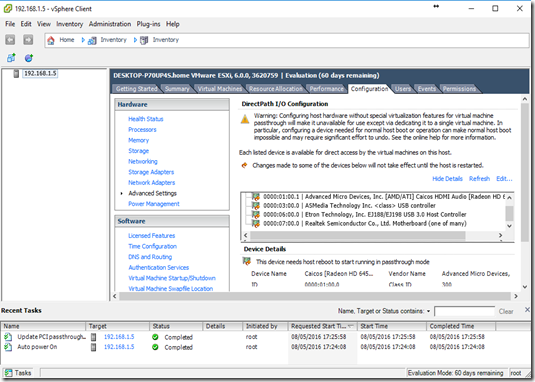
Now that we need to define the hardware that will be available for the virtual machines via passthrough (Grafics Card / USB Ports / Sound Card, etc).
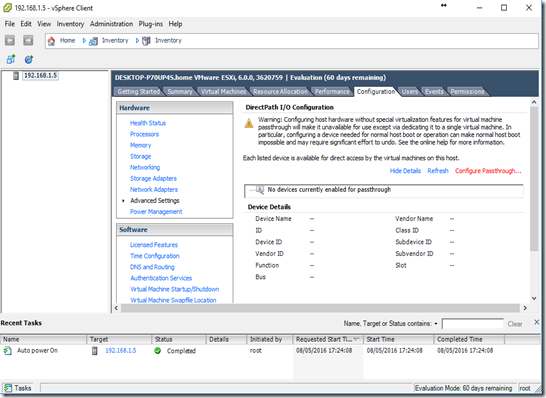
Go to “Advanced Settings”":
Select “Configure Passthrough”
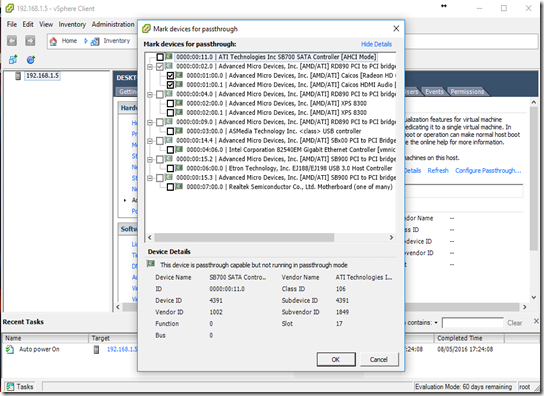
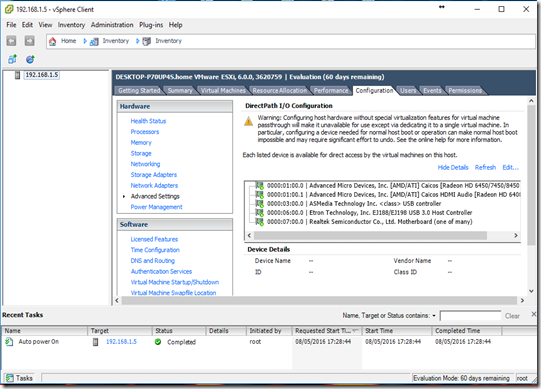
Now you have a list of all the hardware that is compatible with Passthrough (I migth take some trial error to find out what each entry represents), in my case you have:
- SATA II / III Disks Controller (all Sata II or III HardDrives)
- AMD Grafics Card 1 - ASUS RADEON R5 230
- AMD Grafics Card 2 - ATI 5540 (you don’t need a second grafics card)
- USB 3.1 Controller (all USB 3.1 Ports)
- Intel NIC
- USB 3 Controller (all USB 3 Ports)
- Onboard RealTek NIC
Some of the things that weren’t compatible in my case where
- Sata I Hard Drives
- USB 2 Ports
- Sound Card
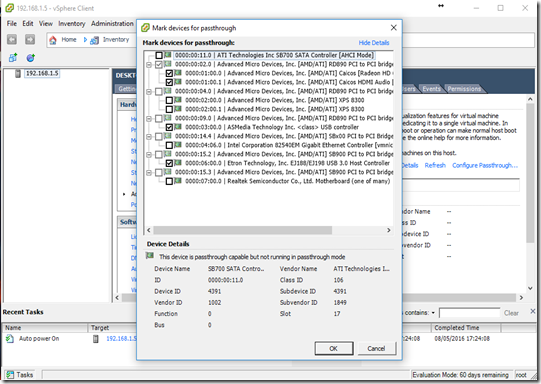
Select the hardware that you want to passthrough to the Desktop VM, I selected:
- AMD Grafics Card 1 - ASUS RADEON R5 230
- USB 3.1 Controller (all USB 3.1 Ports)
- USB 3 Controller (all USB 3 Ports)
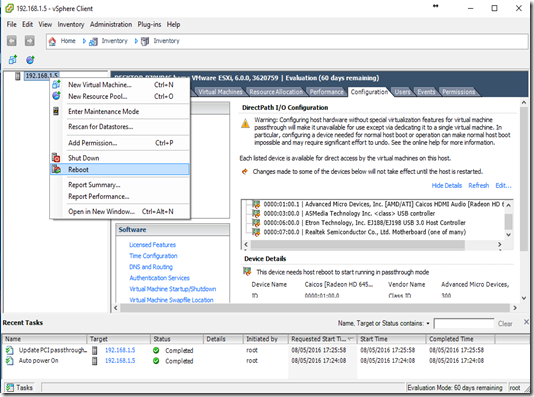
Once selected you have to reboot the ESXI Host in order to make the selection efective:
Now you can start assigning hardware to your VMs.
ESXi – HDs Passthrough (Mapping Physical HDs to Virtual)
You can passthrough you hard drives, the problem is that you either pass all or none, wich means that you will probably pass the disk with the Datastore (where we have the VMs), leaving you without any VMs.
The alternative solution I found was to map the real hard drives that I wanted onto a virtual representation that I can add to VMs.
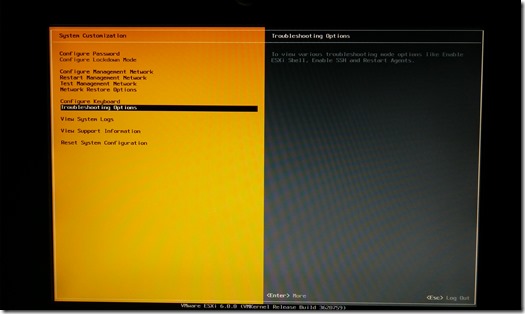
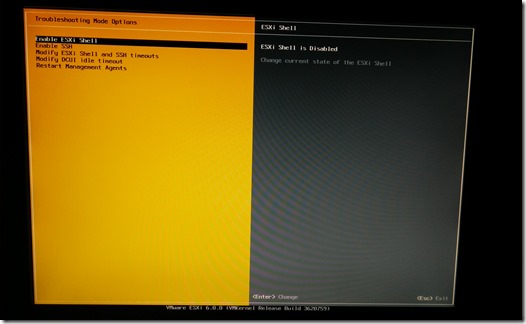
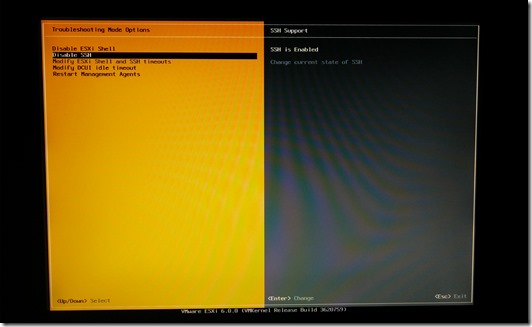
First Step – Gaining Access to the ESXI CLI via SSH
Activating the ESXi shell
Activating the SSH access
Restarting the agent
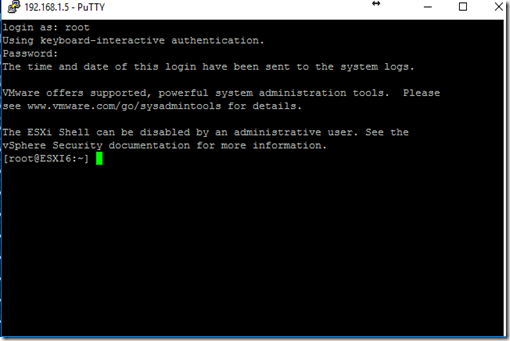
Second Step – Mapping the Physical HDs onto the Virtual Representations
Connect to the ESXi server via SSH
identify the disks that you want to map to a virtual disk,
ls -al /vmfs/devices/disks
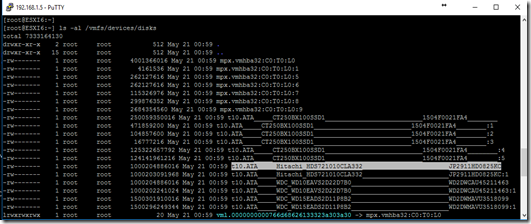
and save their names:
t10.ATA_____Hitachi_HDS721010CLA332_______________________JP2911HD0825KC
t10.ATA_____WDC_WD10EAVS2D22D7B0__________________________WD2DWCAU45211463
t10.ATA_____WDC_WD15EADS2D11P8B2__________________________WD2DWMAVU3518099
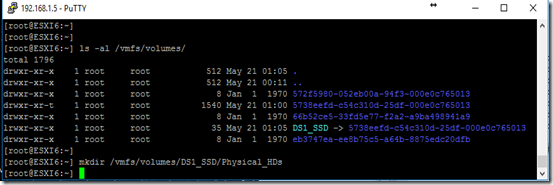
Identify the Datastore where you want to save the virtual representations of the physical disks
ls -al /vmfs/volumes/
I created the folder “Physical_HDs”, to store the virtual representations of the physical disks
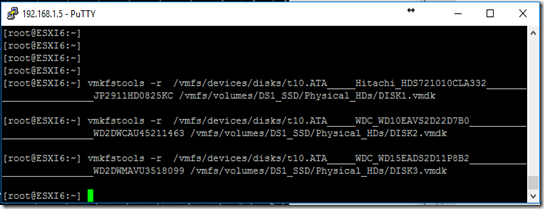
Now we create the virtual representations of the physical disks using the following command:
vmkfstools -r <source-physical-disk> <destination-virtual-disk>
in my case:
vmkfstools -r /vmfs/devices/disks/t10.ATA_____Hitachi_HDS721010CLA332_______________________JP2911HD0825KC /vmfs/volumes/DS1_SSD/Physical_HDs/DISK1.vmdk
vmkfstools -r /vmfs/devices/disks/t10.ATA_____WDC_WD10EAVS2D22D7B0__________________________WD2DWCAU45211463 /vmfs/volumes/DS1_SSD/Physical_HDs/DISK2.vmdk
vmkfstools -r /vmfs/devices/disks/t10.ATA_____WDC_WD15EADS2D11P8B2__________________________WD2DWMAVU3518099 /vmfs/volumes/DS1_SSD/Physical_HDs/DISK3.vmdk
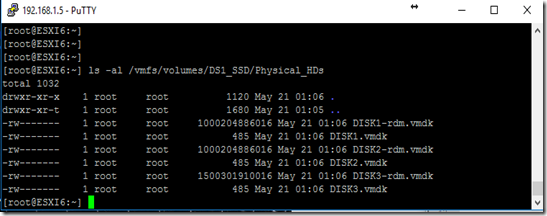
Let’s check that the virtual disks where created:
ls -al /vmfs/volumes/DS1_SSD/Physical_HDs
After we install the Desktop VM we are going to add these virtual disks that represent the physical disks to the Desktop VM.
Desktop VM - Installing Windows with Passthrough
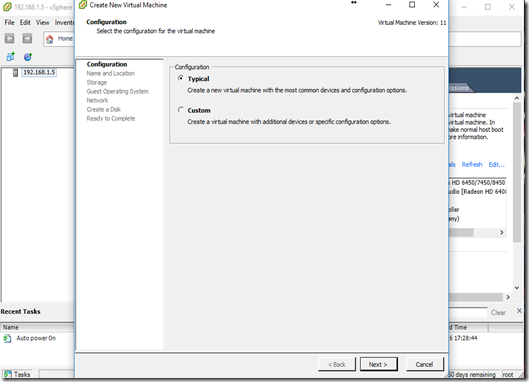
Let’s create the virtual machine that will become our Desktop.
This will be a VM with real hardware assingned to it, that will look and fell like a real desktop.
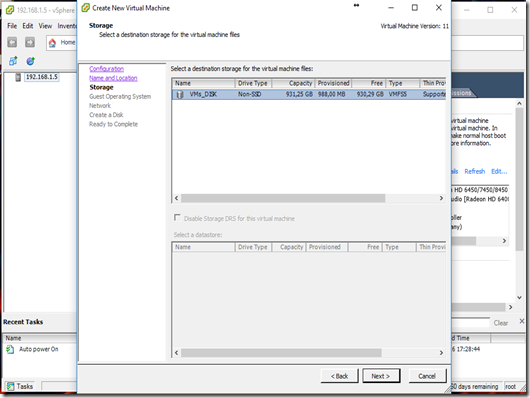
Select the Datastore where you want to store the VM:
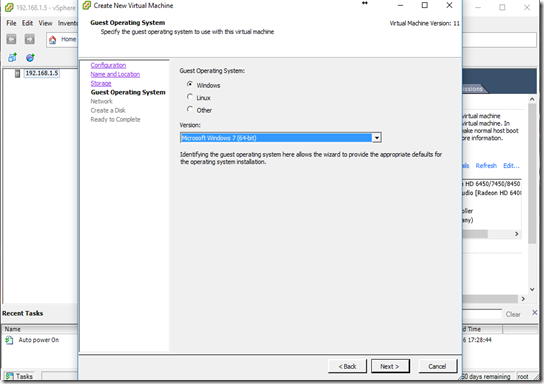
Select the VM OS:
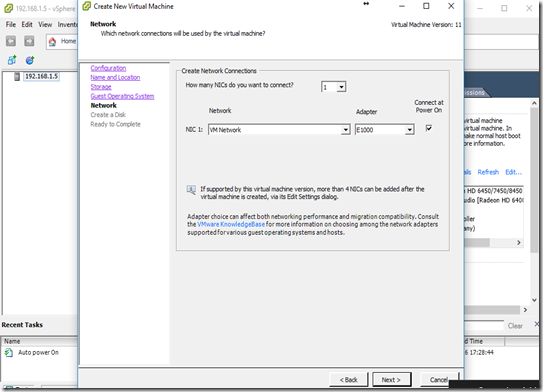
Select the type of virtual NIC (select the E1000 wich emulates a Intel 82545EM Gigabit Ethernet NIC, wich is a very widely suported real NIC), for more information on NICs check the following link:
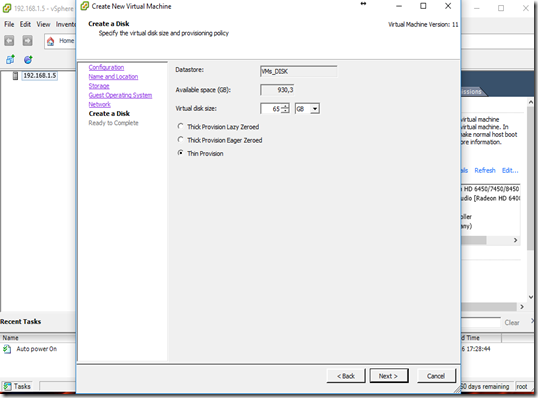
Create the VM virtual Hard Disk, where you will install the OS
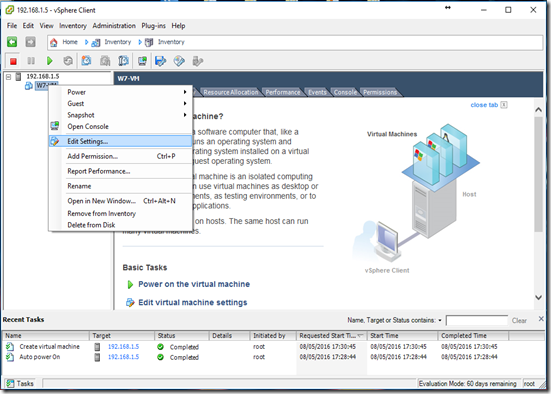
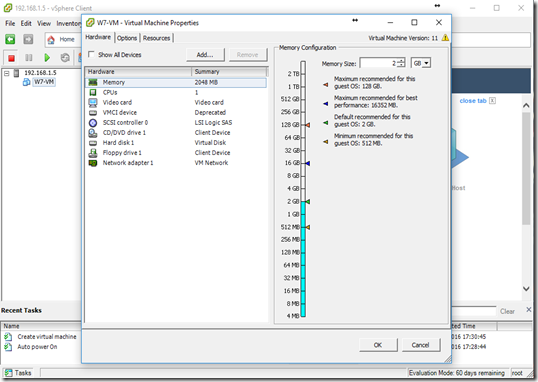
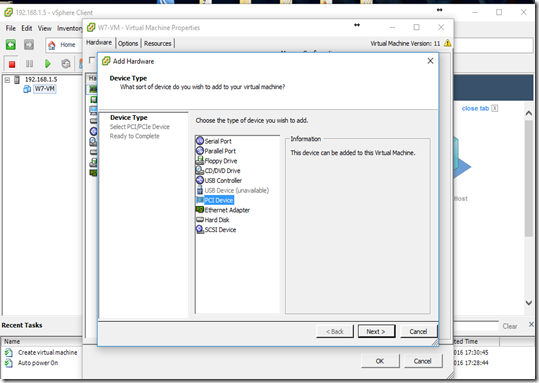
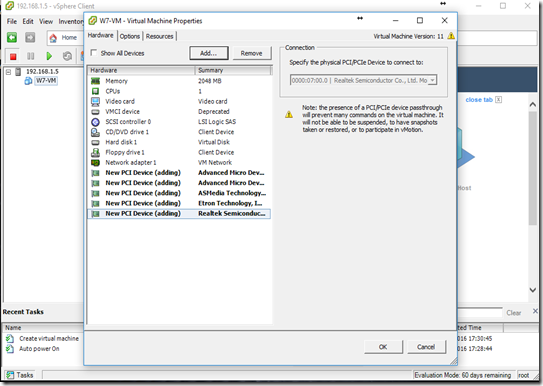
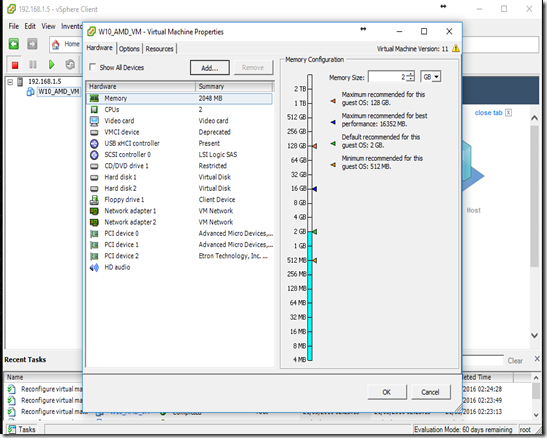
Add the real hardware to the VM:
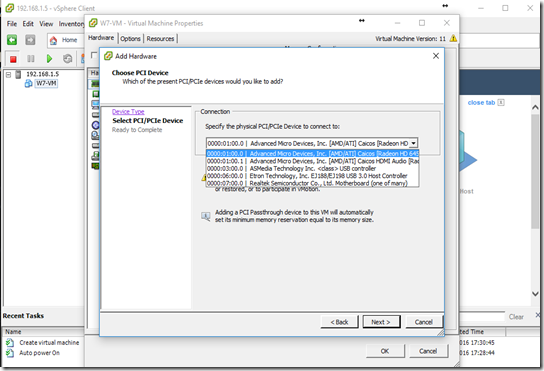
Now add the hardware that you want to passthrough,
my selection:
- AMD Grafics Card 1 - ASUS RADEON R5 230
- USB 3.1 Controller (all USB 3.1 Ports)
- USB 3 Controller (all USB 3 Ports)
- Onboard RealTek NIC (I selected it but I will be using the virtual interface)
The real hardware are the devices in bold (New PCI Device ….):
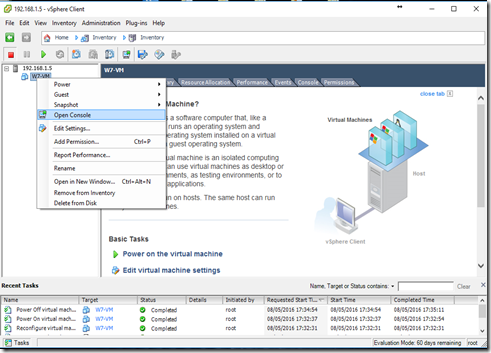
Now open the console that will show the VM
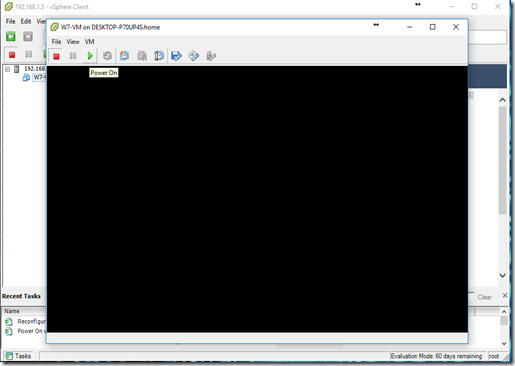
Start the VM…
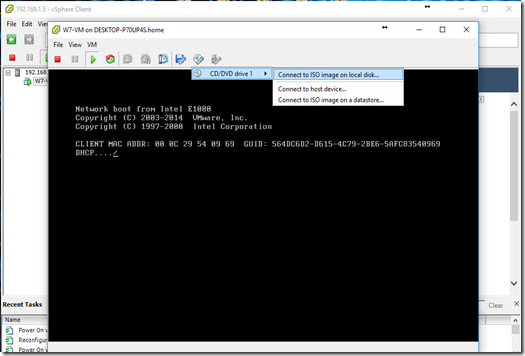
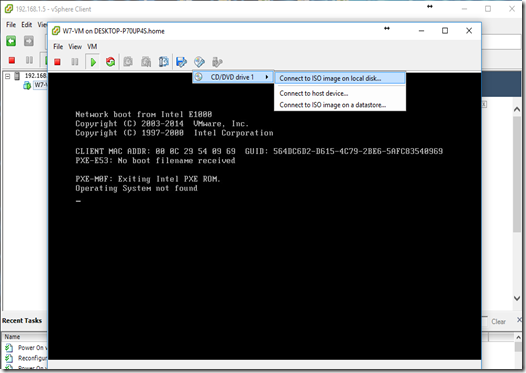
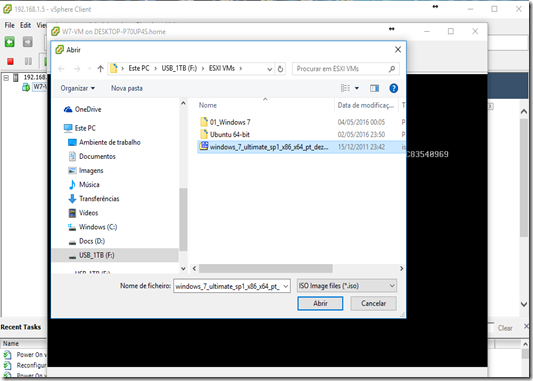
Select the OS ISO
And after “Operating System not found” press enter one or more times to boot the ISO
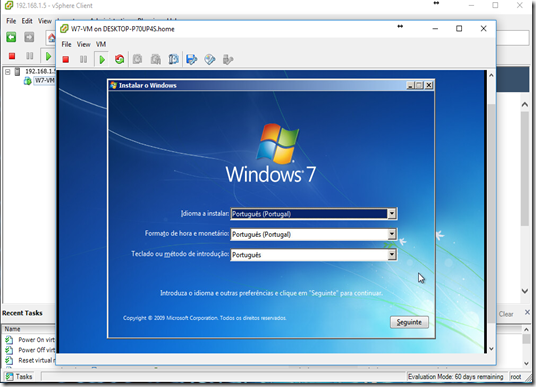
Now that the ISO is booting let’s install Windows (in this case Windows 7, but I have also done this with Windows 10).
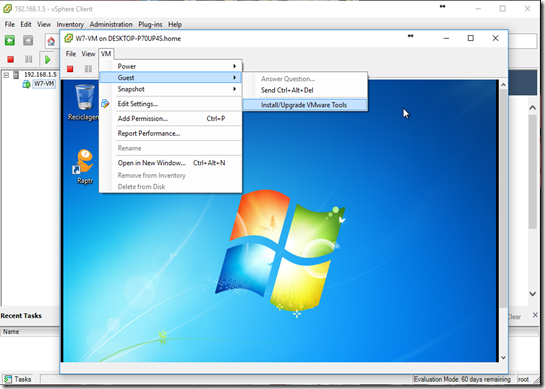
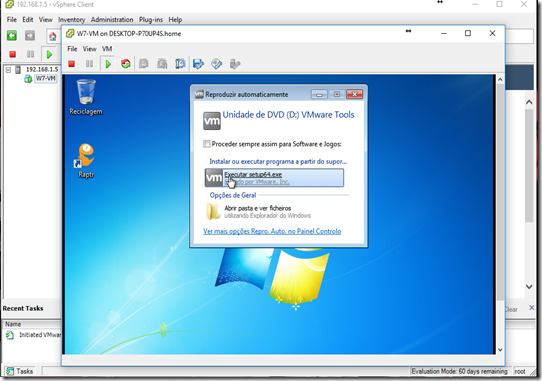
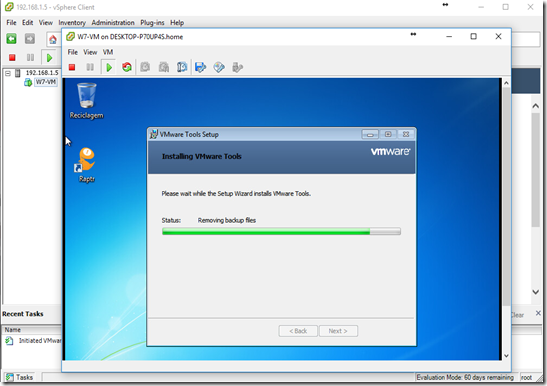
For the GPU Passthrough to work on the first try, it’s very important that you install VMWare Tools before installing the Graphics Card driver (real grafics card -- real drivers from the vendor)
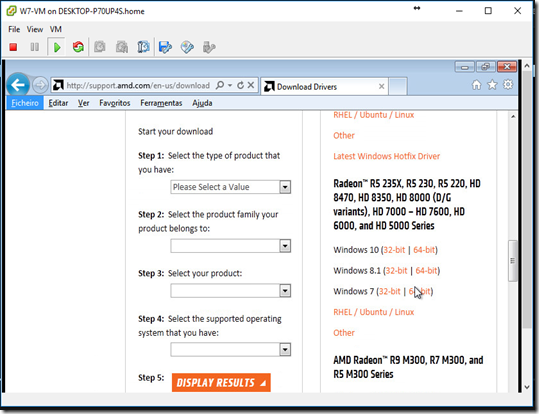
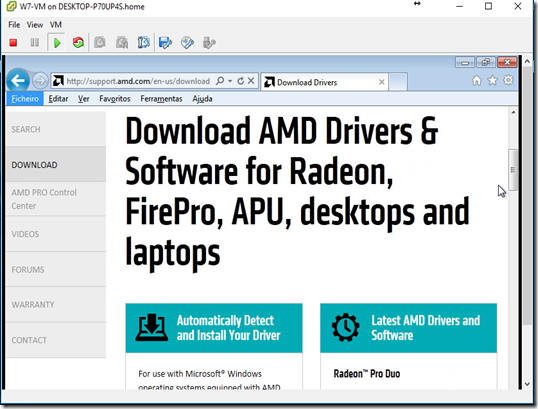
Now that VMWare Tools are installed let’s install the Graffics Card drivers:
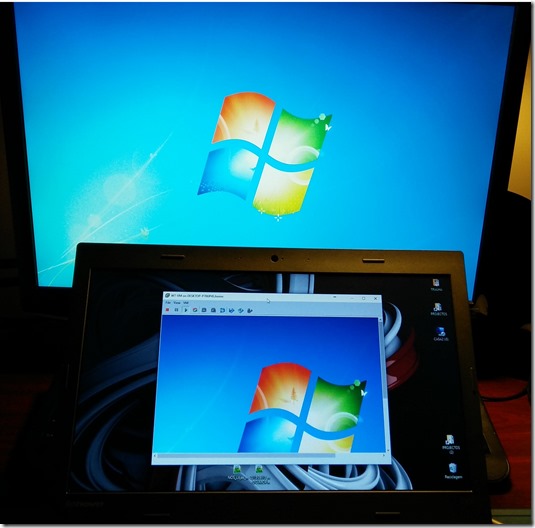
In the process of installing the Grafics Card drivers the Passthrough started working, and showing the VM on my Desktop Screen.
Desktop VM - Adding Real HDDs (Virtual Representation)
Now that we have the Desktop VM with Passthrough let’s add the virtual representation of the physical HDs, that we created before at:
- ESXi – HDDs Passthrough (Mapping Physical HDs to Virtual)
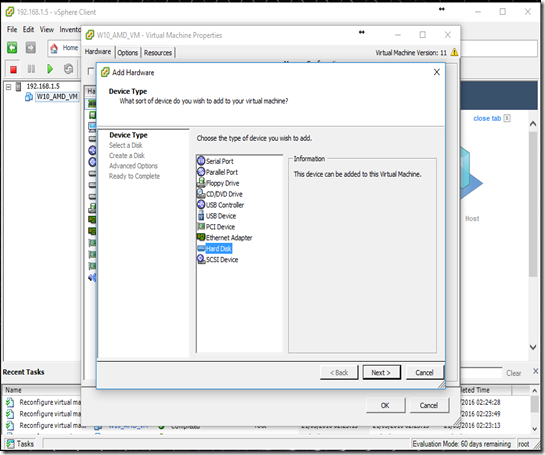
Press Add..
Select Hard Drive
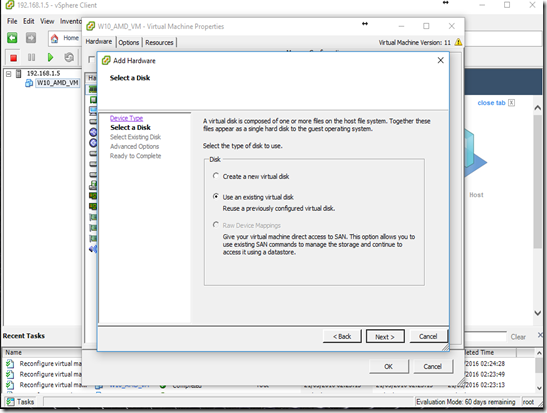
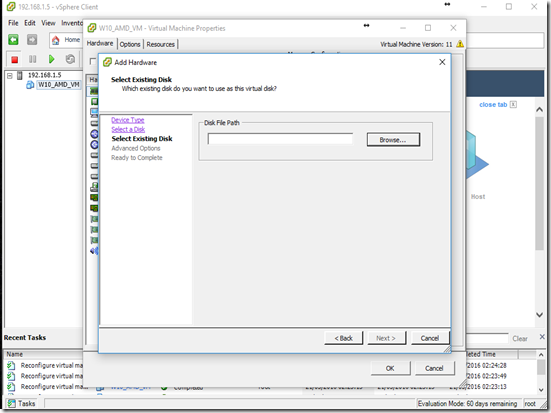
Select the option to add an existing disk
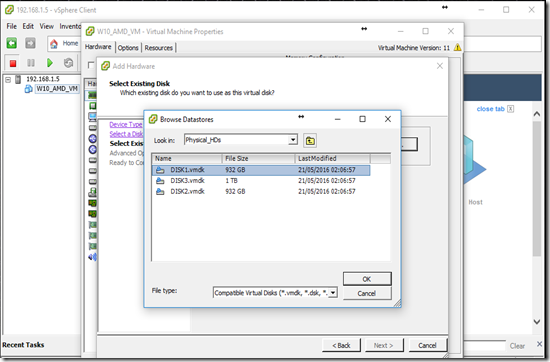
Find the virtual disks (I put mine at /vmfs/volumes/DS1_SSD/Physical_HDs)
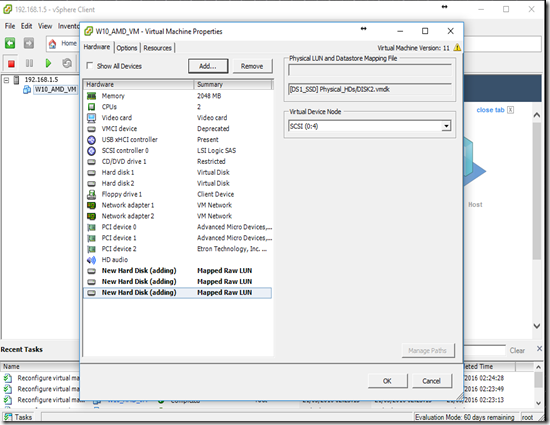
add them to them Desktop VM, one by one:
it should look like this (the bold entries are the new HDs):
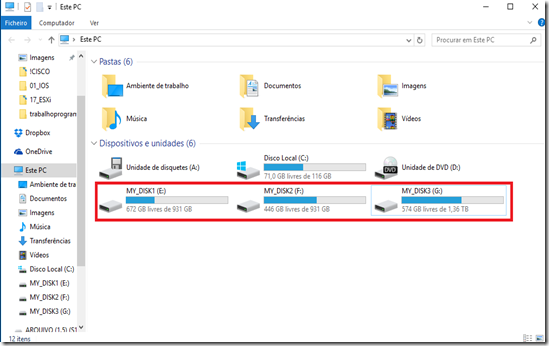
Power the Desktop VM and validate that you physical HDs now show up on the VM:
Desktop VM - Configuring AutoStart
Because we want the Desktop VM to be our main Destktop computer we need that it starts automatically with the ESXi Host, otherwise you need another PC just to start the Desktop VM.
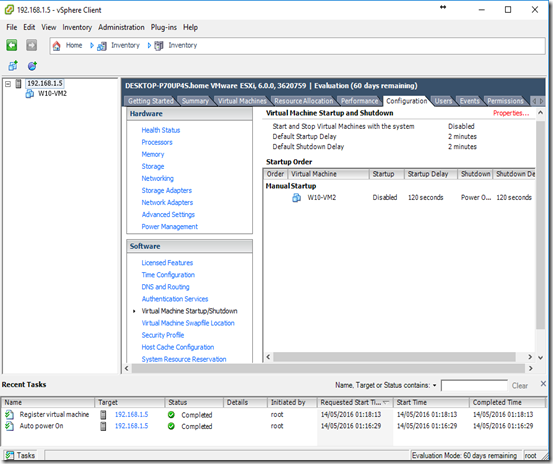
To make the Desktop VM start automatically select “Virtual Machine Startup/Shutdown” and “Properties”:
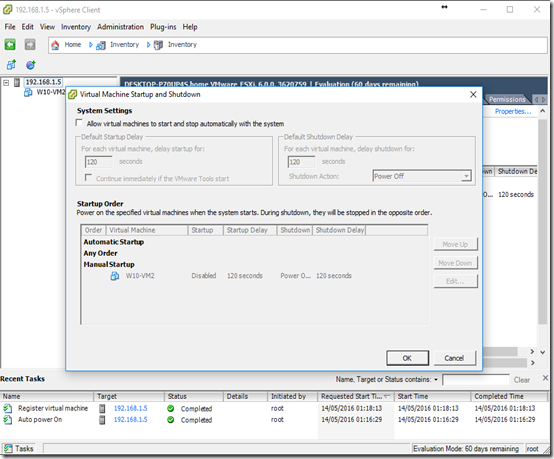
Activate the Auto Start
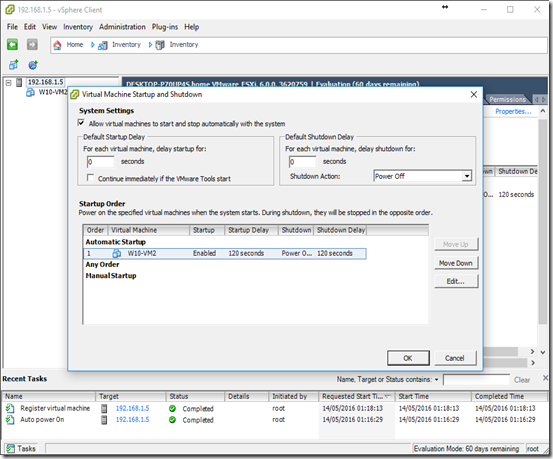
And configure it like this:
next time you ESXi Host starts, so will the Desktop VM, giving you a desktop to use and manage ESXi.
Desktop VM - Making The Desktop Hole Again
At this point I had a fully operation desktop, but there where some things that I coludn’t Passthrough to the Desktop VM as refered before:
- Sata I Hard Drives
- USB 2 Ports
- Sound Card
the first item I solved by mapping the physical HDs onto their virtual representations and adding them to the VM as existing virtual disks:
- ESXi – HDs Passthrough (Mapping Physical HDs to Virtual)
- Desktop VM - Adding Real HDDs (Virtual Representation)
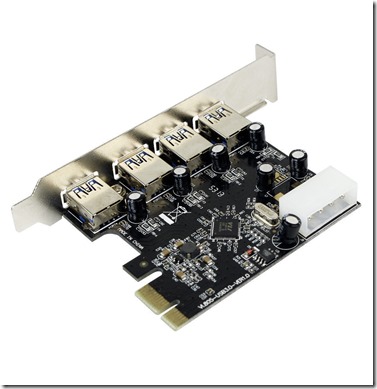
to compensate the loss of the USB 2 Ports I bougth this card with four USB 3.0 ports on eBay for about 7 USD:
USB 3.0 4-Port Host To PCI-E PCI Card Express
Expansion Card Adapter Speed 5Gbps
these where fully compatible with Passthrough.
Or you can try to attach USB 1 and 2 devices (not ports as above), just follow this tutorial:
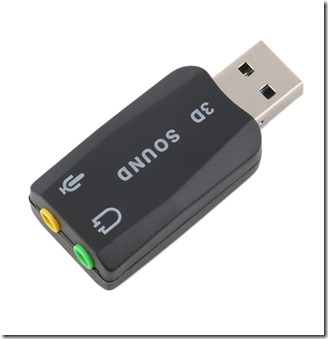
As for the Sound Card I bouth on eBay this usb sound card for about 1 USD, and connected it to a USB 3.0 port:
USB 2.0 to 3D Mic Speaker Audio Headset
Sound Card Adapter 5.1 for PC Laptop E0
but If you want a good usb sound (made in USA) card you should definitely go for this:
Sabrent USB External Stereo Sound Adapter
For Windows And Mac. Plug And Play No
It’s about 18 USD on ebay.
And that’s it, now my Desktop is hole again, nothing is missing… ![]()
ESXi - Adding The Free ESXi License
So far I have been doing things with the 60 days trial, this allows you to use all the feautures in VMWare ESXi, which we dont’t need for what we have done here.
The Free License that we saved when we downloaded the ESXi ISO at:
- Downloading ESXi and Getting the Free License Key
is enough.
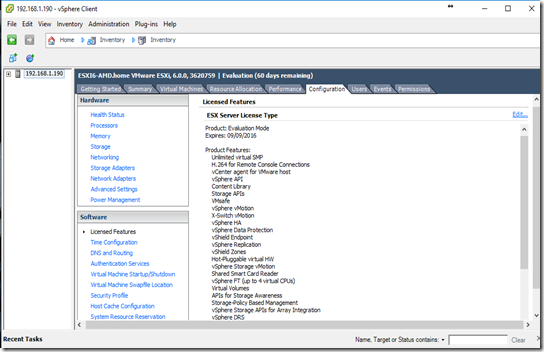
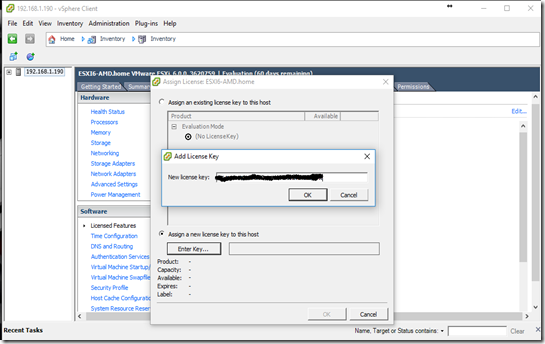
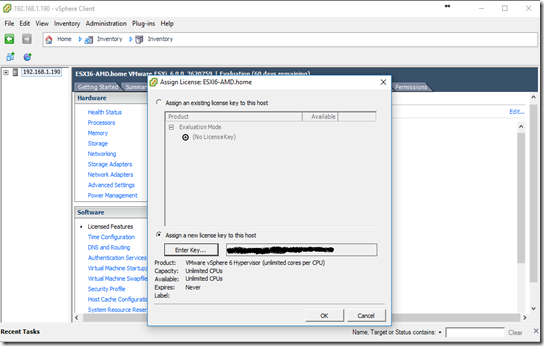
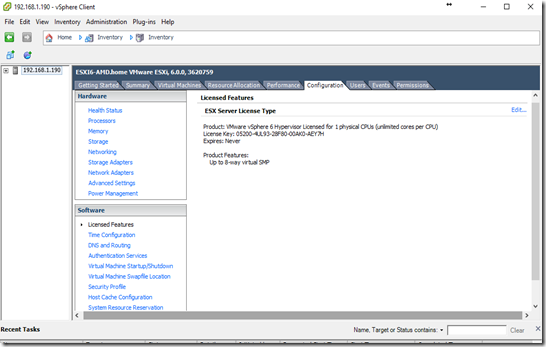
If you want to stop the trial and make you ESXi fully licensed with the Free License, go to
Configuration >> Licensed Features >> Edit
As you can see now the Licensed Features list now is much smaller:
Related Links
- https://www.pugetsystems.com/labs/articles/Multi-headed-VMWare-Gaming-Setup-564/
- https://en.wikipedia.org/wiki/List_of_IOMMU-supporting_hardware
- https://my.vmware.com/en/web/vmware/evalcenter?p=free-esxi6
- https://rufus.akeo.ie/
- https://kb.vmware.com/selfservice/microsites/search.do?language=en_US&cmd=displayKC&externalId=1001805
- http://thehomeserverblog.com/esxi-lab-specs/




No comments:
Post a Comment