Disc images have become more useful than ever on modern PCs that often lack CD and DVD drives. Create ISO files and other types of disc images and you can “mount” them, accessing the virtual discs as if they were physical discs inserted into your computer.
You can also use these image files to burn copies of the original discs later, creating duplicate copies. Disc image files contain a complete representation of a disc.
Windows
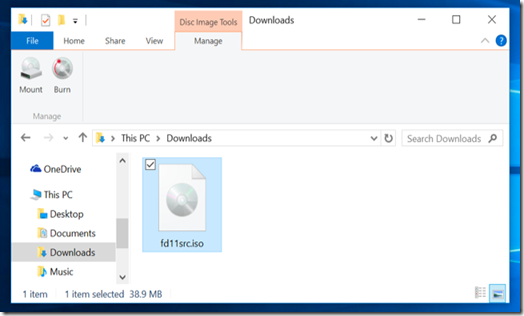
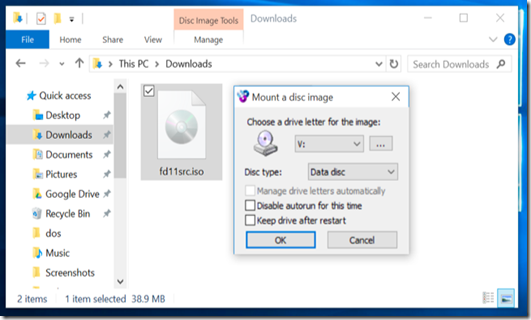
Windows 10 allows you to mount both .ISO and .IMG disc image files without any third-party software. Just double-click a .ISO or .IMG disc image you want to make available. If this doesn’t work, you should be able to click the “Disk Image Tools” tab on the ribbon and click “Mount.” It will appear under Computer as if it were inserted into a physical disc drive.
This feature was added back in Windows 8, so it will also work on Windows 8 and 8.1.
To unmount the disc later, right-click the virtual disc drive and select “Eject.” The disc will be unmounted and the virtual disc drive will disappear from the Computer window until you mount a disc in it again.
To mount ISO or IMG images on Windows 7 — or to mount images in other formats, such as BIN/CUE, NRG, MDS/MDF, or CCD — we recommend the free, open-source, and simple WinCDEmu utility.
Just right-click an image file after installing it, click “Select drive letter & mount,” and you can mount other types of images Windows doesn’t support.
Some other third-party utilities have additional support for emulating various copy-protection technologies, allowing copy-protected discs to function normally. However, such techniques are being phased out and aren’t even supported by modern versions of Windows.
Mac
On a Mac, double-clicking common disc image formats will mount them. This is why you can simply double-click a downloaded .DMG file to access its contents and install Mac applications, for example.
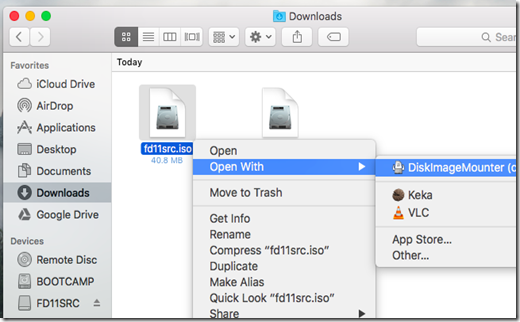
The DiskImageMounter application that handles this can also mount .ISO, .IMG, .CDR, and other types of image files. Just double-click the file to mount it. If this doesn’t work, Option-click or right-click a file, point to “Open With,” and select “DiskImageMounter.”
When you’re done, just click the “Eject” button next to the mounted image in the Finder’s sidebar to eject it and unmount it — just like you’d unmount a .DMG image when you’re done with it.
You can also try mounting the disc image file by opening the Disk Utility application. Press Command+Space, type Disk Utility, and press Enter to open it. Click the “File” menu, select “Open Image,” and select the disc image you want to mount.
Linux
Ubuntu’s Unity desktop and GNOME include an “Archive Mounter” application that can mount ISO files and similar image files graphically. To use it, right-click an .ISO file or another type of disc image, point to Open With, and select “Disk Image Mounter.”
You can later unmount the image by clicking the eject icon next to the mounted image in the sidebar.
You can also mount an .ISO file or another disc image with a Linux terminal command. This is particularly useful if you’re just using the command line, or if you’re using a Linux desktop that doesn’t provide a tool to make this easy. (Of course, graphical tools for mounting ISO files and similar images may be available in your Linux distribution’s software repositories.)
To mount an ISO or IMG file on Linux, first open a Terminal window from your Linux desktop’s applications menu. First, type the following command to create the /mnt/image folder. You can create practically any folder you like — you just have to create a directory where you’ll mount the image. The contents of the disc image will be accessible at this location later.
sudo mkdir /mnt/image
Next, mount the image with the following command. Replace “/home/NAME/Downloads/image.iso” with the path to the ISO, IMG, or other type of disc image you want to mount.
sudo mount -o loop /home/NAME/Downloads/image.iso /mnt/image
To unmount the disc image later, just use the umount command:
sudo umount /mnt/image
Some guides recommend you add “-t iso9660” to the command. However, this isn’t actually helpful - it’s best to let the mount command automatically detect the required file system.
If you’re trying to mount a more obscure type of disc image format that the mount command can’t automatically detect and mount in this way, you may need commands or tools designed specifically for working with that type of image file format.
This should “just work” on most modern operating systems, allowing you to mount and use ISO images and other common types of image files in a few clicks. Windows 7 users will have the toughest time, as it isn’t integrated into that older version of Windows, but WinCDEmu is a lightweight and easy way to accomplish this.
Taken From:


2 comments:
great post , thank u for your blog visit us fiber optic solutions in dubai
Fiber optic network cabling
Great post. I used to be checking always this weblog and I am impressed. Very useful info, Specially the last time I take care of such information a lot. I wish to give view you some interesting things or tips. I used to be looking for this hopeful information for a long time. Thanks and good luck. I wish for to read more things about it.
Regards,
Custom essay writing services
Post a Comment