Showing posts with label backup. Show all posts

Sunday, October 18, 2015

Cisco - Dual WAN Internet with Failover (NAT & Routes)

In the past I had the need to implement failover between two connections to the Internet on the same router, at the time I implemented it using EEM Scripts which wasn’t the most elegant solution, so here I’m going to show you a  a better solution to do this.

Implementing the failover mechanism at first glance seems easier with one router than with two, but that is not the case, with two routers you can have them configured normally with the adition of VRRP/HSRP to do the failover between the routers.

With only one router you are going to have two aditional problems:

  • Changing the route from the primary to the secondary Internet access
  • Changing the NAT overload to the Interface towards the Secondary ISP / WAN (this was the part that I implemented with EEM scripts)

the first you can easily solve with a floating static route (secondary route) and a track / ip sla (to remove the primary route when the connectivity to the primary ISP is lost).

The second one is harder, you can have two NAT rules with two interfaces towards the two ISPs:

ip nat inside source 130 interface FastEthernet0/0 overload
ip nat inside source 131 interface FastEthernet1/0 overload

but selecting the one as the active one is the tricky part.

Even if the interface towards the primary ISP were to fail and become shutdown, the NAT rule remains active.

The cenario bellow has two different ISPs for for the WAN accesses, but its the sames as having two different connectivities via the same ISP (eg. Primary via Fiber Optic | Secondary via 4G)

Cenario

Logical View

TOP17

Fisical View

TOP18

You can download the lab fully implemented here:

it was implemented on GNS3 v1.2.1.


Configuration


PC1
====================================================

enable
conf t

hostname PC1

interface FastEthernet0/0
description *** Link to CPE1 ***
ip address 192.168.1.1 255.255.255.0
no shutdown

ip route 0.0.0.0 0.0.0.0 192.168.1.254 name DefaultGW
 
do write
 
 
CPE1
====================================================

enable
conf t

hostname CPE1

interface FastEthernet0/0
description *** Link to ISP1 ***
ip address 11.0.0.2 255.255.255.252
ip nat outside
no shutdown
 
interface FastEthernet0/1
description *** Link to ISP2 ***
ip address 22.0.0.2 255.255.255.252
ip nat outside
no shutdown
 
interface FastEthernet1/0
no switchport
description *** Link to PC1 ***
ip address 192.168.1.254 255.255.255.0
ip nat inside
no shutdown

 
!-- Select the Route - via ISP1 or ISP2 -------------------
!!!!!!!!!!!!!!!!!!!!!!!!!!!!!!!!!!!!!!!!!!!!!!!!!!!!!!!!!!!!!!!!!!!!!!!!!!!!!!!!!!!!!!!!!!!!!!!!
! The first route makes all the traffic flow via
! ISP1, but this is conditioned to track 10, that
! detects the  connectivity to ISP1.
! If track 10 fails the route is removed from the
! routing table.
!
!
! The second route has an higher administrative
! distance (worst), and as long as the first rule
! is available this rule is never inserted on
! the routing table (aka floating static route)
!
! If the first route disapears because the track
! failed then the second route is inserted in the
! routing table, and all traffic will flow via ISP2
!!!!!!!!!!!!!!!!!!!!!!!!!!!!!!!!!!!!!!!!!!!!!!!!!!!!!!!!!!!!!!!!!!!!!!!!!!!!!!!!!!!!!!!!!!!!!!!!

ip route 0.0.0.0 0.0.0.0 11.0.0.1 track 10 name Default-Primary
ip route 0.0.0.0 0.0.0.0 22.0.0.1 250 name Default-Secondary

ip sla 10
icmp-echo 11.0.0.1 source-interface FastEthernet0/0
frequency 5
ip sla schedule 10 life forever start-time now

track 10 ip sla 10 reachability
!show track brief
!show track 10


!-- Change the NAT Interface to Reflect the Active Route --
!!!!!!!!!!!!!!!!!!!!!!!!!!!!!!!!!!!!!!!!!!!!!!!!!!!!!!!!!!!!!!!!!!!!!!!!!!!!!!!!!!!!!!!!!!!!!!!!
! Changing the routes isn't enough, we also
! need to change the NAT rule, because each route
! implies a different exit interface.
!
! To select which NAT rule will be used for each
! route, we used route maps instead of an ACL
! to identify traffic (active the rule).
!
! These route maps match the LAN traffic, plus
! the current next hop to forward the traffic thus
! selecting the correct NAT rule for the current
! active route.
!!!!!!!!!!!!!!!!!!!!!!!!!!!!!!!!!!!!!!!!!!!!!!!!!!!!!!!!!!!!!!!!!!!!!!!!!!!!!!!!!!!!!!!!!!!!!!!!

ip nat inside source route-map RM-ISP1-PRIMARY interface FastEthernet0/0 overload
ip nat inside source route-map RM-ISP2-PRIMARY interface FastEthernet0/1 overload


access-list 130 remark *** Traffic for The Internet (NAT) ***
access-list 130 permit ip 192.168.1.0 0.0.0.255 any

route-map RM-ISP1-PRIMARY permit 10
match ip address 130
match interface FastEthernet0/0        !--> Match the exit interface of the route

route-map RM-ISP2-PRIMARY permit 10
match ip address 130
match interface FastEthernet0/1        !--> Match the exit interface of the route
!show route-map


!-- Simulate a Failure Along The Way ----------------------
!!!!!!!!!!!!!!!!!!!!!!!!!!!!!!!!!!!!!!!!!!!!!!!!!!!!!!!!!!!!!!!!!!!!!!!!!!!!!!!!!!!!!!!!!!!!!!!!
! To simulate the failure to see the topology
! changing to the secondary access, we are going
! to use a route to force the track/ip sla to fail.
!
! This route will force all the connectivity test
! traffic destined for ISP1(11.0.0.1) to go to NULL
! which is a black hole. Like this ISP1 will never
! get the icmp echos requests from the ip sla test
! or respond to it, thus simulating a connectivity
! failure towards ISP1
!
! NOTE: It takes a couple of seconds to change
!!!!!!!!!!!!!!!!!!!!!!!!!!!!!!!!!!!!!!!!!!!!!!!!!!!!!!!!!!!!!!!!!!!!!!!!!!!!!!!!!!!!!!!!!!!!!!!!

!-- Failure Sim + Debug/Tshoot --
do debug ip nat
ping 77.0.0.1
show ip route
!S*    0.0.0.0/0 [1/0] via 11.0.0.1

ip route 11.0.0.1 255.255.255.255 NULL0 name FailureSim

ping 77.0.0.1
show ip route
!S*    0.0.0.0/0 [250/0] via 22.0.0.1

! Both Pings will work but notice that the default
! route is diferent (diferent next hop)


!-- Restore to Normal Operation --
no ip route 11.0.0.1 255.255.255.255 NULL0 name FailureSim
do no debug all


ISP1-PRIMARY
====================================================

enable
conf t

hostname ISP1-PRIMARY

interface FastEthernet0/0
description *** Link to CPE1 ***
ip address 11.0.0.1 255.255.255.252
no shutdown

interface FastEthernet0/1
description *** Link to CPE2 ***
ip address 11.0.0.5 255.255.255.252
no shutdown
 
 
interface FastEthernet1/0
no switchport
description *** Link to ISP2 ***
ip address 22.0.0.6 255.255.255.252
no shutdown

    
ip route 77.0.0.0 255.255.255.248 11.0.0.6 name PublicIPs
ip route 22.0.0.0 255.255.255.252 22.0.0.5 name NatedLAN-viaIPS2

do write


ISP2-SECONDARY
====================================================

enable
conf t

hostname ISP2-SECONDARY

interface FastEthernet0/1
description *** Link to CPE1 ***
ip address 22.0.0.1 255.255.255.252
no shutdown
 
interface FastEthernet0/0
description *** Link to ISP1 ***
ip address 22.0.0.5 255.255.255.252
no shutdown

ip route 0.0.0.0 0.0.0.0 22.0.0.6 name Default
 
do write
 
 
CPE2
====================================================

enable
conf t

hostname CPE2

interface FastEthernet0/1
description *** Link to ISP1 ***
ip address 11.0.0.6 255.255.255.248
no shutdown
 
interface FastEthernet1/0
description *** Link to Internet Server ***
no switchport
ip address 77.0.0.6 255.255.255.248

ip route 0.0.0.0 0.0.0.0 11.0.0.5 name Default

do write


INTERNET SERVER
====================================================

enable
conf t

hostname INTERNET-SERVER

interface FastEthernet0/0
description *** Link to CPE1 ***
ip address 77.0.0.1 255.255.255.248
no shutdown
 
ip route 0.0.0.0 0.0.0.0 77.0.0.6 name Default

do write


Related Links

Monday, August 3, 2015

Windows - Downgrade From Windows 10 to 7 or 8.1

How to Downgrade from Windows 10 to Windows 7 or 8.1

clip_image001

Windows 10 combines the best of Microsoft’s previous operating systems and combines them into one ultimate package. If you opted in to the free upgrade and have changed your mind after running Windows 10 for a few days, you’ll be pleased to know that it’s easy to roll back.

Don’t worry if you didn’t consider this before you upgraded. Microsoft has made it easy to change back to your previous operating system for a limited period. But there are other options too, meaning if you really don’t like the Windows 10 experience, you’re not stuck with it permanently.

If you’re thinking of rolling back to Windows 7 or 8.1, please drop into the comments section afterwards to let us know why and which method you’ll be using.


Back Up Before You Downgrade

You should do this before upgrading to Windows 10. It’s incredibly important that you always back up your system before making any major change. Although some of the processes outlined below should keep your data in tact, nothing is ever definite and it’s not worth taking the risk.

clip_image002

If you have backed up recently and your data hasn’t changed much since, it could just be a case of copying over a few extra files. If you need to do a full backup, check out our guide on the safest ways to backup. I recommend something likeCrashPlan for the future because it’ll take regular backups of your system, which is a practice you should follow anyway.

Also, make sure you’re not backing up to the same drive that the operating system is installed on. This might mean you’ll have to use an external hard drive or online cloud storage, but a backup is not secure if it’s sitting in the same place as your original data.


Built-in Downgrade Option

When upgrading from a previous version of Windows to 10, your old operating system files will be stored in a folder called Windows.old. This can be removed to free up space, but its existence means that rollback is easy.

Windows 10 has a built-in feature that allows you to go back to your old operating system. The caveat is that this option is only available for one month after you’ve upgraded. If that time has passed, check out some of the other options available below.

clip_image003

To get started, press Windows Key + I to bring up the Settings menu. ClickUpdate & security and then select Recovery from the left-hand navigation. Here you will see a header called Go back to Windows X (dependent on what version you were on before). Click Get started.

A window will open to ask while you’re going back to an old version. Fill this in and continue to click Next, noting the prompts and information like not unplugging your system during the process. The rollback will then begin, during which you won’t be able to use your system.

clip_image004

You might have to reinstall some programs or alter a couple of settings to get things back to how they were previously, but overall you should find it a quick and easy process.


Reinstall Your Previous Windows Version

Another method you could opt for is to do a fresh install of your old operating system. This will wipe everything on your drive, meaning the backup of personal data mentioned earlier is a required step before proceeding with this solution.

If you’ve got the previous Windows version on physical media, like a disc or USB drive, put it into your computer. If you don’t have a physical version then you can create one direct from Microsoft thanks to their Windows 7 Software Recovery andWindows 8.1 Installation Media. We have previously explained in detail how to created bootable Windows installation media.

clip_image005

Then restart your system and look for the message that’ll read something like “press F12 to choose boot device”. The message and key might vary – F10 and Esc are common alternatives. You can tap the key multiple times to make sure it’s registered.

You’ll then see a menu that will list all of the bootable devices to choose from. Use the arrow keys to select the one which corresponds to the media you just put in and then press Enter. Then follow the installation wizard, ensuring to select a custom install if prompted – this means you want to do a completely fresh install. You’ll be asked for your product license key, which can be found on the installation media (if Windows was purchased separately), or usually on a sticker on the device or with the PC’s documentation (if Windows came with the machine).


From a Drive Image

This one will only be applicable if you prepared ahead before upgrading to Windows 10. That is, if you have an image of your drive you can just restore that. An image is a complete copy of what’s on a drive, which includes personal data as well as the operating system’s files.

clip_image006

A drive image can be created in Windows 7 and 8.1 using the System Image utility (do a system search to find it), which can then be stored on external media. To restore from this in Windows 10, press Windows Key + I, click Update & security, then select Recovery. Underneath Advanced start-up, click Restart now and follow the prompts to restore from your drive image.

Again, this only works if you did an image of your drive before upgrading to Windows 10. If you didn’t, use one of the other options listed above. It’ll also wipe any data you created since making the drive image, so be sure to back up where necessary.


Roll Right Back

Microsoft is hoping everyone will love Windows 10, especially since it’s the last version of Windows, but that might not be the case. Thankfully, it’s easy to downgrade to your preferred version, regardless of whether you planned ahead before upgrading.

Remember, Microsoft’s rollback feature in Windows 10 will only be available for 30 days after you upgraded, so do it sooner rather than later if you want to use the easiest method.

Are you considering rolling back from Windows 10 or have you already? What didn’t you like about Microsoft’s new operating system?~

Taken From: http://www.makeuseof.com/tag/downgrade-windows-10-windows-7-8-1/

Friday, July 31, 2015

Windows - Create an Image of Your PC

 How to Create an Image of Your PC Before Upgrading to Windows 10

Windows 10 is the biggest and most aggressive Windows rollout to date. Before you take the plunge you need to image your hard drive so, should you wish to return to the familiarity of Windows 7 or Windows 8 you can do so with the click of a button.

Note: This tutorial details how to create a bit-for-bit backup (a disk image) of your current Windows system disk so that you can later restore your computer using that image. If that’s not what you’re looking for and you’d like to actually copy your disk bit-for-bit over to a brand new hard disk (a disk clone) we’d encourage you to check out our detailed tutorial on the matter:How to Upgrade Your Existing Hard Drive in Under an Hour.

Why Do I Want To Do This?

There’s nothing worse than making a major change to your PC and then finding out that change breaks your workflow (like an old app you rely on doesn’t work anymore) or it outright breaks your PC because the leap to a new operating system leaves your hardware in need of new (and as-of-yet unreleased) drivers.

Over the years we’ve covered plenty of ways to use the tools built into Windows to perform snapshots, create backups, and otherwise help you to restore your computer to a prior state if your hardware upgrades or such go awry. When it comes to a change as big as jumping from Windows 7 or Windows 8 to the barely charted waters of Windows 10, however, you don’t want to rely on snapshots and rollback features to help you return to the safety of a prior version of Windows. You want the clear and precise ability to wipe the entire drive clean and restore it, bit for bit, to the exact state it was in before you even started the upgrade process.

In order to do that we need to image the drive. We want a perfect pre-upgrade copy we can call upon to restore the system. This drive image will remain clean and unchanged independently of anything we do to the computer during the upgrade process and thereafter so even if we format the drives, even if we use Windows 10 for six months and decide we really don’t like it, we can turn right back around and use the image we’ve created to turn back the clock and restore our computer to the exact state it was in before the upgrade.

We can’t emphasize enough how important this step is. We’ll complete it using free tools, it doesn’t cost anything (unless you need to purchase an extra drive to store the image on), and it hardly takes any time (especially when you compare it to the hassle of reinstalling your old version of Windows and reconfiguring everything).

What Do I Need?

As we highlighted in the introduction this procedure is free (unless you need an additional internal or external hard drive to house the drive image). To follow along with us today you’ll need the following things:

  • The PC you wish to backup.
  • A copy of Macrium Reflect Free (available for download here).
  • An internal or external hard drive with enough capacity to hold the contents of the drive you wish to image.
  • A USB drive to turn into a restoration drive (minimum size 1GB).

A few points of consideration before we proceed. We aren’t cloning your Windows drive onto a new bootable drive so we don’t need a fresh storage drive or a drive we can wipe. As long as you have the space you can use any drive you have on hand as long as it can hold the drive image. So, for example, if you have a 2TB external drive that you have a few hundred GB of photos backed up on, you can also use it (space permitting) to backup your Windows disk image with no risk to your photos or other data.

Although we advise you to have enough space for the whole drive, in reality the disk likely isn’t full and compression will buy you some wiggle room. On our test laptop, for example, we had a 100GB SSD, 75GB of that was filled up, and the compressed image in the end was only 50GB. Still, act as if you need a 1:1 space ratio and then be happy when you don’t.

Before proceeding gather together the required materials and take a moment to download and install Macrium Reflect Free.

Creating the Rescue Media

Because we are manipulating the system drive we need rescue media in order to properly restore the drive later (as we cannot simultaneously use the system drive and reload the system image). Further, good rescue media can be invaluable for troubleshooting problems down the road.

Thankfully Macrium makes it incredibly simple to create a Windows PE-based rescue media tool that includes Macrium preloaded and even boots right into the restoration tool. It couldn’t be easier and if you do things correctly on the setup and imaging side of things, the restoration side of things is a walk in the park.

clip_image002

Once you’re ready to create your restoration media, launch Macrium Reflect on select Other Tasks -> Create Rescue Media from the file bar, as seen above.

The Rescue Wizard is very helpful and will not only guide you through selecting the best rescue media but will automatically download and install the files from Microsoft on your behalf. The first step in the wizard process is confirming you have the right version of Windows PE. It automatically detects the version of Windows you’re creating the rescue media on. Ideally you want the rescue media to use the version of Windows PE that shares the same base kernel as the backup version.

If you’re backing up a Windows 7 machine before upgrading to Windows 10 that means you want Windows PE 3.1 (which uses the Windows 7 kernel). If you’re upgrading from Windows 8/8.1 to Windows 10 you want Windows PE 5.0 (PE 4.0 is an option but it’s not feature rich compared to PE 5.0 and the special use case for Windows PE 4.0 is very limited and definitely not within the requirements of anything we’re doing in this tutorial). If you need to change your PE version click on the button labeled “Change PE Version” at the bottom of the wizard screen.

Click Next and then confirm the drivers list (by default the media thoughtfully snags needed drivers from the host Windows installation, like USB 3.0 host drivers). Click Next.

clip_image003

Confirm that the “PE Architecture” matches your machine (it should have defaulted to the correct setting). Newer machines (made recently or in the last few years) are almost universally 64 bit. If you’re unsure you can read up on the differences between 64 bit and 32 bit (and how to check what you have) in our article HTG Explains: What’s the Difference Between 32-bit and 64-bit Windows?

Click Next and you’ll be prompted to OK a download from Microsoft (typically around 500MB).

clip_image004

Once the files from Microsoft finish downloading you’ll find yourself in the final step of the Rescue Media Wizard. Select your USB drive carefully; while the recovering media creation process doesn’t format your USB drive it does dump a bunch of files onto the disk and make some minor modifications you’ll just have to turn around and undo.

When the process is complete it’s safe to eject the recovery disk (you won’t need it again until it is time to restore your system at a later date).

Cloning Your Windows Disk

This portion of the tutorial occurs on your PC before installing Windows 10. Again, for emphasis as many readers following this tutorial likely don’t routinely use disk imaging software, this step occurs on your machine before you begin the Windows 10 upgrade.

Now would be a great time to do some last minute housekeeping: delete things you don’t need, run CCleaner to purge old temporary files that don’t need to live on forever in your disk image, uninstall apps you no longer want or need, and so on.

When you’re ready to create a perfect copy of the disk in a tidy pre-Windows 10 state, launch Macrium Reflect. In the left-hand navigation panel of the main window select “Create an image of the partition(s) required to backup and restore Windows” as seen in the screenshot below.

clip_image005

That link will automatically pop up Disk Image dialogue box with only the critical Windows partitions selected, as seen in the screenshot below.

clip_image006

There are a few important things to note here. By default the tool only selects the partitions you need to actually run Windows. In the screenshot above you can see that it selected the system and OS partitions. It did not select the recovery partition or other partitions on the primary disk. If you wish to preserve the recovery partition or other partitions, you can check them and include them in the disk image. If you don’t (we really don’t care if the recovery partition is preserved) leave them unchecked. If you do, check them off.

clip_image007

Next, select where you wish to store the image file. A local non-OS disk or a removable USB drive of suitable size is good. We stored ours on a removable USB 3.0 drive with plenty of space to spare. Click Next and you’ll be prompted to setup a backup plan for the disk. You can ignore all of these options. Macrium Reflect, even in the free version, has a very excellent automated backup system but that’s totally overkill for our needs as we’re making a one off backup. Leave the template “None”, don’t bother setting a schedule, and leave everything unchecked. Hit Next to continue on.

Confirm your settings on the last page (make sure the listed operations match what you selected earlier, like copying the system and Windows disks). Click Finish. In the final screen confirm “Run this backup now” is checked and click OK.

Sit back and relax as Macrium works to create the disk image. Expect to wait at least 30-60 minutes at minimum. When the process is complete you’ll have a perfect copy of your disk ready to pull out and restore the previous version of Windows. Put it in a safe place!

How Do I Restore To The Old Version?

Maybe you love Windows 10 and everything works wonderfully. We certainly never hope that someone is unhappy with an upgrade and despite all the complaints about Windows 8 we (albeit with a Windows 7 skin on things) were happy with the improvements. But not every upgrade is a match made in heaven and you might find that instabilities, non-existent drivers, or other problems hamper your enjoyment of Windows 10.

In such cases you’ll need to rollback with the help of Macrium Reflect and the disk image we just created. First things first, to avoid frustration, reboot your computer and enter the BIOS (it varies from manufacturer to manufacturer, but typically you access the BIOS via F2 or F11 on the keyboard when the computer is first booting).

It’s not enough to have a computer that can boot from USB, you need to check the boot order. More times than we can count we’ve had a boot disk fail because while the computer was more than capable of booting from a USB drive the USB drive option was third in the list after the physical hard disk and CDROM drive. Double check that the USB drive is at the top of the list! (Sometimes you actually need the physical USB drive inserted during the BIOS adjustment process or it won’t be detected or ordered properly). Save the changes and boot into your recovery media.

The recovery media we created in the early portion of the tutorial automatically boots right to the Macrium Reflect recovery software which is more than convenient. Once it boots up look for the Restore and Image Restore tabs as seen in the screenshot below.

If you’ve booted the computer with the hard drive that houses the disk image attached (either internally mounted or with the USB drive attached to the computer) it should automatically detect that the disk image is present and it matches the disk you’re about the restore via that image. If it doesn’t automatically detect don’t worry, you can browse for it.

clip_image008

Click on the entry “Browse for an image file”. Browse for the file and select the .MRIMG file you previously created. After you load the backup image you’ll see additional information about the image file.

clip_image009

Confirm that it is the correct image file (the name matches the one you want, the drive size and partitions match, and so on). Once you’ve confirmed it is the image you want, click the link “Restore Image” as seen in the screenshot above.

clip_image010

You’ll be prompted to select a disk to restore your image to. Click “Select a disk to restore to…”

Select carefully from the available disks. You don’t want to overwrite your secondary data hard drive when your real target is your primary system disk. Once you’ve selected the image, then click “Copy selected partitions” to copy the partitions from the image file back over to your disk.

clip_image011

Note: Sharp-eyed readers will likely have noticed that the disk size and partition distribution between our source disk and our destination disk do not match up in the above image. Because the computer with which we conducted the steps for this tutorial (as we personally test and confirm all steps in all articles we write here at How-To Geek) would not cooperate with our capture tool during the time it was booted into Windows PE we recreated the sequence in a virtual machine expressly to create the screenshots for your reference. Please note that in the particular application we’ve using here (overwriting your existing disk with an old image) the image and the actual hard drive configuration should match up.

With the disk selected (and double checked), click Next. Confirm the Restore Summary and Operation list match what you expect and then click Finish to start the process.

When the restoration process is complete and the conclusion summary is displayed, you’re all done! Click on the shutdown button located in the lower left corner of the restoration user interface, remove the USB restoration drive, and confirm you wish to restart. You’ll boot back into your Windows machine and everything will be good as new and exactly like it was the day you made the image.

When it comes to foolproof restoration you just can’t beat a good disk image. Before you make the leap to Windows 10 take an hour or so and make a clean disk image you can return to should you find the upgrade isn’t all it’s promised to be.

Taken From: http://www.howtogeek.com/223139/how-to-create-an-image-of-your-pc-before-upgrading-to-windows-10/

Thursday, August 22, 2013

Cisco IOS Resilient Image and Configuration

Last week, we looked at Recovering a Router with the Password Recovery Service Disabled. Today we're going to examine a related Cisco IOS security feature, dubbed resilient configuration. This feature enables critical router files, namely the IOS image and configuration, to persist despite destructive events such as deletion of the startup configuration or a format of the Flash filesystem. The feature does not require any external services; all persistent files are stored locally on the router.

Enabling Resilient Configuration

First, a quick review of how Cisco ISR (x800 series) routers work. The binary IOS image used to boot the router is stored on the Flash filesystem, which is a type of memory very similar to that found inside a USB thumbdrive. The startup configuration file is stored on a separate filesystem, NVRAM. The contents of both filesystems can be viewed with the dir command.

Router# dir flash:
Directory of flash:/

    1  -rw-    23587052   Jan 9 2010 17:16:58 +00:00  c181x-advipservicesk9-mz.124-24.T.bin
    2  -rw-         600  Sep 26 2010 07:28:12 +00:00  vlan.dat

128237568 bytes total (104644608 bytes free)
Router# dir nvram:
Directory of nvram:/

  189  -rw-        1396                      startup-config
  190  ----          24                      private-config
  191  -rw-        1396                      underlying-config
    1  -rw-           0                      ifIndex-table
    2  -rw-         593                      IOS-Self-Sig#3401.cer
    3  ----          32                      persistent-data
    4  -rw-        2945                      cwmp_inventory
   21  -rw-         581                      IOS-Self-Sig#1.cer

196600 bytes total (130616 bytes free)

The resilient image and configuration features are enabled with one command each.

Router(config)# secure boot-image
Router(config)#
%IOS_RESILIENCE-5-IMAGE_RESIL_ACTIVE: Successfully secured running image


Router(config)# secure boot-config
Router(config)#
%IOS_RESILIENCE-5-CONFIG_RESIL_ACTIVE: Successfully secured config archive [flash:.runcfg-20101017-020040.ar]

The combination of the secured IOS image and configuration file is referred to as the bootset. We can verify the secure configuration with the command show secure bootset.

Router# show secure bootset
IOS resilience router id FHK110913UQ

IOS image resilience version 12.4 activated at 02:00:30 UTC Sun Oct 17 2010
Secure archive flash:c181x-advipservicesk9-mz.124-24.T.bin type is image (elf) []
  file size is 23587052 bytes, run size is 23752654 bytes
  Runnable image, entry point 0x80012000, run from ram

IOS configuration resilience version 12.4 activated at 02:00:41 UTC Sun Oct 17 2010
Secure archive flash:.runcfg-20101017-020040.ar type is config
configuration archive size 1544 bytes

At this point, we notice that our IOS image file on Flash is now hidden.

Router# dir flash:
Directory of flash:/

2  -rw-         600  Sep 26 2010 07:28:12 +00:00  vlan.dat

128237568 bytes total (104636416 bytes free)

Restoring an Archived Configuration

Now suppose that the router's startup configuration file is erased (accidentally or otherwise) and the router is reloaded. Naturally, it boots with a default configuration. The resilient configuration feature will even appear to be disabled.

Router# erase startup-config
Erasing the nvram filesystem will remove all configuration files! Continue? [confirm]
[OK]
Erase of nvram: complete

Router# show startup-config
startup-config is not present
Router# reload

System configuration has been modified. Save? [yes/no]: n
Proceed with reload? [confirm]
...
Router> enable
Router# show secure bootset
%IOS image and configuration resilience is not active

To restore our original configuration, we simply have to extract it from the secure archive and save it to Flash. Next, we can replace the current running configuration with the archived config using the configure replace command.

Router(config)# secure boot-config restore flash:archived-config
ios resilience:configuration successfully restored as flash:archived-config
Router(config)# ^C

Router# configure replace flash:archived-config
This will apply all necessary additions and deletions
to replace the current running configuration with the
contents of the specified configuration file, which is
assumed to be a complete configuration, not a partial
configuration. Enter Y if you are sure you want to proceed. ? [no]: y
Total number of passes: 1
Rollback Done

Router#

Don't forget to save the running configuration once the restoration is complete (copy run start).

Be aware that the resilient configuration file is not automatically updated along with the startup configuration. To update it, you must first delete the existing resilient configuration and issue the secure boot-config command again.

Router(config)# no secure boot-config
%IOS_RESILIENCE-5-CONFIG_RESIL_INACTIVE: Disabled secure config archival [removed
flash:.runcfg-20101017-020040.ar]

Router(config)# secure boot-config
%IOS_RESILIENCE-5-CONFIG_RESIL_ACTIVE: Successfully secured config archive
[flash:.runcfg-20101017-024745.ar]
Finally, note that the secure bootset features can only be disabled from the console line.

Router(config)# no secure boot-config
%You must be logged on the console to apply this command

In fact, attempting to disable either part of the secure bootset generates a handy syslog message to alert administrators:

%IOS_RESILIENCE-5-NON_CONSOLE_ACCESS: Non console configuration request denied for command "no secure boot-config "

What About the IOS Image?

It turns out that the secure boot image feature works pretty well too. Here we can see that it persists even when the Flash filesystem appears to have been formatted.

Router# format flash:
Format operation may take a while. Continue? [confirm]
Format operation will destroy all data in "flash:".  Continue? [confirm]
Writing Monlib sectors...
Monlib write complete

Format: All system sectors written. OK...

Format: Total sectors in formatted partition: 250848
Format: Total bytes in formatted partition: 128434176
Format: Operation completed successfully.

Format of flash: complete
Router# dir
Directory of flash:/

No files in directory

128237568 bytes total (104640512 bytes free)
Router# reload
Proceed with reload? [confirm]

*Oct 17 02:37:37.127: %SYS-5-RELOAD: Reload requested  by console. Reload Reason
: Reload Command.
System Bootstrap, Version 12.3(8r)YH8, RELEASE SOFTWARE (fc2)
Technical Support:
http://www.cisco.com/techsupport
Copyright (c) 2006 by cisco Systems, Inc.
C1800 platform with 131072 Kbytes of main memory with parity disabled

Upgrade ROMMON initialized
program load complete, entry point: 0x80012000, size: 0xc0c0

Initializing ATA monitor library.......
program load complete, entry point: 0x80012000, size: 0xc0c0

Initializing ATA monitor library.......

program load complete, entry point: 0x80012000, size: 0x167e724
Self decompressing the image : #################################################
################################################################################
################################################################ [OK]

Restricted Rights Legend

Use, duplication, or disclosure by the Government is
subject to restrictions as set forth in subparagraph
(c) of the Commercial Computer Software - Restricted
Rights clause at FAR sec. 52.227-19 and subparagraph
(c) (1) (ii) of the Rights in Technical Data and Computer
Software clause at DFARS sec. 252.227-7013.

cisco Systems, Inc.
           170 West Tasman Drive
           San Jose, California 95134-1706

Cisco IOS Software, C181X Software (C181X-ADVIPSERVICESK9-M), Version 12.4(24)T,
RELEASE SOFTWARE (fc1)
Technical Support:
http://www.cisco.com/techsupport
Copyright (c) 1986-2009 by Cisco Systems, Inc.
Compiled Thu 26-Feb-09 03:22 by prod_rel_team
...
Router> enable
Password:
Router# dir
Directory of flash:/

No files in directory

128237568 bytes total (104640512 bytes free)
Router# show version
Cisco IOS Software, C181X Software (C181X-ADVIPSERVICESK9-M), Version 12.4(24)T,
RELEASE SOFTWARE (fc1)
Technical Support:
http://www.cisco.com/techsupport
Copyright (c) 1986-2009 by Cisco Systems, Inc.
Compiled Thu 26-Feb-09 03:22 by prod_rel_team
...

Taken From: http://packetlife.net/blog/2010/oct/18/ios-resilient-configuration/


Monday, February 20, 2012

Soft RAID - Windows

If you�ve ever had the desire to RAID your hard drives for increased performance, but didn�t want to shell out the cash for additional hardware, then here is a practical solution for you. You can utilize a software RAID system through the use of dynamic disks if you happen to be the lucky owner of Windows 2000 or XP (Pro/Server).

Microsoft's Definition of Dynamic Disks (�dem fellers is smart)

Dynamic disks provide features that basic disks do not, such as the ability to create volumes that span multiple disks (spanned and striped volumes), and the ability to create fault-tolerant volumes (mirrored and RAID-5 volumes). All volumes on dynamic disks are known as dynamic volumes and can only be accessed by Windows 2000 or XP. You can perform the following tasks only on a dynamic disk:

  • Create and delete simple, spanned, striped, mirrored, and RAID-5 volumes.
  • Extend a simple or spanned volume.
  • Remove a mirror from a mirrored volume or split the volume into two volumes.
  • Repair mirrored or RAID-5 volumes.
  • Reactivate a missing or offline disk.
  • Check disk properties, such as capacity, available free space, and current status.
  • View volume and partition properties such as size, drive letter assignment, label, type, and file system.
  • Establish drive letter assignments for volumes or partitions, optical storage devices (for example CD-ROM), and removable drives.
  • Establish disk sharing and security arrangements for volumes and partitions formatted with NTFS.

RAID 101 - The Condensed Version

RAID = Redundant Array of Independent Disks. The key word here is redundant. RAID was developed for data backup reasons on file servers. The basic idea is to have two or more hard drives in a system and when data is written on one, the same data is duplicated on the other (mirroring), and quicker than you can say �deathstar� you have a reliable backup to your data. It was discovered that if you could care less about your data, and just wanted a screaming machine that you could configure two or more drives to act as one. So one set of data is split and written to multiple disks, and you know the old adage �two heads are better than one,� well in this case it is certainly true. Two drives retrieving or writing a file at the same time (striping) increases the efficiency significantly. Now of course there are several possible configurations for striping and mirroring drives in the same array, but since I�m one of those who could care less about my data, I will focus on striping and increasing performance.

Be aware that if you decide to undertake this delicate procedure that your data is at risk. If you have one drive go down then you�re your RAID configuration is no longer valid. Remember, striping splits your data among the drives, so if you lose a drive to failure you won�t be able to access the half files left behind on the good drive!

Just Like the Boy Scouts, Be Prepared!

Windows itself cannot reside on a striped partition. Does that mean you have to have a third drive just for Windows? No! Three drives? Money doesn�t grow on trees you know. Remember, we are being cheap..err�frugal here. However, if you happen to be independently wealthy, just as two heads are better than one, three must be thrice as good, and four must be force as good, huh?

You can pull this off without a format and reinstall of Windows if you already have Windows on its own partition. My recommendation is to back up your data and start from scratch.

Since I�ve convinced you to wipe your drives now, give some consideration to how you will be partitioning them. Keep in mind that to do software RAID it is not necessary to have matched drives. You could get this done with an 80GB and a 40GB without giving up drive space. This is an advantage over hardware RAID, which requires like drives to retain all drive space. However, even in the software setup, I would suspect performance would take a hit if one drive was significantly slower than the other, or the buffers were different sizes.

Here is how I partitioned using two 80GB Maxtor drives:

  • C: =10GB single drive for Windows
  • E: = 100GB on two drives (50GB on each drive striped).
  • F: =10GB Single drive for backups
  • G: = 25GB Single drive for downloads
  • Z: = 2GB on two drives (1GB on each drive striped) for the swapfile

Since Windows can�t be on a striped partition, and I would like to get the maximum benefit from striping, this is the volume on which I keep all program files and data such as My Documents, My Pictures, My Music, etc, etc, etc�. You may be asking yourself �how in the name of Pete do you move all that Windows stuff to a drive that doesn�t contain Windows?� Well, I could tell you, but then I�d have to kill you. Seriously, if you desire this information, feel free tocontact me.
For you visual types, here you go:

clip_image001

If you�re wondering what the 5.33 GB of unallocated space is for, that�s reserved for the day I figure out how to install Linux on a Windows dynamic disk� :p

One more thing, whether you use two, three, or four disks; the biggest performance gain is when each drive is on its own channel. In order to accomplish this with more than two drives, the addition of a PCI controller card is required. There we go spending money on hardware again, but the good news is an IDE controller is much less money than a quality RAID controller.

Throwing Caution to the Wind

Now we get down to the nuts and bolts. Turn off your computer and physically place each hard drive on its own channel. If for some reason you can�t get this done with your system don�t despair. You will still be able to do this, but the results just won�t be as good.

Next we need to do a clean install of Windows. What we are trying to accomplish with this step is to remove all partitions and create just one small one for Windows. The size is up to you, keep in mind that without a swapfile, My Documents, or program files; WinXP pro will take less than 2GB after the installation of SP1. You do need extra room to grow for things like system restore, the registry, and the many other things Windows manages to bloat it self with. Also, you will want free space to allow for later drive defragmentation. My recommendation is 5 to 10GB. After Windows is installed get all your updates done and your hardware installed.

Now that you have a nice fresh install of Windows and everything is working and up to date, right click on My Computer and click on �Manage�, this will bring up the Computer Management console. Just like everything else in Windows there are many ways to get to this, this is the one I prefer. Click on Disk Management and it will bring up a screen similar to the earlier image.

Convert all hard drives to dynamic by right clicking in the disk info box to the left of the partition graph and clicking on convert to Dynamic Disk. Select all drives that will be used for striping, follow the directions, read the warnings, and finish. Note in these images my drives are already converted and partitioned so options are grayed out or missing for me that won�t be for you.

clip_image002

Now that you have dynamic disks, you can create your volumes (partitions) on them. Simply right click anywhere in the unallocated space of the drive where you want the partition be and select �new volume�. Now there will be a wizard to guide you through the process.

clip_image003

You will have a choice of simple, spanned, striped, and mirrored. The wizard provides descriptions of each selection. Be careful of the difference between striped and spanned, spanned will not give a performance increase. We will be using simple or striped. Depending on how you planned out your partitions make the appropriate choice and continue.

clip_image004

Next, for a simple volume, make sure the appropriate drive is selected and for striped volumes make sure all drives are selected. Dial in the size of the partition, for striped volumes this number will be the amount of space taken on one drive and the total size of the partition will be this number times the number of drives involved. For example if you were using two drives and you selected 10MB, the total partition size would be 20MB, 10 on each drive.

clip_image005

Continue and select a drive letter. Click next and select your file system, allocation unit size, and the name you want on this drive. I went with NTFS and default allocations.

clip_image006

Clicking next will give you an overview of what you selected, if it looks ok click finish. Continue in this manner until you have your drives partitioned the way you want them.

Now you are ready to move Your Documents and the pagefile off of the windows partition and on to the new ones you created. Install your software and you�re done. Bear in mind that most installs default to C:\Program Files, so remember to change the path when installing.

System as Tested

Processor:

AMD Athlon 2200+

Motherboard:

MSI KT7 Ultra 2 KT133A

Graphics Card:

ATI Radeon 9800 AGP

Memory:

768MB PC-133 SD-RAM

Hard Drive:

2x Maxtor 80GB 7200RPM 2MB Cache

Software:

Windows XP Pro SP1

SiSoft Sandra is utilized for hard disk performance testing. As you can see my system is not state of the art, yet my results were significant during testing.

Default Drive Performance

clip_image007

Software RAID Performance

clip_image008

Conclusion

This seems to be a good way to squeeze some extra performance from one of the slowest parts of your PC. I have noticed a significant improvement in load time, especially for games. The performance improves greatly with three and four drives, but I�m sure that is getting close to or exceeding the limits of the current PCI bus. Have fun and enjoy your new found performance boost.

Pros:

  • Inexpensive
  • Good performance increase
  • Easy to configure
  • No need for matched drives
  • Can do spanning and mirroring also

Cons:

  • Dynamic disks are only recognized by Windows 2000 or later
  • Small increase in CPU loading

Taken From: http://www.techimo.com/articles/index.pl?photo=149

Saturday, December 24, 2011

Backup a Cisco Config Automatically – Time (Kron Method)

In order to get a router to copy the running-config to startup-config, for example every Sunday at 23:00, complete these steps:

1 - Create a kron policy list—This is the script that lists what commands the router should run at the scheduled time.

Router#enable
Router#configure terminal
Router(config)#kron policy-list Backup
Router(config-kron-policy)#cli show startup-config | redirect tftp://192.168.1.252/test.cfg
Router(config-kron-policy)#exit

cli—Specifies EXEC CLI commands within a Command Scheduler policy list.
policy-list—Specifies the policy list associated with a Command Scheduler occurrence.

Note: The reason why write was used rather than copy running-config startup-config is because kron does not support interactive prompts and the copy running-config startup-config command requires interaction. It is important to remember this when you create commands. Also, note that kron does not support configuration commands.


2 - Create a kron occurrence—This informs the router when and how often the policy should run.

Router(config)#kron occurrence SaveConfigSchedule at 23:00 Sun recurring
Router(config-kron-occurrence)#policy-list Backup

SaveConfigSchedule—This is the name of occurrence. Length of occurrence-name is from 1 to 31 characters. If the occurrence-name is new, an occurrence structure will be created. If the occurrence-name is not new, the existing occurrence will be edited.

at—Identifies that the occurrence is to run at a specified calendar date and time.
recurring—Identifies that the occurrence is to run on a recurring basis.


3 - Verify the kron configuration by using the show command.

Router#show kron schedule
Kron Occurrence Schedule
SaveConfigSchedule inactive, will run again in 1 days 12:37:47 at 23:00 on Sun

inactive—Means that kron is not running the command(s) at present.
active—Means that kron is running the current command(s).


Router#show running-configuration
...
kron occurrence SaveConfigSchedule at 23:00 Sun recurring
policy-list Backup
!
kron policy-list Backup
cli show startup-config | redirect tftp://192.168.1.252/test.cfg
...


Note: You can use this to schedule other things, just change the the policy-list, to what you want.

Based Onhttp://www.cisco.com/en/US/products/sw/iosswrel/ps1835/products_tech_note09186a008020260d.shtml

Friday, December 23, 2011

Backup a Cisco Config Automatically – Changes ( Archive Method )

Cisco IOS has the ability to save it’s configuration when you run the write memory command.
Here is how:

R1#enable
R1#configure terminal
R1(config)#archive
R1(config-archive)#path tftp://172.16.10.61/sw3725/sw3725.cfg
R1(config-archive)#write-memory
R1(config-archive)#exit
R1(config)#exit

The “write-memory” option means that when the running-config is saved to the startup-config a copy will also be saved on the tftp server, thus backing up the startup-config every time it’s changed.

In this example, we’ve configured the switch to save to the configuration file to the sw3725 sub-directory of a ttp server.
To test the setup, run the “write memory” command.

R1#enable
R1#write memory

or
R1#copy running-config startup-config

Looking on the sw3725 on the tftp server, we see a configuration file was uploaded:

sw3725.cfg-1

if you save the running-config a couple more times you wil get something like this:

sw3725.cfg-1
sw3725.cfg-2
sw3725.cfg-3

like you see the number at the end of the file name is incremented, every time you save the running-config

Based On: http://www.rainingpackets.com/configuring-cisco-ios-automatically-save-running-configuration-tftp-server-save

More Info at:

Wednesday, August 4, 2010

System Administration - Overview

Taming the Beast

From Issue #191
March 2010

The right plan can determine the difference between a large-scale system administration nightmare and a good night's sleep for you and your sysadmin team.

As the appetite for raw computing power continues to grow, so do the challenges associated with managing large numbers of systems, both physical and virtual. Private industry, government and scientific research organizations are leveraging larger and larger Linux environments for everything from high-energy physics data analysis to cloud computing. Clusters containing hundreds or even thousands of systems are becoming commonplace. System administrators are finding that the old way of doing things no longer works when confronted with massive Linux deployments. We are forced to rethink common tasks because the tools and strategies that served us well in the past are now crushed by an army of penguins. As someone who has worked in scientific computing for the past nine years, I know that large-scale system administration can at times be a nightmarish endeavor, but for those brave enough to tame the monster, it can be a hugely rewarding and satisfying experience.

People often ask me, “How is your department able to manage so many machines with such a small number of sysadmins?” The answer is that my basic philosophy of large-scale system administration is “keep things simple”. Complexity is the enemy. It almost always means more system management overhead and more failures. It's fairly straightforward for a single experienced Linux sysadmin to single-handedly manage a cluster of a thousand machines, as long as all of the systems are identical (or nearly identical). Start throwing in one-off servers with custom partitioning or additional NICs, and things start to become more difficult, and the number of sysadmins required to keep things running starts to increase.

An arsenal of weapons in the form of a complete box of system administration tools and techniques is vital if you plan to manage a large Linux environment effectively. In the past, you probably would be forced to roll your own large-scale system administration utilities. The good news is that compared to five or six years ago, many open-source applications now make managing even large clusters relatively straightforward.

Monitoring

System administrators know that monitoring is essential. I think Linux sysadmins especially have a natural tendency to be concerned with every possible aspect of their systems. We love to watch the number of running processes, memory consumption and network throughput on all our machines, but in the world of large-scale system administration, this mindset can be a liability. This is especially true when it comes to alerting. The problem with alerting on every potential hiccup is that you'll either go insane from the constant flood of e-mail and pages, or even worse, you'll start ignoring the alerts. Neither of those situations is desirable. The solution? Configure your monitoring system to alert only on actionable conditions—things that cause an interruption in service. For every monitoring check you enable, ask yourself “What action must be taken if this check triggers an alert?” If the answer is “nothing”, it's probably better not to enable the check.

Monitoring Tools

If you were asked to name the first monitoring application that comes to mind, it probably would be Nagios. Used by just about everyone, Nagios is currently the king of open-source monitoring tools.

Zabbix sports a slick Web interface that is sure to make any manager happy. Zabbix scales well and might be posed to give Nagios a run for its money.

Ganglia is one of those must-have tools for Linux environments of any size. Its strengths include trending and performance monitoring.

I think it's smart to differentiate monitoring further into critical and noncritical alerts. E-mail and pager alerts should be reserved for things that require immediate action—for example, important systems that aren't pingable, full filesystems, degraded RAIDs and so on. Noncritical things, like NIS timeouts, instead should be displayed on a Web page that can be viewed when you get back from lunch. Also consider writing checks that automatically correct whatever condition they are monitoring. Instead of your script sending you an e-mail when Apache dies, why not have it try restarting httpd automatically? If you go the auto-correcting “self-healing” route, I'd recommend logging whatever action your script takes so you can troubleshoot the failure later.

When selecting a monitoring tool in a large environment, you have to think about scalability. I have seen both Zabbix and Nagios used to monitor in excess of 1,500 machines and implement tens of thousands of checks. Even with these tools, you might want to scale horizontally by dividing your machines into logical groups and then running a single monitoring server per group. This will increase complexity, but if done correctly, it will also prevent your monitoring infrastructure from going up in flames.

Configuration Management

In small environments, you can maintain Linux systems successfully without a configuration management tool. This is not the case in large environments. If you plan on running a large number of Linux systems efficiently, I strongly encourage you to consider a configuration management system. There are currently two heavyweights in this area, Cfengine and Puppet. Cfengine is a mature product that has been around for years, and it works well. The new kid on the block is Puppet, a Ruby-based tool that is quickly gaining popularity. Your configuration management tools should, obviously, allow you to add or modify system or application configuration files to a single system or groups of machines. Some examples of files you might want to manage are /etc/fstab, ntpd.conf, httpd.conf or /etc/password. Your tool also should be able to manage symlinks and software packages or any other node attributes that change frequently.

Configuration Management Tools

Cfengine is the grandfather of configuration management systems. The project started in 1993 and continues to be actively developed. Although I personally find some aspects of Cfengine a little clunky, I've been using it successfully for many years.

Puppet is a highly regarded Ruby-based tool that should be considered by anyone considering a configuration management solution.

Regardless of which configuration management tool you use, it's important to implement it early. Managing Linux configurations is something that should be set up as the node is being installed. Retrofitting configuration management on a node that is already in production can be a dangerous endeavor. Imagine pushing out an incorrect fstab or password file, and you get an idea of what can go wrong. Despite the obvious hazards of fat-fingering a configuration management tool, the benefits far outweigh the dangers. Configuration management tools provide a highly effective way of managing Linux systems and can reduce system administration overhead dramatically.

As an added bonus, configuration management systems also can be used as a system backup mechanism of sorts. Granted, you don't want to store large amounts of data in a tool like Cfengine, but in the event of system failure, using a configuration managment tool in conjunction with your node installation tools should allow you to get the system into a known good state in a minimal amount of time.

Provisioning

Provisioning is the process of installing the operating system on a machine and performing basic system configuration. At home, you probably boot your computer from a DVD to install the latest version of your favorite Linux distro. Can you imagine popping a DVD in and out of a data center full of systems? Not appealing. A more efficient approach is to install the OS over the network, and you typically do this with with a combination of PXE and Kickstart. There are numerous tools to assist with large-scale provisioning—Cobbler and Spacewalk are two—but you may prefer to roll your own. Your provisioning tools should be tightly coupled to your configuration management system. The ultimate goal is to be able to sit at your desk, run a couple commands, and see a hundred systems appear on the network a few minutes later, fully configured and ready for production.

Provisioning Tools

Rocks is a Linux distribution with built-in network installation infrastructure. Rocks is great for quickly deploying large clusters of Linux servers though it can be difficult to use in mixed Linux distro environments.

Spacewalk is Red Hat's open-source systems management solution. In addition to provisioning, Spacewalk also offers system monitoring and configuration file management.

Cobbler, part of the Fedora Project, is a lightweight system installation server that works well for installing physical and virtual systems.

Hardware

When it's time to purchase hardware for your new Linux super cluster, there are many things to consider, especially when it comes to choosing a good vendor. When selecting vendors, be sure to understand their support offerings fully. Will they come on-site to troubleshoot issues, or do they expect you to sit for hours on the phone pulling your hair out while they plod through an endless series of troubleshooting scripts? In my experience, the best, most responsive shops have been local whitebox vendors. It doesn't matter which route you go, large corporate or whitebox vendor, but it's important to form a solid business relationship, because you're going to be interacting with each other on a regular basis.

The odds are that old hardware is more likely to fail than newer hardware. In my shop, we typically purchase systems with three-year support contracts and then retire the machines in year four. Sometimes we keep machines around longer and simply discard a system if it experiences any type of failure. This is particularly true in tight budget years.

Purchasing the latest, greatest hardware is always tempting, but I suggest buying widely adopted, field-tested systems. Common hardware usually means better Linux community support. When your network card starts flaking out, you're more likely to find a solution to the problem if 100,000 other Linux users also have the same NIC. In recent years, I've been very happy with the Linux compatibility and affordability of Supermicro systems. If your budget allows, consider purchasing a system with hardware RAID and redundant power supplies to minimize the number of after-hours pages. Spare systems or excess hardware capacity are a must for large shops, because the fact of the matter is regardless of the quality of hardware, systems will fail.
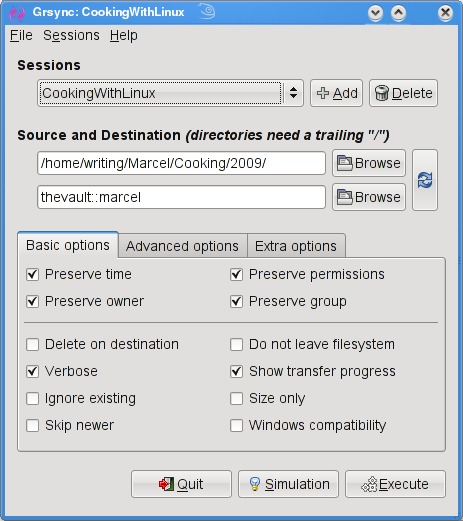
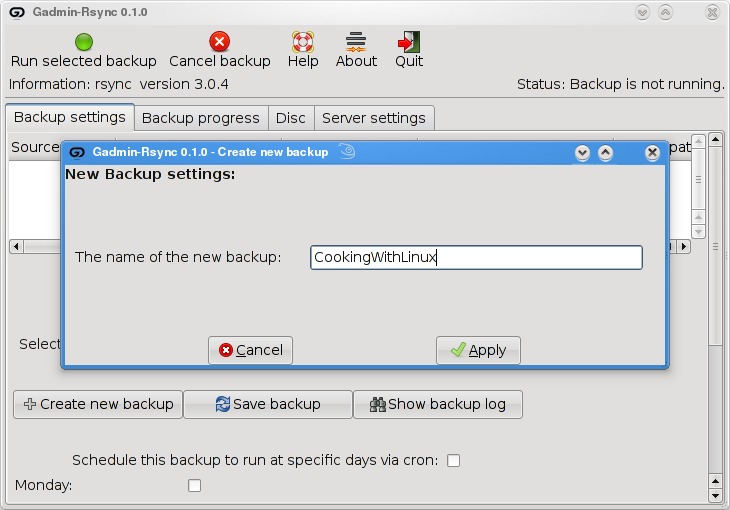
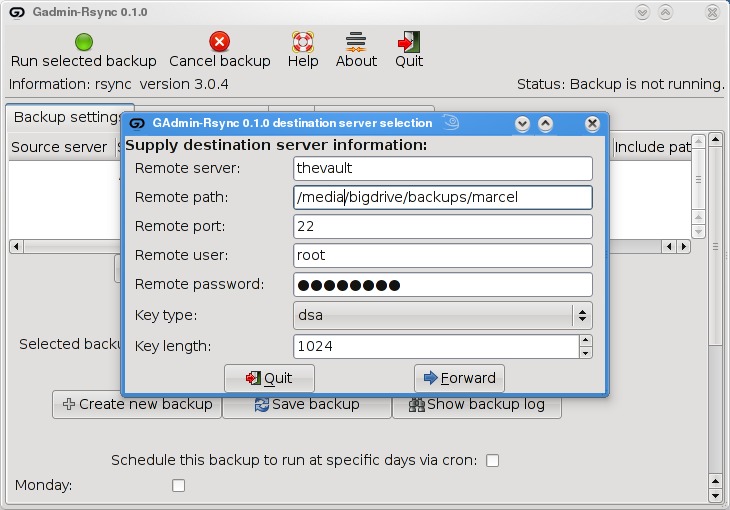
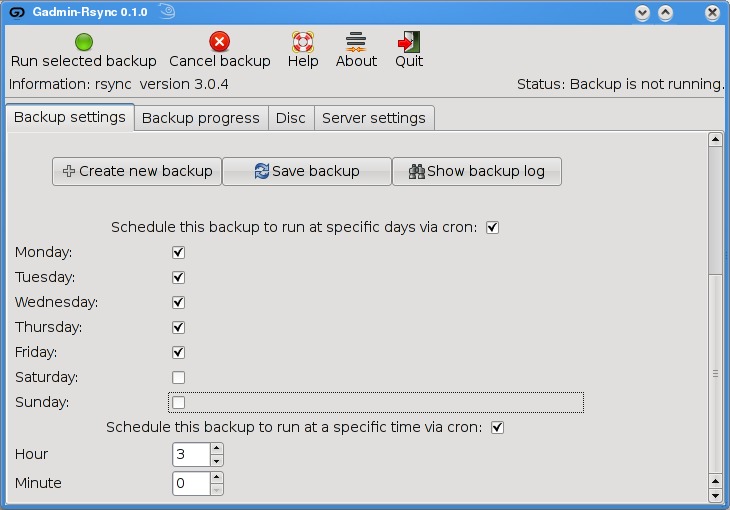
Backups

Rethink backups. More than likely, when confronted with a large Linux deployment, you're going to be dealing with massive amounts of data. Deciding what data to back up requires careful coordination with stakeholders. Communicate with users so they understand backup limitations. Obviously, written policies are a must, but the occasional e-mail reminder is a good idea as well. As a general rule, you want to back up only absolutely essential data, such as home directories, unless requirements dictate otherwise.

Serial Console Access

Although it may seem antiquated, do not underestimate the value of serial console access to your Linux systems. When you find yourself in a situation where you can't access a system via SSH or other remote-access protocol, a good-old serial console potentially could be a lifesaver, particularly if you manage systems in a remote data center. Equally important is the ability to power-cycle a machine remotely. Absolutely nothing is more frustrating than having to drive to the data center at 3am to push the power button on an unresponsive system.

Many hardware devices exist for power-cycling systems remotely. I've had good luck with Avocent and APC products, but your mileage may vary. Going back to our “keep it simple” mantra, no matter what solution you select, try to standardize one particular brand if possible. More than likely, you're going to write a wrapper script around your power-cycling utilities, so you can do things like powercycle node.example.com, and having just a single hardware type keeps implementation more straightforward.

System Administrators

No matter how good your tools are, a solid system administration team is essential to managing any large Linux environment effectively. The number of systems managed by my group has grown from about a dozen Linux nodes eight years ago to roughly 4,000 today. We currently operate with an approximate ratio of 500 Linux servers to every one system administrator, and we do this while maintaining a high level of user satisfaction. This simply wouldn't be possible without a skilled group of individuals.

When hiring new team members, I look for Linux professionals, not enthusiasts. What do I mean by that? Many people might view Linux as a hobby or as a source of entertainment, and that's great! But the people on my team see things a little differently. To them, Linux is an awesomely powerful tool—a giant hammer that can be used to solve massive problems. The professionals on my team are curious and always thinking about more efficient ways of doing things. In my opinion, the best large-scale sysadmin is someone who wants to automate any task that needs to be repeated more than once, and someone who constantly thinks about the big picture, not just the single piece of the puzzle that they happen to be working on. Of course, an intimate knowledge of Linux is mandatory, as is a wide range of other computing skills.

In any large Linux shop, there is going to be a certain amount of mundane, low-level work that needs to be performed on a daily basis: rebooting hung systems, replacing failed hard drives and creating new user accounts. The majority of the time, these routine tasks are better suited to your junior admins, but it's beneficial for more senior people to be involved from time to time as they serve as a fresh set of eyes, potentially identifying areas that can streamlined or automated entirely. Senior admins should focus on improving system management efficiency, solving difficult issues and mentoring other team members.

Conclusion

We've touched a few of the areas that make large-scale Linux system administration challenging. Node installing, configuration management and monitoring are all particularly important, but you still need reliable hardware and great people. Managing a large environment can be nerve-racking at times, but never lose sight of the fact that ultimately, it's just a bunch of Linux boxes.

Jason Allen is CD/SCF/FEF Department Head at Fermi National Accelerator Laboratory, which is managed by Fermi Research Alliance, LLC, under Management and Operating Contract (DE-AC02-07CH11359) with the Department of Energy. He has been working with Linux professionally for the past 12 years and maintains a system administration blog at savvysysadmin.com.


Taken From: http://www.linuxjournal.com/article/10665

Friday, June 12, 2009

Backup Files With Rsync and Grsync

There are, of course, numerous backup solutions you can use, from the simple and free to the complex and expensive, as well as everything in between. The technology behind most backup systems, however, tends to be much more limited. Using classic tools, such as tar and gzip, to back up and compress is still very common under the surface of much more complex tools. This is true even when using network resources. In the end, you are backing up from one machine to another. Many people I know, including those with small businesses, do this for their regular backups. Machine A backs to machine B, which backs to C, which backs to A. The machines, and their drives, are all part of a network. Hey, instant cloud, and you probably didn't know you had one.

This is where rsync, another popular backup tool, shows its worth. As the name implies, rsyncs keep a backup copy of your data, in sync with the original. It can do it locally, from one physical drive to another, or across your network. Because only those files that have been modified are transferred, the process can be very quick. You can do this with single files, whole directories and subdirectories, while maintaining file ownership and permissions, links, symbolic links and so on. rsync has its own transport, or you can use OpenSSH to secure the transfer, and (of course) there are some great front-end, graphical tools to make the process a little slicker.

You can find rsync at rsync.samba.org, but you probably don't even have to look that far. Many distributions load it when you install your system. If not, check your installation disks or simply pick it up from your distribution's repositories. Before I explain how to rsync your data to your own personal cloud, let me show you how easy it is to create a synchronized backup of your data from one directory to another (or one drive to another):

rsync -av important_stuff/ is_backup

In the above example, rsync copies everything in the directory important_stuff into another directory (or folder) called is_backup. Most of you will have figured out that the -v means verbose copy. The -a option hides some amount of complexity in that it is the same as using the -rlptgoD flags. In order, this means that rsync should do a recursive copy; copy symbolic links; preserve permissions, modification times and group and owner information; and, with the final D, copy special files (device and block). When you press Enter, files go scrolling by, after which you see something like this:

sending incremental file list
./
CookingJul08.tgz
CookingJul2008_albums.odt
CookingJul2008_albums.txt
igal_page.png
montage.png
shalbum.png
zenphoto_comment.png
zenphoto_go.png
zenphoto_login.png
zenphoto_makepass.png
zenphoto_setup.png
zenphoto_theming_comment.png
zenphoto_upload_photos.png
zenphoto_view_album.png
. . . .

sent 46059880 bytes received 2753 bytes 6141684.40 bytes/sec
total size is 46044132 speedup is 1.00

One other thing that rsync should be able to do in order to be completely useful is delete files. If you are mirroring files and directories, it stands to reason that you want the mirror to represent exactly what is on the original. If files have been deleted, you want them deleted on the backup server as well. This is where the --delete parameter comes into play. Using the earlier example, let's delete that tgz file from the original, then relaunch the command:

$ rsync -av --delete important_stuff/ is_backup
sending incremental file list
./
deleting CookingJul08.tgz

sent 4164 bytes received 25 bytes 8378.00 bytes/sec
total size is 41911050 speedup is 10005.03

From here on, both directories will always be in sync. When doing network backups, this magic synchronization of files and directories is done using a client and server setup. At least one machine must play the role of server (although nothing is stopping you from running an rsync dæmon on every one of your machines). The server gets its information about who can access what from a configuration file called rsyncd.conf. You'll find that it probably lives in the /etc directory. The following partial listing is from one of my rsync servers:

hosts allow = 192.168.1.0/24
use chroot = no
max connections = 10
log file = /var/log/rsyncd.log
gid = nogroup
uid = nobody

[marcel]
path = /media/bigdrive/backups/marcel
read only = no
comment = Marcel's files
[francois]
path = /media/bigdrive/backups/francois
read only = no
comment = Files for the waiter

This configuration file is quite simple once you get the hang of it. Backup areas are identified by a name in square brackets (marcel, website, francois and so on). The chief bits of information there include the path to the disk area and some kind of comment. Notice that I specified read only = no, but I could just as easily have added that to the top section (the one without a name in square brackets). That's the global section. Anything put up there applies to all other sections, but it can be overridden. Pay particular attention to the gid and uid values; these are the group ID and user ID to which the file transfer takes place. The default is nobody, but you need to make sure that is correct for your system. One of my servers does not have a nobody group, but has a nogroup group instead.

The hosts allow section identifies my local subnet as being the only set of addresses from which transfers can take place. The log file line identifies a file to log information from the dæmon. You also can specify a maximum number of connections, specific users who are allowed to transfer files (auth users) and a whole lot more. Run man rsyncd.conf for the full details. When your configuration is set, you can launch the rsync dæmon, which, interestingly enough, is exactly the same program as the rsync command itself. Just do the following:

rsync --daemon

That's it. Now, it's time to put this setup to use. You might want to test your rsync connection by issuing the command:

rsync remote_host::

Note the double colon at the end of the server's name. The result should be something like this, assuming a server called thevault:

$ rsync thevault::
website All our websites
francois Files for the waiter
marcel Backup area for Marcel

Now, pretend I am on the server where my Web site files live. Using the following command, I can launch rsync to back up this entire area:

rsync -av /var/www thevault::website/

building file list ...

The format of the rsync command is rsync options source destination, which means I also could start the command from thevault, assuming my Web site machine also was running an rsync dæmon. The result would look more like this:

rsync -av localbackupdir websitemachine.dom::websites

All this work at the command line is great, but there are some tools for making the process easier, particularly if you will be creating a number of rsync backups or if you want to get into more complex requirements, such as scheduled backups. A friendly graphical front end on your desktop also may be a greater incentive to perform regular backups or take a quick backup when you've added important data and a “right now” backup is desirable. The first tool I want to show you is Piero Orsoni's grsync (Figure 1).

Figure 1. grsync provides an easy-to-use interface with every rsync option you could want.

While providing a great front end to rsync, grsync also works as a teaching tool for the command-line version of the program, or at least it helps as a memory aid. Almost any command-line option available to rsync is covered in one of these three tabs: Basic options, Advanced options and Extra options. What makes it a learning tool is that if you pause over any of those check boxes with your mouse, a tooltip appears showing the command-line option with a brief description of its function.

To start, click the Add button next to the session drop-down dialog and enter a name for your backup. You can define many different rsync backups here, and then launch them again at a later time. Clicking the Browse button brings up the standard Gtk2 file browser window from which you can select your local and destination folders. Unfortunately, you can't browse remote systems, but if you've already set up an rsync server, have no fear. You can enter it manually in the format I showed you earlier (for example, thevault::marcel/). When you are happy with the various options, click Execute. If you only think you are happy, click the Simulation button. (Chef Marcel loves a program with a sense of humor.) When you do click Execute, the program switches to a progress window (Figure 2), so you can see where you are in the process.

Figure 2. Once your grsync backup begins, it switches to a progress report view.

The next item on our rsync menu is Magnus Loef's GAdmin-Rsync. GAdmin-Rsync makes every aspect of creating an rsync backup a matter of filling in the blanks. What's more, the program creates backups using SSH by default, which means you can set up rsync backups to any machine to which you have secure shell access. This also means you don't actually need to have an rsync dæmon running on the remote machine if you have SSH access. Let me show you how it works.

When you start the program for the first time, you'll be asked for a name to give your new backup (Figure 3). You could back up the entire system or select specific folders of filesystems. Choose a name that makes sense to you based on what you want to back up. Enter a name, then click Apply to continue.

Figure 3. GAdmin-Rsync lets you define numerous backup configurations, each with its own identifier.

As you saw when we did this at the command line, rsync backups can be local, to a remote system or from a remote system. The next window looks for that very information (Figure 4). By default, local backup is checked. To back up to a remote server, select Local to remote backup. Because you can swap source and destination easily when using rsync, there's that third option. I routinely use a remote to local backup for my Web sites and remote systems. Click Forward to continue.

Figure 4. Your next step is to define the location of the backup.

Assuming you chose to back up to your cloud, your next step is to enter the server information (Figure 5). This includes the backup path on your networked server as well as your SSH key type and length. When you have entered this information, click Forward.

Figure 5. For remote backups, GAdmin-Rsync uses SSH/SCP for secure transfers.

Now you're ready to start the rsync backup. Click the Backup Progress tab to watch all the action.

What is nice about this program is that you can (as with grsync) store a number of backup definitions, so you can choose to back up your documents, music or digital photographs when it suits you. GAdmin-Rsync goes further though. If you take a look down at the bottom of the window on the Backup settings tab, you'll notice the words “Schedule this backup to run at specific days via cron” and a check box (Figure 6). Check the box, then scroll down to choose the days you want the backup to run. A little further down, you can specify the time as well.

Figure 6. GAdmin-Rsync also provides an easy way to schedule your backups with cron.

Well, mes amis, closing time has caught up to us, and at least for now, time is one thing we can't back up. Despite the hour, I am quite sure we can convince François to refill our glasses one final time before we go our separate ways. Please, mes amis, raise your glasses and let us all drink to one another's health. A votre santé! Bon appétit!

Marcel Gagné is an award-winning writer living in Waterloo, Ontario. He is the author of the Moving to Linux series of books from Addison-Wesley. Marcel is also a pilot, a past Top-40 disc jockey, writes science fiction and fantasy, and folds a mean Origami T-Rex. He can be reached via e-mail at marcel@marcelgagne.com. You can discover lots of other things (including great Wine links) from his Web sites at www.marcelgagne.com and www.cookingwithlinux.com.


Taken From: Linux Journal Contents #180, April 2009

http://www.linuxjournal.com/article/10409