Wednesday, August 4, 2010

Comparing MythTV and XBMC

Audio/Video

MythTV and XBMC can turn your Linux system into a video playback device with all the options you've ever dreamed of.

The Linux desktop is a place to work and a place to play. People fortunate enough to have time to play have many distractions to amuse them. Audio fun abounds with programs like Amarok and Rhythmbox. Video enthusiasts will find a plethora of options, from standalone video players (like MPlayer, Xine and VLC) to comprehensive multimedia environments (like Freevo and Moovida). Being a video enthusiast, I find myself drawn to two of the most popular open-source entertainment tools: MythTV and XBMC.

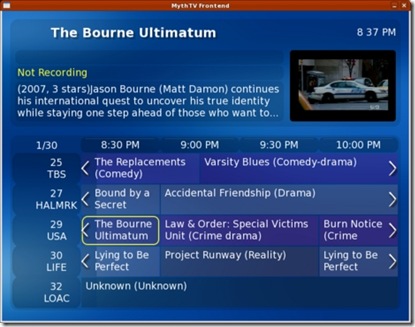
MythTV (www.mythtv.org) is a full-featured digital video recorder built for the Linux desktop yet perfectly suited to running as a home-theater system. It includes support for live TV and recordings, video file and DVD playback, photo galleries, music collections, weather forecasts, movie rentals via Netflix and even home video surveillance.

clip_image001

Figure 1. MythTV can be run as a distributed system, with front and back ends on different computers.

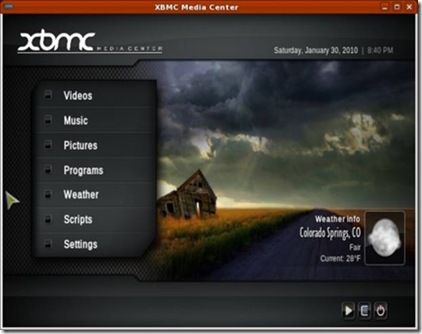
XBMC (xbmc.org) is a media player that also supports DVD and video file playback, music collections, photo galleries and weather forecasts. Unlike MythTV, XBMC was not originally developed for the Linux desktop. Instead, it was built to run on modified Xbox hardware, and later it was modified to be a general-purpose media tool and ported to the Linux desktop. Because of this, some of XBMC's features are geared toward the use of Xbox features, such as running games and dashboards. Even so, XBMC has evolved into an excellent desktop Linux media player in its own right.

clip_image003

Figure 2. XBMC is a media player on steroids.

MythTV and XBMC are similar tools but have different designs and target audiences. This article doesn't attempt to compare them side by side, apples to apples. Instead, the intention is to examine each from a user perspective and discover what features have meaning to different types of users. Because these applications are so feature-rich, the primary focus here is limited to video services—playing movies and watching TV. Although both systems have been designed to work well when displayed on a TV, this article is written from the point of view of using the applications on a desktop.

Installation and Requirements

MythTV is a well established project and, as such, is easily installed on most major Linux distributions using desktop package management tools. Ready-made packages are available for Fedora/Red Hat/CentOS, Ubuntu, Debian, OpenSUSE, Mandriva and Arch Linux. There also are live CD distributions, such as MythBuntu, MythDora and LinHES (formerly KnoppMyth), which allow you to run MythTV without installing it. Building from source is possible, but it can be complex, and there are many prerequisites. Using prepackaged versions is the preferred installation mechanism.

MythTV can be used without TV capture cards. The MythVideo plugin can be used to view and manage video files that have been ripped from DVDs or other sources. However, MythTV requires a supported TV capture card to allow watching live TV. It currently does not provide direct support for external TV sources, such as Hulu or Veoh.

MythTV back ends start automatically when installed from distribution packages. To start front ends, use the mythfrontend command. You can run other command-line tools, such as mythfilldatabase, although these often run automatically once MythTV is configured.

XBMC is built specifically for the Ubuntu distribution, and packages are available from the Ubuntu repositories. Other Linux distributions must build from source. Fortunately, doing so isn't hard, at least for Fedora. As with MythTV, you need to install many prerequisite packages. The XBMC Wiki provides copy-and-paste commands for installing them. Some distributions may require setting some environment variables, but building the package is the same for all listed distributions:

./bootstrap


./configure


make


make install


To install to a program-specific directory, specify a prefix. A prefix allows installation to a directory that can be removed easily later:


./configure --prefix=/opt/xbmc


To start the program, run bin/xbmc from the installation directory, such as /opt/xbmc/bin/xbmc.


Design Overview


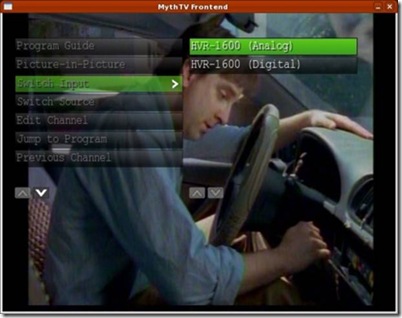
MythTV is designed as a personal video recorder (PVR) application. It is a network-based system with back ends used to acquire and serve TV and other media to front ends that handle display and playback. It supports a wide variety of hardware for both analog and video capture (Figure 3). The core recording and playback system is extended with plugins that provide additional features. The MythVideo plugin handles management and playback of video files, such as DVD rips. MythTV is best known for its wide support of TV tuner hardware and ability to play and record both analog and digital TV.


clip_image005


Figure 3. MythTV back ends support both analog and digital (HDTV) video capture cards.


MythTV's core focuses on watching and recording TV as well as providing extensive program guide and scheduling support. Some plugins extend this feature, such as the Archive plugin, which allows saving recorded programs to DVDs or other files.


Because of XBMC's Xbox roots, it focuses on being a multifunction media player, capable of many types of media playback from local or remote sources. This focus also allows the development team to emphasize the user experience. XBMC is best known for its well designed and sophisticated user interface and skins (Figure 4).


clip_image006


Figure 4. XBMC skins are plentiful and impressive.


XBMC's core focuses on video playback, but it also is extensible through the use of Python plugins. Currently, plugins are available that add support for TV and movie guides, instant messaging and front ends to other hardware like a TiVo. And, XBMC forms the basis of at least one commercial venture, Boxee.


Video Management


Browsing and playback of video files, such as ripped DVDs, in MythTV is handled by the MythVideo plugin. MythVideo manages video files under a single configurable folder. Folders under the top-level folder can be mountpoints for multiple hard drives. Each folder can have its own icon (folder.png) that is displayed while browsing the collection (Figure 5). Videos can be streamed from the back end or played by the front end from an NFS mount. Over an 802.11g wireless connection, streamed files play with fewer pauses/skips.


clip_image007


Figure 5. The MythVideo gallery view shows folder icons and is the easiest way to browse a large video collection.


Using mountpoints under the top-level directory offers multiple options on how to manage your hard drives. RAID configurations can be used to create one large storage space. Alternatively, multiple drives can be used for different genres.


Unlike MythVideo, XBMC is based entirely on the concept of sources. A source can be a local hard drive or NFS mountpoint or a remote server providing streamed data (Figure 6). XBMC supports multiple streaming formats and actually can be used to connect to a MythTV back end to watch TV and stream video.


clip_image009


Figure 6. The movies source is an NFS drive, but the MythTV source is a network connection.


To add videos to a MythVideo collection, copy files to the appropriate folder. MythVideo can play AVI, MPEG and even DVD ISO files (including menus). To reduce disk usage, 7GB DVDs often are ripped to AVI files, which can be as small 2GB without loss of quality. However, ripping like this typically loses the DVD menu options and possibly the subtitles. If you have the disk space, a DVD ISO copy is faster to create, and you won't lose any DVD features.


Videos can be added to local or network sources for XBMC. However, XBMC cannot stream MythTV movies. Instead, the MythTV movie folders must be mounted via NFS on the XBMC system, and the local mountpoint added as a video source to XBMC. Like MythTV, XBMC can play a large number of video file formats.


Organization and Browsing


MythTV provides three methods for video collection browsing. The first is Browse mode, and it allows you to browse the entire collection front to back. The page up and down keys make jumping through the list easy enough, although this method doesn't remember your last location. The second method is List mode, and it uses a tree listing to display entries. This listing benefits from a well structured hierarchy under the top-level video directory. Gallery mode is the last mode, and it uses icons for folders and movie posters for individual entries. This is visually appealing and also benefits from a well structured hierarchy for the video collection, although the number of entries in each folder displayed over the icons is rather distracting (Figure 7).


clip_image010


Figure 7. MythTV can browse sequentially or through a hierarchy.


You can give custom icons to folders in MythTV by creating a JPEG or PNG image in each directory. The size doesn't matter, although making them large enough to be displayed in high quality on the front end with the highest resolution may offer the best overall results. MythTV scales the image as appropriate.


XBMC approaches video organization a little differently. First, it provides two browsing modes: file and library. File browsing starts by showing the available configured sources. Choosing one of those then presents a listing of options relevant to that source. For example, if one source is a set of videos on a local hard drive and another is a remote MythTV back end, the former lists the movies in a typical tree hierarchy and the latter shows features available from the server, such as live TV or recordings.


In file mode, the listings are similar in structure to a directory listing. The typical “..” parent directory lets you back up through the hierarchy. Library mode allows you to browse only recordings. It won't show sources. Instead, it shows you the list of scanned recordings. Moving up through the hierarchy typically involves selecting an up-arrow icon (Figure 8).


clip_image011


Figure 8. XBMC's Library mode displays scanned recordings, but File mode can access any remote source.


Like MythTV, folders under XBMC can have custom icons. Place a folder.jpg file in each directory that requires a custom icon, and it will be displayed in either mode. If you share the directories between MythTV and XBMC, using JPEG will mean only one icon is needed. However, JPEG images don't support transparency, which means converting a PNG folder icon with transparency from MythTV to a JPEG for XBMC will lose the transparent effect (Figure 9).


clip_image012


Figure 9. Transparent PNG folder icons are supported by MythTV, while XBMC uses JPEG format icons.


In either mode, the listings can have multiple views. Library mode offers List, Full List and Thumbnail views. File mode adds Wide Icons and DVD Thumbs.


Both applications allow browsing by genre. Genre information is set automatically when metadata is retrieved for a video. Both systems can stack files. Stacking associates multipart movie files as a single movie.


Metadata Editing


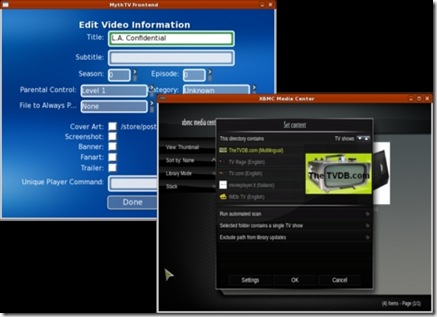
Information about videos is known as metadata. The metadata includes movie title, runtime, cast, synopsis and a variety of items similar to what is found on IMDB.com or TheMovieDatabase.org. Both applications can retrieve metadata automatically when new files are added to folders, and both allow you to edit this metadata while browsing the collection (Figure 10). XBMC offers multiple configurable sources for metadata on a per-folder basis. MythTV's metadata sources are dependent on configurable scripts, but only one script can be configured, and it applies to all files.


clip_image013


Figure 10. MythTV (left) can edit individual movies. XBMC (right) works only on folders of movies.


XBMC sets metadata via the context menu. Right-click on any folder to get the menu, and then select Set Content. Choose a source for the metadata, and then run an automated scan. XBMC will let you add a movie that is not found manually, but once you've done this, there is no easy way to remove the entry if it's wrong. In MythVideo, pressing I over a movie in any browse mode will bring up a context menu. From there, you can edit the metadata data, reset it, play the movie or just view more details about the movie.


Video Playback


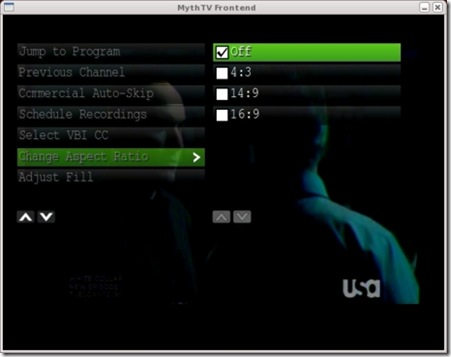
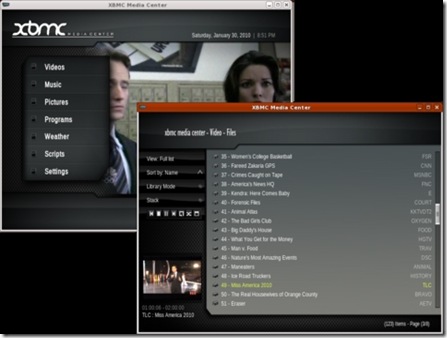
Once you're past the setup and management, you finally can play your videos. And, this is where the two systems shine. Both offer high-quality playback of files in AVI, MPEG4 and even ISO formats. ISO offers the best viewing, because all of the DVD features are available, including menus and subtitles. Of course, both programs also will play a DVD directly from a local DVD drive. MythVideo plays videos with no embellishments—the full window is the video. XBMC actually can wrap its menus around a playing video and will play a video in a small window while the user browses other features (Figure 12). XBMC also offers the usual media controls on-screen. MythTV uses an on-screen menu, but media controls are supported by keyboard keys without the aid of on-screen controls (Figure 11).


clip_image014


Figure 11. MythTV's on-screen display handles most functions except media control while playing.


clip_image015


Figure 12. XBMC can wrap menus around playing video (left) or place it in a small window (right).


TV Guide, Playback and Recordings


From the user perspective, TV playback under both systems is very similar to video playback. XBMC places TV as another source under its Video feature. MythTV separates videos from TV, although TV recordings still are under the TV function. The main difference between MythTV and XBMC is the way the guide is displayed. MythTV has a built-in guide that is updated by a back-end server (Figure 13). The guide is accessed from the OSD menu while watching live TV or when scheduling a recording.


MythTV can record live TV from any configured hardware. The more TV tuners installed on the back ends, the more sources for recordings. When one tuner is busy recording, another can be used to watch live TV. You can schedule recordings using any of the numerous guide search mechanisms, and you can start recordings while watching a show. You also can view recordings even while it is still recording, as long as some recorded data is available. Recordings are given priorities so that if they conflict and not enough video sources are available, the higher priority gets access to the device.


clip_image016


Figure 13. The MythTV guide is color-coded by genre.


There is only one way to watch recordings, and MythTV uses a tree structure for finding the recordings. Migrating recordings from MythTV's TV feature to MythVideo requires archiving them first via MythArchive. This is not particularly user-friendly, so keep your expectations low for hanging onto recordings.


XBMC uses a MythTV back end to show live TV. It also uses MythTV's guide information. However, it shows the guide information using the same view types as videos in File mode. XBMC, however, cannot record data. It can play only live TV or view existing video files. It cannot create new video files from live TV.


Appearance and Intangibles


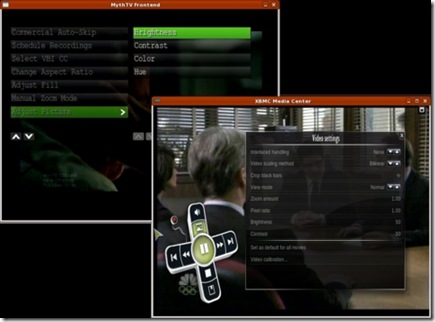
Both systems support the VDPAU extensions for NVIDIA, which provides high-quality playback. Because both support OpenGL, they also provide video controls, such as brightness, contrast and color controls (Figure 14). The actual features available under MythTV depend on various configuration options for both video and TV features. XBMC always has the same options available from any video playback, be it video files or live TV. These controls were available for an NVIDIA-based display. Other video hardware may present different options.


clip_image017


Figure 14. Video controls are available in both programs.


MythTV uses upfront configuration of window sizes and doesn't allow scaling the display while you watch. This isn't a problem once you're set up to display on a real TV, but if you watch on a desktop while you work, it's more of an issue. XBMC can display full screen, as does MythTV, but it also allows playing in a window that can be scaled while video is playing.


Neither system will stream Internet video, so you can't get to Hulu or Veoh from them. There are hacks for doing this, but they mostly just launch the Hulu player as an external application.


Both systems are fairly stable. XBMC crashed a few times during my research, and I experienced a few lockups, although the latter may have been due to some interaction with the MythTV back end. MythTV crashes are very seldom. During my research, it crashed once while experimenting with the use of subtitles while playing a DVD ISO file.


Summary


The XBMC experience with its polished skins is very entertaining. But, without a TV source, you still need a MythTV back end to watch TV. If you watch TV while you work, using XBMC as a TV front end to a MythTV back end is ideal, because you can scale the XBMC window interactively. MythTV may be your only choice if you need to watch, schedule and record multiple sources at once.


Both tools do an admirable job with video file collections. MythTV provides more flexibility in setting metadata on a per-movie basis, while XBMC has attractive browsing options and supports more metadata sources. But, don't expect to play Blu-ray disks any time soon with either tool. For one thing, they produce huge files (50GB typically), if you can rip them at all.


This is far from a comprehensive review of MythTV and XBMC. Both offer far more features and capabilities than can be given justice in a single article, especially if your goal is to hook them up to a real TV and use them as home-theater systems. If you enjoy using your Linux system for media playback, you owe it to yourself to investigate both of these excellent applications.


Michael J. Hammel is a Principal Software Engineer for Colorado Engineering, Inc. (CEI), in Colorado Springs, Colorado, with more than 20 years of software development and management experience. He has written more than 100 articles for numerous on-line and print magazines and is the author of three books on The GIMP, the premier open-source graphics editing package.

Linux VPNs with OpenVPN - Part IV

Jun 30, 2010  By Mick Bauer
In Security
Use dangerous local-area networks without fear with OpenVPN.
For the past few months, I've been describing how to build a Virtual Private Network (VPN) server using OpenVPN, a free, multiplatform, TLS/SSL-based VPN dæmon. My example usage scenario involves the common “road warrior” setup where remote users connect back to a VPN server on their “home network” by establishing an encrypted VPN tunnel over the Internet.
Last month, in Part III, I finished a line-by-line walk-through of an example OpenVPN server configuration file (server.ovpn) shown here for your reference (Listing 1).
Listing 1. Server's server.ovpn File
port 1194
proto udp
dev tun

ca 2.0/keys/ca.crt
cert 2.0/keys/server.crt
key 2.0/keys/server.key  # Keep this file secret
dh 2.0/keys/dh1024.pem
tls-auth 2.0/keys/ta.key 0

server 10.31.33.0 255.255.255.0
ifconfig-pool-persist ipp.txt
push "redirect-gateway def1 bypass-dhcp"

keepalive 10 120
cipher BF-CBC        # Blowfish (default)
comp-lzo
max-clients 2

user nobody
group nogroup
persist-key
persist-tun

status openvpn-status.log
verb 3
mute 20


I then talked about running OpenVPN as a server process (the same executable can be run either as a dæmon/listener or as a client process), either running in the foreground, with all log messages printed to the console:

bash-$ sudo openvpn --config ./server.ovpn

or in the background, with all log messages being written to /var/log/daemon.log:

bash-$ sudo openvpn --daemon --config ./server.ovpn

While in the early stages of getting OpenVPN working on both server and clients, you'll definitely want to run the server dæmon in the foreground, because you'll probably have to stop and restart it through configuration tweaks anyhow. Once everything's working, you can put an init-script into your server's /etc/init.d directory that starts OpenVPN in dæmon mode automatically at startup time.

OpenVPN Client Configuration

This brings us to client configuration. Listing 2 shows a sample client configuration file, client.ovpn. Let's dissect it!

Listing 2. Client's client.ovpn File

client
proto udp
dev tun


remote 1.2.3.4 1194

nobind

ca ca.crt
cert minion.crt
key minion.key


ns-cert-type server
tls-auth ta.key 1


cipher BF-CBC
comp-lzo


user nobody
group nogroup
persist-key
persist-tun


mute-replay-warnings

verb 3
mute 20


First is the client directive. Like server, which we covered last time, client is actually a helper directive that, when read by the openvpn command, expands to two other directives: pull, which instructs OpenVPN to accept options pushed to it by the OpenVPN server it connects to, and tls-client, which enables TLS (SSL) encryption and tells OpenVPN to assume the role of client any time it initiates a TLS transaction.

Next comes proto udp, which tells OpenVPN to use UDP packets to build its VPN tunnel. This setting needs to be the same as what's specified on the server to which you wish to connect.

Next comes dev tun, which tells OpenVPN to encapsulate IP packets via a /dev/tun interface, rather than Ethernet frames via a /dev/tap device. I'm sticking to IP encapsulation in my examples, and besides, this setting has to be the same as on the server to which you wish to connect.

And, to which server do you wish to connect? The one specified in the remotedirective, which has two parameters, IP address (or hostname) and port. In Listing 2, these are set to 1.2.3.4 1194, specifically UDP port 1194. (If earlier I had set proto totcp-client, OpenVPN would assume you mean TCP port 1194 here.)

The IP address of my example server is 1.2.3.4, which may strike you as improbable, but this address is, at least, Internet-routable. If you're going to connect to your OpenVPN server from across the Internet, you'll need to target an Internet-routable IP address. In my home setup, this is actually the address of my DSL router, which I've configured to redirect UDP 1194 connections to the same port on my OpenVPN server, whose real IP address is a non-Internet-routable 192.168.0.0 address.

After remote comes nobind, which tells OpenVPN to allow the local IP stack (your Linux kernel's TCP/IP modules) to assign a local port from which to send and receive OpenVPN packets dynamically, rather than have the OpenVPN dæmon “bind” to (listen on) a specific port like a server process would. This setting, therefore, is suitable only for VPN client systems.

Certificate/Key-Related Directives

Next, there are five directives related to helper files that OpenVPN will need to read in order to build a tunnel. ca specifies a file containing at least one Certificate Authority certificate, specifically, the certificate of whatever CA will have signed the OpenVPN's server certificate. If you try to connect to a server whose server certificate was not signed by a CA key/certificate specified here, your OpenVPN client process will terminate the connection.

cert specifies a file containing a client certificate for your OpenVPN client process to present to the OpenVPN server. This certificate needs to have been signed by a CA whose certificate resides in the server's ca file, or the server will reject connections from you.

In many if not most cases, the simplest way to handle these certificates is to use the same CA to create and sign both server and client certificates. In fact, if you remember Part II in this series (LJ, March 2010), I already created a client certificate and key, right after I created the server credentials.

Because this process is both important and simple, let's take a minute to review it. I'm skipping the process of setting up and creating the Certificate Authority itself, as that applies only to server setup (you should do that only once, on the server). So, assuming you've got a working CA set up on your OpenVPN server as described in Part II of this article, follow these steps to use OpenVPN's pkitool script to create a new client certificate:

1) su to root:

bash-$ su

2) Change your working directory to /etc/openvpn/2.0:

bash-# cd /etc/openvpn/2.0

3) Declare some PKI-related environment variables stored in the file vars:

bash-# source ./vars

4) Create the new certificate:

bash-# ./pkitool --pass minion

In step 4, the string minion is the name (the “common name”, in x.509 parlance) of the host or user whose certificate you're creating. After issuing this command, you'll be prompted twice to type the certificate's passphrase.

The output of this command takes the form of three files: ./keys/minion.csr, ./keys/minion.crt and ./keys/minion.key. Only the last two are important for the purposes of this article: the new client certificate and client key, respectively.

Of the helper files related to crypto that were created when you set up the OpenVPN server, your client certificate and key are the only two unique to the client; ca.crt and ta.key are used on the server and on all clients that connect to it. Note also that although the client certificate (minion.crt) contains no private data, the client key minion.key and the TLS authentication key ta.key both should be kept secret through local file permissions and by handling them carefully.

For example, you should never e-mail any client key or TA key in clear text (note that using an https:// URL for Webmail access doesn't count as message encryption). You should use S/MIME or PGP e-mail encryption if you need to mail keys to users.

If you use a USB drive or other physical media to distribute keys, you should either deliver it in person or use a trusted courier to deliver it, and users should be instructed either to destroy or erase the media after installing their keys, or keep the media under lock and key. Although having a passphrase-protected client key shouldmake it hard for an attacker to use an intercepted key file, it's no guarantee! Under no circumstances should you issue blank-passphrase client certificates for any VPN scenario.

Speaking of the client key's passphrase, you also should take care in how you transmit that passphrase to the key's user. Because it isn't good policy for any system administrator to know users' passphrases in any context, users may afterward want to change the key's passphrase. The simplest way for users to do so is via the openssl command, like so:

bash-$ openssl rsa -in minion.key -out minion.key -aes192

The user does not need to be root to do this, provided the proper file permissions are set on minion.key (users should have read/write access on their own keys). After entering this command, users will be prompted for the key file's old passphrase and then twice for the new passphrase.

Once users have copied the files ca.crt, client.crt, client.key and ta.key over to their client system's /etc/openvpn/ directory, they should make sure they have the correct file permissions set. The two .crt files should be world-readable, but only owner-writable (that is, -rw-r--r--). The two .key files, however, should be only owner-readable/writable (that is, -rw-------).

All four files should be owned by root, assuming your users have root on their own Linux systems. (Setting up OpenVPN for nonroot users and the security challenges of doing so are beyond this article's scope.)

Now that you're clear on how to generate and manage client certificate/key pairs, let's continue working our way down Listing 2. The ca, cert and key directives specify the paths of your CA key file, client certificate file and client key file, respectively. In Listing 2 the values for these parameters are all just filenames, without their full paths specified. This implies that those three files are in the same directory as the client configuration file itself.

So, unlike on the server, where I left all the certificates and keys in /etc/openvpn/2.0/keys and, therefore, specified a CA certificate path of 2.0/keys/ca.crt, on the client system, you can get by with simply ca.crt if the file ca.crt, like the configuration file client.ovpn, is kept in the directory /etc/openvpn/.

The ns-cert-type server directive says what type of certificate your client should accept. Because in this example I'm dealing with multiple clients connecting back to a server, in Listing 2, it's set to server. This will prevent some other client from impersonating the server in a man-in-the-middle attack; the server's certificate, while signed by the same CA as its clients, has attributes that identify it as a server certificate, not another client certificate.

The last directive in the certificate/key-file portion of Listing 2 is tls-auth ta.key 1, which tells OpenVPN to use the file ta.key to add an extra layer of authentication on your VPN tunnel by requiring all packets in the TLS handshake phase at the beginning of each tunnel session to be signed with the specified TLS Authentication key. After the name of the TLS Authentication key (ta.key), specify a number telling in which “direction” to use this file: “0” for the server and “1” for clients.

Other Client Settings

Nearly all of the rest of the directives in Listing 2 are ones I already covered in Parts II and III of this series when dissecting Listing 1, the server configuration file. The client-side settings for those directives are even the same as specified on the server.

In the case of user nobody and group nogroup, which tell the openvpn command to run with unprivileged user and group identities after initialization, make sure the user account nobody and the group nogroup exist on your client system. Because both typically exist on most Linux systems, they probably do already. If not, you either can create them or change the directives to point to some other, existing dæmon account or group name. In no event should you change either to any user or group name used for actual human-use login accounts!

The only other directive worth mentioning here is mute-replay-warnings, which I didn't include in the server.ovpn file. Declaring this directive (without any argument) tells OpenVPN not to log events associated with its anti-packet-replay mechanism, which tends to trigger false alarms if you connect to a wireless network. It won't turn off the actual anti-replay protection; it just suppresses associated local log entries.

Initiating a Tunnel

You've created a client configuration file and put it into your client system's /etc/openvpn directory. You've copied over your CA certificate file, client certificate and key files, and your TA key file. It's time to connect to the server.

Assuming your client system is running Linux (specifically Ubuntu), and assuming that, as in Listing 2, your client configuration file is called client.ovpn, follow these steps the first time you connect to your server:

1) Change your working directory to /etc/openvpn:

bash-$ cd /etc/openvpn

2) Run OpenVPN like this:

bash-$ sudo openvpn --config ./client.ovpn

3) When prompted, enter your client key's passphrase.

Enter Private Key Password: Your passphrase here

Note that in step 2 you started OpenVPN without the --daemon directive, leaving it running in the foreground. If everything works without a hitch, the next time you start OpenVPN, you can use sudo openvpn --daemon --config ./client.ovpn, in which case OpenVPN will run silently after asking you for your client key passphrase. On my Ubuntu client system, OpenVPN logs to the file /var/log/syslog when running in dæmon mode.

Troubleshooting

Hopefully, at this point you've got a working VPN tunnel back to your server. If you don't though, two different mistakes have caused the majority of my own problems using OpenVPN.

First, your tunnel will fail if you fail to copy all necessary files into /etc/openvpn: client configuration file, CA certificate, client certificate, client key and TLS Authentication key. These files also must have appropriate permissions set, and you must run the openvpn command with the appropriate level of privilege (that is, root privilege).

Second, firewall rules on both server and clients must be either disabled (left open) or reconfigured to allow OpenVPN traffic to pass. Telling you how to write such rules easily could occupy half or more of an entire article, especially if I were to cover the art of forcing certain types of traffic to use the tunnel. Suffice it to say, for now, check your iptables rules before you even bother running OpenVPN in server or client mode.

Cross-Platform Notes

In writing this article, I tested both an Ubuntu client and a Windows XP client. Getting the Windows XP client to connect properly was no more difficult than on Ubuntu. It was a simple matter of placing the correct files in the correct directory and tweaking my Windows firewall configuration a little.

On Windows clients, the user and group directives have no effect, as OpenVPN's self-demotion feature is not supported in Windows. Other than that, however, I found the Windows version of OpenVPN to work in a very similar manner as the Linux version.

Conclusion

And that, dear readers, is how you configure OpenVPN to allow yourself to connect back to your home network from an untrusted remote site. This process is, in practice, much easier than my taking four months to describe it implies. Hopefully, my line-by-line dissections of the two configuration files have given you a strong enough understanding of how OpenVPN works for you to explore other usage scenarios.

I may devote one more column to this topic, because Virtual Private Networks are such a powerful tool, and these four installments have covered only a small subset of its potential. Regardless, I hope you've found this series useful and that you have success in your own Virtual Private Linux endeavors. Until next time, be safe!

Resources

Official OpenVPN Home Page: www.openvpn.net

Ubuntu Community OpenVPN Page:https://help.ubuntu.com/community/OpenVPN

Mick Bauer (darth.elmo@wiremonkeys.org) is Network Security Architect for one of the US's largest banks. He is the author of the O'Reilly book Linux Server Security, 2nd edition (formerly called Building Secure Servers With Linux), an occasional presenter at information security conferences and composer of the “Network Engineering Polka”.

Taken From: http://www.linuxjournal.com/article/10744

Linux VPNs with OpenVPN - Part III

Apr 01, 2010  By Mick Bauer
In Security
Secure remote networking, the OpenVPN way.
In my previous two columns, I began a series on building Linux-based Virtual Private Network (VPN) solutions using OpenVPN. When I left off last time, I had gotten as far through the OpenVPN server configuration process as creating a simple Public Key Infrastructure (PKI), using it to generate server and client certificates, and creating a few other “support” files involved in building OpenVPN tunnels. In so doing, I worked my way down just the first third or so of the example OpenVPN server configuration, but those PKI/crypto-related configuration parameters represent the most complicated part of OpenVPN configuration tasks.
This month, I describe the rest of that server configuration file and show a corresponding OpenVPN client configuration file (which I'll dissect next month). I also show how to start both server and client processes, although debugging, firewall considerations and other finer points also will need to wait until my next column.
Have no fear—I think you'll find this installment to be plenty action-packed in its own right. Let's get to it!
OpenVPN Server Configuration, Continued
Normally at this point in a multipart series, I'd review at least some details from the prior month's column, but that won't work this time. Last month's article covered a lot of ground, and this month's needs to cover still more. Suffice it to say that I began dissecting an example OpenVPN server configuration file, /etc/openvpn/server.ovpn (Listing 1).
I got as far as generating the files referenced in the ca, cert, key, dh and tls-authlines, using a combination of OpenVPN “easy-rsa” helper scripts (located in /usr/share/doc/openvpn/examples/easy-rsa/2.0) and the commands openvpn and openssl. I'm going to continue describing Listing 1's parameters, assuming that the aforementioned certificate, key and other helper files are in place.
Listing 1. Server's server.ovpn File

port 1194
proto udp
dev tun


ca 2.0/keys/ca.crt
cert 2.0/keys/server.crt
key 2.0/keys/server.key  # This file should be kept secret
dh 2.0/keys/dh1024.pem
tls-auth 2.0/keys/ta.key 0


server 10.31.33.0 255.255.255.0
ifconfig-pool-persist ipp.txt
push "redirect-gateway def1 bypass-dhcp"


keepalive 10 120

cipher BF-CBC        # Blowfish (default)
comp-lzo
max-clients 2


user nobody
group nogroup
persist-key
persist-tun


status openvpn-status.log
verb 3
mute 20


So, having set up the basic port/protocol/device settings and cryptography-related settings, let's move on to settings that will determine what happens once a client successfully establishes an authenticated, encrypted tunnel. The first such setting isserver.

server actually is a helper directive. It expands to an entire block of other parameters. Rather than slogging through all those additional parameters, let's just say that the server directive takes two parameters: a network address and a netmask. For each tunnel established by clients on the port we specified earlier, the OpenVPN server process will carve a little 30-bit subnet from the specified IP space, assign itself the first host IP address in that subrange as its local tunnel endpoint and assign the other host IP in the 30-bit subnet to the connecting client as its remote tunnel endpoint.

In the example, I've specified the network address 10.31.33.0 with a netmask of 255.255.255.0, which translates to the range of IP addresses from 10.31.33.1 to 10.31.33.254. When the first tunnel is established, the server will use 10.31.33.1 as its local tunnel endpoint address and assign 10.31.33.2 to the client to use as the remote tunnel endpoint address. (10.31.33.0 is that subnet's network address, and 10.31.33.3 is its broadcast address.)

For the next client to connect, the server will use 10.31.33.5 as its tunnel endpoint and will assign 10.31.33.6 as the client's tunnel endpoint (with 10.31.33.4 and 10.31.33.7 as network and broadcast addresses, respectively). Get it?

This isn't the most efficient use of an IP range. The server needs a different local IP address for each tunnel it builds, and for each tunnel, the server essentially wastes two others (for network and broadcast addresses). Preceding the server directive with the line topology subnet will cause the server to use the first IP in its server [network address] [netmask] range for its local tunnel IP for all tunnels and for client tunnel-endpoint IPs to be allocated from the entire remainder of possible IPs in that range, as though all remote tunnel endpoints were IP addresses on the same LAN.

This isn't the default behavior, because it's new to OpenVPN 2.1. The “subnet” topology isn't supported by earlier versions or by Windows clients using version 8.1 or lower of the TAP-Win32 driver. Note that if undeclared (as in Listing 1), thetopology parameter has a default value of net30, which results in server's specified IP range being split up into 30-bit subnets as described above.

Continuing on in Listing 1, next comes ifconfig-pool-persist, which specifies a file in which to store associations between tunnel clients' Common Names (usually their hostnames, as specified in their respective client certificates) and the IP addresses the server assigns to their tunnels. Although this doesn't guarantee a given client will receive the same tunnel IP every time it connects, it does allow clients to use the --persist-tun option in their client configurations, which keeps tunnel sessions open across disruptions in service (OpenVPN server dæmon restarts, network problems and so forth).

Next comes the statement push "redirect-gateway def1 bypass-dhcp". The pushdirective causes the subsequent double-quotation-mark-enclosed string to be run on the client as though it was part of the client's local configuration file. In this case, the server will push the redirect-gateway parameter to all clients, with the effect that each time a client connects, the client's local default gateway, DNS servers and other network parameters normally provided by DHCP will be overridden by the server's settings for those things.

This effectively enforces a VPN policy of “local-subnet-only split tunneling”. For those of you new to VPNs, a split tunnel configuration is one in which clients can use their VPN tunnels to connect to some things and their local (non-tunneled) Internet connection to connect to other things.

As I've said in previous columns though, forcing clients to use the remote network's infrastructure (DNS servers, Internet uplink and so forth) makes it much harder for attackers connected to a client's local network, which might be an untrusted environment like a coffee-shop wireless hotspot, to perform various kinds of eavesdropping, session-hijacking and man-in-the-middle attacks.

Even with this setting, a client still will be able to connect to some things on the local network. It just won't be able to use it as a route for anything but connecting back to your OpenVPN server. Again, it's good policy to configure clients to leverage as much of your trusted network's infrastructure as possible.

After the push "redirect-gateway..." directive comes keepalive 10 120. Likeserver, keepalive is a helper directive that expands to a list of other parameters. Again for the sake of brevity, let me summarize the effect of the example line: every ten seconds, the server will check to see that each client is still connected, and if no reply is received from a given client over any 120-second period, it will assume that client is unreachable at its last known IP address.

For example, if the server sends a query to a particular tunnel client at 9:00:00 and gets a reply, but another at 9:00:10 to which there's no reply, and also receives no reply to any of 11 more queries sent out at 9:00:20, 9:00:30 and so on until 9:02:00, then at 9:02:00 (after 120 seconds of no replies), the server will conclude the client system is unreachable.

At this point, the server will attempt to re-resolve the remote client's name, on the assumption that its IP address may have changed (due to DHCP lease renewal, for example) and, thus, re-establish the tunnel session.

The aforementioned infrastructure settings, such as DNS servers, by the way, will be read by the server's openvpn process from /etc/resolv.conf, the server's running routing table and so forth—no OpenVPN configuration parameters are necessary for those settings unless you want them to be different from the server's. (For now, let's assume you don't!)

I just spent a fair amount of ink on only a handful of settings. But I think this is warranted given that server and keepalive are helper directives that expand to many more settings and given that we're now done with the network configuration portion of our server configuration.

The next parameter is a simple one: cipher BF-CBC, which specifies that each tunnel's data payload will be encrypted with the Blowfish cipher, using 128-bit keys, in Cipher Block Chaining mode (CBC mode makes it harder for an attacker to brute-force-decrypt isolated parts of a given session). BF-CBC is the default setting for cipher, so technically, I don't need to specify this, but it's an important setting. You can use the command openvpn --show-ciphers to see a list of all supported cipher values and their default key sizes.

comp-lzo is even simpler. It tells OpenVPN to compress all session data using the LZO compression algorithm, unless a given portion of data appears to be compressed already (for example, if a JPEG image or a ZIP file is being transferred), in which case OpenVPN won't compress until it detects a return to noncompressed session content. This adaptive behavior helps minimize the data padding that results from trying to compress already-compressed data. Because LZO is a fast algorithm, this is a good setting. Its cost in CPU overhead is generally more than compensated for by the amount of network bandwidth (and, thus, other CPU cycles) it conserves.

The next setting, max-clients 2, specifies that a maximum of two tunnels may be active at one time. If you have only one or two users, there's no good reason to allow more than one or two concurrent tunnels. In my own testing, however, I've found that setting this all the way down to 1 can cause problems even if you have only one user, probably due to how OpenVPN handles tunnel persistence (see keepaliveabove).

The next four settings are interrelated. user and group specify the names of an unprivileged user account and group (nobody and nogroup, respectively), for the OpenVPN server dæmon to demote itself to after opening necessary tun/tap devices, reading its configuration file, certificates and keys, and other root-only startup actions.

For this to work properly, you also need to set persist-key and persist-tun.persist-key causes OpenVPN to keep key file contents cached in memory across dæmon interruptions (like those caused by tunnels being broken and re-established).persist-tun causes OpenVPN to keep any tun/tap devices that were opened on startup, open across the same kinds of dæmon restarts.

With user and group set to unprivileged user and group, if you were to skip declaringpersist-key or persist-tun, the OpenVPN dæmon would lack the necessary privileges to re-read protected key files or re-open the tun or tap device.

You could, of course, skip the user and group settings. Those settings, however, lessen the impact of some unforeseen buffer-overflow vulnerability. It can make the difference from an attacker gaining an unprivileged shell and gaining a root shell. Unfortunately, you can't assume that just because OpenVPN has had a good track record so far with respect to lacking many significant security vulnerabilities, that it never will have any!

The last three settings in Listing 1 concern logging. status specifies a file to which OpenVPN will write dæmon status updates periodically, regardless of actual activity. Unlike most log files, each time this file is updated, OpenVPN will overwrite the previous message. This is what the file /etc/openvpn/openvpn-status.log on my OpenVPN server says right now:

OpenVPN CLIENT LIST
Updated,Fri Jan  1 21:55:11 2010
Common Name,Real Address,Bytes Received,Bytes Sent,Connected Since
minion2,192.168.20.1:36491,125761,103329,Fri Jan  1 17:56:21 2010
ROUTING TABLE
Virtual Address,Common Name,Real Address,Last Ref
10.31.33.6,minion2,192.168.20.1:36491,Fri Jan  1 20:54:03 2010
GLOBAL STATS
Max bcast/mcast queue length,0
END


As you can see, there's only one client currently connected (minion2), with one corresponding route table entry.

Moving on back in Listing 1, verb 3 sets the overall logging-verbosity level to 3 out of a possible range of 0 (no logging except major errors) and 11 (the most verbose debugging output possible). The default value is 1, but 3 is much more useful for getting things set up and working properly, without presenting any particular danger of log files growing too huge too quickly.

This is especially true with mute 20 set, which tells OpenVPN never to log the same message (in a given event category) more than 20 times in a row.

On my Ubuntu system, OpenVPN writes all its messages to /var/log/daemon if theopenvpn command is executed with the --daemon flag, which causes it to run as a background (dæmon) process. If you run openvpn without --daemon, it runs in the foreground and logs all messages to the console or terminal window you started it in (tying up that console in the process, but this is a very handy way to run OpenVPN during initial setup and testing).

Running OpenVPN as a Server Dæmon

Now that I've covered a sample server configuration file in depth, let's fire up our OpenVPN dæmon in server mode! This, as you'll see, is the easy part.

OpenVPN uses a single command, openvpn, for everything. Precisely what any given OpenVPN instance does depends on how you start it. As you've already seen, some startup parameters, like --show-ciphers, cause the openvpn command to give certain information and then exit. Other parameters tell it to remain active, listening for incoming client connections (--mode server) or attempting to establish and maintain a tunnel to some server, as a client (--mode client).

If you execute openvpn with the --config parameter followed by the name of a configuration file, OpenVPN will start itself configured with all parameters in that file. For example, you could create a configuration file containing just the parameter show-ciphers (parameters must start with a -- if specified in a command line, but the -- is omitted for all parameters within configuration files).

More commonly, as with Listing 1, we use configuration files for server-mode and client-mode startup. I mentioned that the server helper directive expands into a list of other parameters; the first of these is mode server.

Thus, to start OpenVPN as a persistent server dæmon running the configuration file /etc/openvpn/server.ovpn, shown in Listing 1, use this command:

sudo openvpn --config ./server.ovpn

Note the relative path for the file server.ovpn. If that file resides in /etc/openvpn, you'd need to run the above command from within that directory. Note also the use of sudo. On non-Ubuntu systems, you might instead su to root before running this command. Regardless, OpenVPN must be run as root in order to read its server key file, to open the tun device and so forth, even though as configured in Listing 1 it subsequently will demote itself to user nobody and group ID nogroup.

Did you notice I omitted the --daemon flag on that command line? Again, you can use that flag to tell OpenVPN to run in the background (like a quiet, well-behaved dæmon) and log its messages to /var/log/daemon.log, but you first may want to make sure everything's working properly.

Configuring the Client

At this point, I had hoped I'd be able to give you a detailed walk-through of client configuration, but I'm out of space for now, so that will need to wait until next time. But, I won't leave you completely hanging. Listing 2 shows a sample client configuration file, client.ovpn, that corresponds to Listing 1's server.ovpn file.

Listing 2. Client's iwazaru.ovpn File

client
dev tun
proto udp


remote 1.2.3.4 1194

resolv-retry infinite
nobind


user nobody
group nogroup
persist-key
persist-tun


mute-replay-warnings

ca ca.crt
cert minion.crt
key minion.key


ns-cert-type server
tls-auth ta.key 1


cipher BF-CBC
comp-lzo


verb 3
mute 20


Much of this should be familiar. Other parts you can figure out via the openvpn(8) man page. In the meantime, feel free to experiment. To run OpenVPN in client mode on a client computer, use this command:

sudo openvpn --config ./iwazaru.ovpn --daemon openvpn-client

One parting tip for you experimenters: you'll need to disable or reconfigure any local iptables (firewall) rules you've got running on either your server or client systems. I'll discuss iptables considerations in the next column in this series, and I'll continue where we left off this time. Until then, be safe!

Resources

Official OpenVPN Home Page: www.openvpn.net

Ubuntu Community OpenVPN Page:https://help.ubuntu.com/community/OpenVPN

Mick Bauer (darth.elmo@wiremonkeys.org) is Network Security Architect for one of the US's largest banks. He is the author of the O'Reilly book Linux Server Security, 2nd edition (formerly called Building Secure Servers With Linux), an occasional presenter at information security conferences and composer of the “Network Engineering Polka”.

Taken From: http://www.linuxjournal.com/article/10707

Linux VPNs with OpenVPN - Part II

May 01, 2010  By Mick Bauer
In Security
Build a simple, secure VPN connection now!
Last month, I began a new series on how to build a Linux-based Virtual Private Network (VPN) solution using OpenVPN. I described what VPNs are, what they're used for, and I listed some popular ways of building VPNs with Linux. That column ended with some pointers for obtaining and installing OpenVPN.
This month, I continue with detailed instructions on how to build a quick-and-dirty single-user VPN connection that allows you to connect securely from some untrusted remote site, like a coffee shop wireless hotspot, back to your home network.
Quick Review
If you missed last month's column, here's a two-paragraph primer on VPNs. First, they're generally used for two things: connecting different networks together over the Internet and connecting mobile/remote users to some corporate or home network from over the Internet. In the first case, a VPN connection is usually “nailed”—that is, it stays up regardless of whether individual users actually are sending traffic over it. In the latter case, end users each create their own tunnels, bringing them up only as needed.
Several protocols are in common use for VPNs. The two most important of which are probably IPsec and SSL. IPsec is nearly always used to create an “encrypted route” between two networks or between one system and a network. In contrast, SSL, whether in the context of SSL-VPN (which uses a Web browser as client software) or in other SSL-based VPNs (like OpenVPN), can be used either to tunnel specific applications or entire network streams.
IPsec and SSL-VPN are out of the scope of this series of articles, which mainly concern OpenVPN. However, I will cover at least two different remote-access usage scenarios: single-user and multiuser. A later installment in this series may include site-to-site VPNs, which actually are simpler than remote-access solutions and which use a lot of the same building blocks. If I don't cover site-to-site VPNs, or if you need to build one sooner than I get around to it here, you'll have little trouble figuring it out yourself even after just this month's column!
The Scenario
Let's get busy with a simple scenario: setting up a single tunnel to reach your home network from the local coffee shop (Figure 1).
clip_image001
Figure 1. Remote-Access Scenario
In this simple example, a laptop is connected to a wireless hotspot in a coffee shop (Coffee Shop WLAN), which in turn is connected to the Internet. The laptop has an OpenVPN established with a server on the home network; all traffic between the laptop and the home network is sent through the encrypted OpenVPN tunnel.
What, you may wonder, is the difference between the hardware and software comprising the OpenVPN “server” versus that of the “client”? As it happens, the command openvpn can serve as either a server dæmon or client dæmon, depending on how you configure and run it. What hardware you run it on is totally up to you, although obviously if you're going to terminate more than a few tunnels on one server, you'll want an appropriately powerful hardware platform.
In fact, if you need to support a lot of concurrent tunnels, you may want to equip your server with one of the crypto-accelerator hardware cards (“engines”) supported by OpenSSL (on which OpenVPN depends for its cryptographic functions). To see which are supported by your local OpenSSL installation, issue the command openvpn --show-engines. See the documentation at www.openssl.org for more information on its support for crypto engines.
For this simple example scenario, let's assume both client and server systems are generic laptop or desktop PCs running current versions of some flavor of Linux with their respective distributions' standard OpenVPN and OpenSSL packages. The example OpenVPN configurations I'm about to walk through, however, should work with little if any tweaking on any of OpenVPN's supported platforms, including Windows, Mac OS X and so forth.
Although this scenario implies a single user connecting back to the home server, the configurations I'm about to describe can just as easily support many users by changing only one server-side setting (max-clients) and by generating additional client certificates. Have I mentioned certificates yet? You'll need to create a Certificate Authority (CA) key, server certificate and at least one client certificate. But have no fear, OpenVPN includes scripts that make it quick and easy to create a homegrown Public Key Infrastructure.
What about Static Keys?
Conspicuously absent from my OpenVPN examples are static keys (also known as pre-shared secret keys), which provide a method for authenticating OpenVPN tunnels that is, arguably, simpler to use than the RSA certificates described herein. Why?
An OpenVPN shared secret takes the form of a small file containing cryptographically generated random data that is highly, highly infeasible for an external attacker to guess via some sort of dictionary or brute-force attack. However, unlike WPA or IPsec shared secrets, an OpenVPN shared secret is used as a de facto session encryption key for every instance of every tunnel that uses it; it is not used to generate other, temporary, session keys that change over time.
For this reason, if attackers were to collect encrypted OpenVPN packets from, say, four different OpenVPN sessions between the same two endpoints and were to later somehow obtain a copy of that tunnel's shared secret file, they would be able to decrypt all packets from all four captured sessions.
In contrast, if you instead authenticate your OpenVPN tunnel with RSA certificates, OpenVPN uses the certificates dynamically to re-key the tunnel periodically—not just every time the tunnel is established, but even during the course of a single tunnel session. Furthermore, even if attackers somehow obtain both RSA certificates and keys used to key that tunnel, they can't easily decrypt any prior captured OpenVPN session (which would involve reconstructing the entire key negotiation process forevery session key used in a given session), although they easily can initiate new sessions themselves.
So in summary, although it is a modest hassle to set up a CA and generate RSA certificates, in my opinion, using RSA certificates provides an increase in security that is much more significant than the simplicity of using shared secrets.
Configuring the Server
Let's get to work configuring the server. Here, I explain how to create a configuration file that puts OpenVPN into “server” mode, authenticates a single client by checking its RSA certificate for a valid CA signature, transparently generates dynamic session keys, establishes the tunnel, and then pushes settings back to the client that give the client a route back to the home network. And, let's even force the client to use the tunnel (and therefore the home network) as its default route back to the outside world, which is a potent protection against DNS spoofing and other attacks you otherwise might be vulnerable to when using an untrusted network.
Configuring OpenVPN consists of creating a configuration file for each OpenVPN listener you want to run and creating any additional files (certificates and so forth) referenced by that file. Prior to OpenVPN 2.0, you needed one listener per tunnel. If ten people needed to connect to your OpenVPN server concurrently, they'd each connect to a different UDP or TCP port on the server.
OpenVPN as of version 2.0, however, is multithreaded, and running in “server” mode, multiple clients can connect to the same TCP or UDP port using the same tunnel profile (that is, you can't have some users authenticate via TLS certificates and other users authenticate via shared secret on the same port). You still need to designate different ports for different tunnel configurations.
Even though the example scenario involves only one client, which would be amply served by a “peer-to-peer” OpenVPN tunnel, it really isn't any more complicated to use a “server mode” tunnel instead (that, again, you can use to serve multiple clients after changing only one line). As far as I can tell, using server mode for a single user doesn't seem to have any noticeable performance cost either. In my testing, even the relatively computationally intensive RSA public key routines involved in establishing my tunnels completed very rapidly.
Listing 1 shows a tunnel configuration file, server.ovpn, for our home network's OpenVPN server.
Listing 1. Server's server.ovpn File
port 1194
proto udp
dev tun

ca 2.0/keys/ca.crt
cert 2.0/keys/server.crt
key 2.0/keys/server.key  # This file should be kept secret

dh 2.0/keys/dh1024.pem
tls-auth 2.0/keys/ta.key 0
server 10.31.33.0 255.255.255.0
ifconfig-pool-persist ipp.txt

push "redirect-gateway def1 bypass-dhcp"
keepalive 10 120
cipher BF-CBC        # Blowfish (default)
comp-lzo
max-clients 2

user nobody
group nogroup
persist-key
persist-tun

status openvpn-status.log
verb 3
mute 20

Let's walk through Listing 1's settings. port obviously designates this listener's port number. In this case, it's OpenVPN's default of 1194. proto specifies that this tunnel will use fast, connectionless UDP packets rather than slower but more reliable TCP packets (the other allowable value being tcp). Note that OpenVPN uses information in its UDP data payloads to maintain tunnel state. Even though UDP is by definition a “stateless” protocol, the OpenVPN process on either end of an OpenVPN UDP tunnel can detect dropped packets and request the other side to retransmit them.
dev sets the listener to use the Linux kernel's /dev/tun (tun) special device rather than /dev/tap (which would be specified by tap). Whereas the tap device is used to encapsulate entire Ethernet frames, the tun device encapsulates only IPv4 or IPv6 packets. In other words, the tap device tunnels all network traffic regardless of protocol (IPX/SPX, Appletalk, Netbios, IP). For this example, let's stick to the tun device; this will be an IP-only tunnel.
Next, there is the RSA certificate information: ca, cert and key, which specify the respective paths of a CA certificate, the server's certificate and the server's private key. The CA certificate is used to validate client certificates. If the certificate presented by a client contains a valid signature corresponding to the CA certificate, tunnel authentication succeeds. The server key is used during this authentication transaction and also, subsequently, during key negotiation transactions.
Note that certificate files are public information and as such don't need highly restrictive file permissions, but key files must be kept secret and should be root-readable only. Never transmit any key file over any untrusted channel! Note also that all paths in this configuration file are relative to the configuration file itself. If the file resides in /etc/openvpn, then the ca path 2.0/keys/ca.cert actually expands to /etc/openvpn/2.0/keys/ca.cert.
dh specifies a file containing seed data for the Diffie-Hellman session-key negotiation protocol. This data isn't particularly secret. tls-auth, however, specifies the path to a secret key file used by both server and client dæmons to add an extra level of validation to all tunnel packets (technically, “authentication”, as in “message authentication” rather than “user authentication”). Although not necessary for the tunnel to work, I like tls-auth because it helps prevent replay attacks.
Before I go any further explaining Listing 1, let's generate the files I just described. The first three, ca, cert and key, require a PKI, but like I mentioned, OpenVPN includes scripts to simplify PKI tasks. On my Ubuntu systems, these scripts are located in /usr/share/doc/openvpn/examples/easy-rsa/2.0. Step one in creating a PKI is to copy these files to /etc/openvpn, like so:
bash-$ cd /usr/share/doc/openvpn/examples/easy-rsa
bash-$ su
bash-# cp -r 2.0 /etc/openvpn

Notice that contrary to preferred Ubuntu/Debian practice, I “su-ed” to root. This is needed to create a PKI, a necessarily privileged set of tasks.
Step two is to customize the file vars, which specifies CA variables. First, change your working directory to the copy of easy-rsa you just created, and open the file vars in vi:
bash-# cd /etc/openvpn/2.0
bash-# vi vars


Here are the lines I changed in my own vars file:

export KEY_COUNTRY="US"
export KEY_PROVINCE="MN"
export KEY_CITY="Saint Paul"
export KEY_ORG="Wiremonkeys"
export KEY_EMAIL="mick@wiremonkeys.org"


Next, initialize your new PKI environment:

bash-# source ./vars
bash-# ./clean-all
bash-# ./build-dh


And now, finally, you can create some certificates. First, of course, you need the CA certificate and key itself, which will be necessary to sign subsequent keys:

bash-# ./pkitool --initca

The output of that command consists of the files keys/ca.crt and keys/ca.key. By the way, if you want pkitool's output files to be written somewhere besides the local directory keys, you can specify a different directory in the file vars via the variable KEY_DIR.

Next, generate your OpenVPN server certificate:

bash-# ./pkitool --server server

This results in two files: keys/server.crt and keys/server.key. There's nothing magical about the last parameter in the above command, which is simply the name of the server certificate; to name it chuck (resulting in keys/chuck.crt and keys/chuck.key), you'd use ./pkitool --server chuck.

Last comes the client certificate. Unlike the server certificate, whose key may need to be used by some unattended dæmon process, we expect client certificates to be used by human beings. Therefore, let's create a client certificate with a password-protected (encrypted) key file, like so:

bash-# ./pkitool --pass minion

You'll be prompted twice for the key file's passphrase, which will be used to encrypt the file keys/minion.key (keys/minion.crt also will be created by not password-protected). If minion.key falls into the wrong hands, it won't be usable unless the thief also knows its password. However, this also means that every time you use this certificate, you'll be prompted for the key file's password, which I think is a reasonable expectation for VPN clients.

Now that you've got a working PKI set up, all you'll need to do to generate additional client certificates is repeat that last command, but with different certificate names, for example ./pkitool --pass minion102.

Warning: be careful about how you transmit client certificates and keys to end users! Unencrypted e-mail is a poor choice for this task. You should instead use scp,sftp or some other secure file-transfer protocol, or even transport them manually with a USB drive. Once the client certificate and key have been copied where they need to go (for example, /etc/openvpn/keys on the client system), make sure the key file is root-readable only! Erase any temporary copies of this file you may have made in the process of transporting it—for example, on a USB drive.

The OpenVPN server does not need local copies of client certificate or key files, though it may make sense to leave the “original” copies of these in the server's /etc/openvpn/2.0/keys directory (in my examples) in the event of users losing theirs due, for example, to a hard drive crash.

In the interest of full disclosure, I should note that contrary to my examples, it is a PKI best practice not to run a PKI (CA) on any system that actually uses the PKI's certificates. Technically, I should be telling you to use a dedicated, non-networked system for this purpose! Personally, I think if all you use this particular PKI for is OpenVPN RSA certificates, if your OpenVPN server is configured securely overall, and you keep all key files root-readable only, you probably don't need to go that far.

Okay, we've got a working PKI and some certificates. That may have been a lengthy explanation, but in my opinion, the process isn't too difficult or unwieldy. It probably will take you less time to do it than it just took you to read about it.

You've got two more files to generate before continuing working down server.ovpn. To generate your Diffie-Hellman seed file (still working as root within the directory /etc/openvpn/2.0), use this command:

bash-# openssl dhparam -out keys/dh1024.pem 1024

And, last of all the supplemental files, generate that TLS-authentication file, like so:

bash-# openvpn --genkey --secret 2.0/keys/ta.key

Conclusion

At this point, I've got good news and bad news. The good news is, you've made it through the most complicated part of OpenVPN configuration: creating a PKI and generating certificates and related files. The bad news is, you've also reached the end of this month's column!

If you can't wait until next time to use these certificates, to get OpenVPN running, you probably can figure out how to do so yourself. See the openvpn(8) man page and the sample configuration files server.conf.gz and client.conf under /usr/share/doc/openvpn/examples/sample-config-files, upon which my examples are based. Good luck!

Resources

Official OpenVPN Home Page: www.openvpn.net

Ubuntu Community OpenVPN Page:https://help.ubuntu.com/community/OpenVPN

“Linux VPN Technologies” by Mick Bauer, LJ, January 2005:www.linuxjournal.com/article/7881

Charlie Hosner's “SSL VPNs and OpenVPN: A lot of lies and a shred of truth”:www.linux.com/archive/feature/48330

Mick Bauer (darth.elmo@wiremonkeys.org) is Network Security Architect for one of the US's largest banks. He is the author of the O'Reilly book Linux Server Security, 2nd edition (formerly called Building Secure Servers With Linux), an occasional presenter at information security conferences and composer of the “Network Engineering Polka”.

Taken From: http://www.linuxjournal.com/article/10693

Linux VPNs with OpenVPN – Part I

Feb 01, 2010  By Mick Bauer in
Security
Connect safely to the mother ship with a Linux VPN.
The other day, I was accompanying local IT security legend and excellent friend Bill Wurster on his last official “wireless LAN walkabout” prior to his retirement (it was his last day!), looking for unauthorized wireless access points in our company's downtown offices. As we strolled and scanned, we chatted, and besides recalling old times, battles won and lost, and one very colorful former manager, naturally we talked about wireless security.
Bill, who has dedicated much of the past decade to wireless network security work in various capacities, reiterated something all of us in the security game have been saying for years: one of the very best things you can do to defend yourself when using someone else's WLAN is to use a Virtual Private Network (VPN) connection to connect back to some other, more trustworthy, network.
You might think the main value of a VPN connection is to encrypt sensitive communications, and that's certainly very important. But if you make your VPN connection your default route and use your trusted network's DNS servers, Web proxies and other “infrastructure” systems to communicate back out to the Internet (for example, for Web surfing), you won't have to worry about DNS spoofing, Web-session hijacking or other entire categories of localized attacks you might otherwise be subject to on an untrusted LAN.
For this reason, our employer requires us to use our corporate VLAN software any time we connect our corporate laptops to any WLAN “hotspot” or even to our personal/home WLANs. So, Bill asked me, why don't you write about making VLAN connections with Linux laptops?
This isn't the first good idea Bill's given me (nor, I hope, is it the last). So this month, I begin a series on Linux VPNs, with special attention to OpenVPN. I'd like to dedicate this series to Bill Wurster, whose skill, creativity, enthusiasm and integrity have been such an inspiration not only to me but also to a couple generations of coworkers. Your warmth and wisdom will be sorely missed, Bill—here's wishing you a long, happy and fun retirement!
VPN Basics
Rather to my surprise, the overview of VPN technologies in general, and Linux VPN choices in specific, that I did in 2005 is still pretty current (see Resources for a link to this earlier article). If you find the overview I'm about to give to be too brief, I refer you to that piece. Here, though, is a brief introduction.
To create a “Virtual Private Network” is to extend some private network—for example, your home Local Area Network (LAN) or your employer's Wide Area Network (WAN)—by connecting it to other networks or systems that aren't physically connected to it, using some sort of “virtual” (non-dedicated, non-persistent) network connection over network bandwidth not controlled or managed by you. In other words, a VPN uses a public network (most commonly the Internet) to connect private networks together.
Because by definition a public network is one over which you have no real control, a VPN must allow for two things: unreliability and lack of security. The former quality is mainly handled by low-level error-correcting features of your VPN software. Security, however, is tricky.
You must select a VPN product or platform that uses good security technologies in the first place (the world is filled with insecure VPN technologies), and you must furthermore enable those security features and resist the temptation to weaken them in order to improve VPN performance (which is ultimately futile anyhow, as Internet bandwidth is generally slower and less reliable than other long-range network technologies, such as dedicated circuits).
There are three categories of security we care about in this context:
1. Authentication: is the computer or network device trying to connect to the trusted network an expected, authorized VPN endpoint? Conversely, am I, the VPN client, really connecting to my trusted network or has my connection request been redirected to some impostor site?
2. Data integrity: is my connection truly usable only by me and my trusted network, or is it possible for some outsider to inject extraneous traffic into it or to tamper with legitimate traffic?
3. Privacy: is it possible for an attacker to read data contained in my VPN traffic?
You may not need all three types of security. For example, if you're using a VPN connection to transfer large quantities of public or otherwise nonsensitive information, and are only using a VPN in the first place to tunnel some not-normally-IP-routable protocol, you might consider a “null-encryption” VPN tunnel. But even in that case, you should ask yourself, what would happen if an attacker inserted or altered data in these transactions? What would happen if an attacker initiated a bogus connection altogether?
Luckily, some VPN protocols, such as IPsec, allow you to “mix and match” between features that address different security controls. You can, for example, use strong authentication and cryptographic error/integrity-checking of all data without actually encrypting the tunnel. In most situations, however, the smart thing to do is leverage good authentication, integrity and privacy (encryption) controls. The remainder of this series assumes you need all three of these.
There are two common usage scenarios for VPNs: “site-to-site” and “remote-access”. In a site-to-site VPN, two networks are connected by an encrypted “tunnel” whose endpoints are routers or servers acting as gateways for their respective networks. Typically, such a VPN tunnel is “nailed” (or “persistent”)—once established, it's maintained as an always-available, transparent route between the two networks that end users aren't even aware of, in the same way as a WAN circuit, such as a T1 or Frame Relay connection.
In contrast, each tunnel in a remote-access VPN solution connects a single user's system to the trusted network. Typically, remote-access VPN tunnels are dynamically established and broken as needed. For example, when I work from home, I establish a VPN tunnel from my company's laptop to the corporate VPN concentrator. Once my tunnel's up, I can reach the same network resources as when I'm in the office; with respect to computing, from that point onward I can work as normal. Then at the end of the day, when it's time to shut down my machine, I first close my VPN tunnel.
For site-to-site VPNs, the endpoints are typically routers. All modern router platforms support VPN protocols, such as IPsec. Establishing and breaking VPN tunnels, however, can be computationally expensive—that is, resource-consuming.
For this reason, if you need to terminate a lot of site-to-site tunnels on a single endpoint (for example, a router in your data center connecting to numerous sales offices), or if you need to support many remote-access VPN clients, you'll generally need a dedicated VPN concentrator. This can take the form of a router with a crypto-accelerator circuit board or a device designed entirely for this purpose (which is likely to have crypto-accelerator hardware in the form of onboard ASICs).
A number of tunneling protocols are used for Internet VPNs. IPsec is an open standard that adds security headers to the IPv4 standard (technically it's a back-port of IPv6's security features to IPv4), and it allows you either to authenticate and integrity-check an IPv4 stream “in place” (without creating a tunnel per se) or to encapsulate entire packets within the payloads of a new IPv4 stream. These are called Authentication Header (AH) mode and Encapsulating Security Payload (ESP) mode, respectively.
Microsoft's Point-to-Point Tunneling Protocol (PPTP) is another popular VPN protocol. Unlike IPsec, which can be used only to protect IP traffic, PPTP can encapsulate non-IP protocols, such as Microsoft NETBIOS. PPTP has a long history of security vulnerabilities.
Two other protocols are worth mentioning here. SSL-VPN is less a protocol than a category of products. It involves encapsulating application traffic within standard HTTPS traffic, and different vendors achieve this in different (proprietary) ways. SSL-VPN, which usually is used in remote-access solutions, typically allows clients to use an ordinary Web browser to connect to an SSL-VPN gateway device. Once authenticated, the user is presented with a Web page consisting of links to specific services on specific servers on the home network.
How, you might ask, is that different from connecting to a “reverse” Web proxy that's been configured to authenticate all external users? For Web traffic, most SSL-VPN products do, in fact, behave like standard Web proxies. The magic, however, comes into play with non-HTTP-based applications, such as Outlook/Exchange, Terminal Services, Secure Shell and so forth.
For non-HTTP-based applications, the SSL-VPN gateway either must interact with a dedicated client application (a “thick” client) or it must push some sort of applet to the user's Web browser. Some SSL-VPN products support both browser-only access and thick-client access. Others support only one or the other.
Thick-client-only SSL-VPN, unlike browser-accessible, can be used to encapsulate an entire network stream, not just individual applications' traffic. In common parlance though, the term SSL-VPN usually connotes browser clients.
And, that brings us to the subject of the remainder of this month's column and the exclusive focus of the next few columns: other SSL-based VPNs. As I just implied, it's possible to encrypt an entire network stream into an SSL session, for the same reason it's possible to stream audio, video, remote desktop sessions and all the other things we use our browsers for nowadays.
OpenVPN is a free, open-source VPN solution that achieves this very thing, using its own dæmon and client software. Like PPTP, it can tunnel not only IP traffic, but also lower-level, non-IP-based protocols, such as NETBIOS. Like IPsec, it uses well-scrutinized, well-trusted implementations of standard, open cryptographic algorithms and protocols. I explain how, in more detail, shortly. But for overview purposes, suffice it to say that OpenVPN represents a class of encapsulating SSL/TLS-based VPN tools and is one of the better examples thereof.
Some Linux VPN Choices
Nowadays, a number of good VPN solutions exist for Linux. Some commercial products, of course, release Linux versions of their proprietary VPN client software (so many more than when I began this column in 2000!).
In the IPsec space, there are Openswan, which spun off of the FreeS/WAN project shortly before the latter ended; Strongswan, another FreeS/WAN spin-off; and NETKEY (descended from BSD's KAME), which is an official part of the Linux 2.6 kernel and is controlled by userspace tools provided by the ipsec-tools package. All of these represent IPsec implementations for the Linux kernel. Because IPsec is an extension of the IPv4 protocol, any IPsec implementation on any operating system must be integrated into its kernel.
vpnc is an open-source Linux client for connecting to Cisco VPN servers (in the form of Cisco routers, Cisco ASA firewalls and so forth). It also works with Juniper/Netscreen VPN servers.
Although I don't recommend either due to PPTP's security design flaws, PPTP-linux and Poptop provide client and server applications, respectively, for Microsoft's PPTP protocol. Think it's just me? Both PPTP-linux's and Poptop's maintainers recommend that you not use PPTP unless you have no choice! (See Resources for links to the PPTP-linux and Poptop home pages.)
And, of course, there's OpenVPN, which provides both client and server support for SSL/TLS-based VPN tunnels, for both site-to-site and remote-access use.
Introduction to OpenVPN
All the non-PPTP Linux VPN tools I just mentioned are secure and stable. I focus on OpenVPN for the rest of this series, however, for two reasons. First, I've never covered OpenVPN here in any depth, but its growing popularity and reputation for security and stability are such that the time is ripe for me to cover it now.
Second, OpenVPN is much simpler than IPsec. IPsec, especially IPsec on Linux in either the client or server context, can be very complicated and confusing. In contrast, OpenVPN is easier to understand, get working and maintain.
Among the reasons OpenVPN is simpler is that it doesn't operate at the kernel level, other than using the kernel's tun and tap devices (which are compiled in the default kernels of most mainstream Linux distributions). OpenVPN itself, whether run as a VPN server or client, is strictly a userspace program.
In fact, OpenVPN is composed of exactly one userspace program, openvpn, that can be used either as a server dæmon for VPN clients to connect to or as a client process that connects to some other OpenVPN server. Like stunnel, another tool that uses SSL/TLS to encapsulate application traffic, the openssl dæmon uses OpenSSL, which nowadays is installed by default on most Linux systems, for its cryptographic functions.
OpenVPN, by the way, is not strictly a Linux tool. Versions also are available for Windows, Solaris, FreeBSD, NetBSD, OpenBSD and Mac OS X.
2009: a Bad Year for SSL/TLS?
OpenVPN depends on OpenSSL, a free implementation of the SSL and TLS protocols, for its cryptographic functions. But SSL/TLS has had a bad year with respect to security vulnerabilities. First, back in February 2009, Moxie Marlinspike and others began demonstrating man-in-the-middle attacks that could be used to intercept SSL/TLS-encrypted Web sessions by “stripping” SSL/TLS encryption from HTTPS sessions.
These are largely localized attacks—in practice, the attacker usually needs to be on the same LAN as (or not very far upstream of) the victim—and they depend on end users not noticing that their HTTPS sessions have reverted to HTTP. The NULL-prefix man-in-the-middle attack that Marlinspike and Dan Kaminsky subsequently (separately) demonstrated that summer was more worrisome. It exploited problems in X.509 and in Firefox that made it possible for an attacker essentially to proxy an HTTPS session, breaking the encryption in the middle, in a way that allows the attacker to eavesdrop on (and meddle with) HTTPS traffic in a way that is much harder for end users to notice or detect.
But, that wasn't all for 2009 (which isn't even finished yet, as I write this). In November, security researchers uncovered problems with how the SSL/TLS protocol handles session state. These problems at least theoretically allow an attacker not only to eavesdrop on but also inject data into SSL/TLS-encrypted data streams. Although the effects of this attack appeared similar to those of the NULL-prefix attack, the latter involved client/browser-side X.509 certificate-handling functions that were browser/platform-specific and didn't involve any server-side code.
In contrast, the November revelation involved actual flaws in the SSL/TLS protocol itself, whether implemented in Web browsers, Web servers or anything else using SSL/TLS. Accordingly, application or platform-specific patches couldn't help. The SSL/TLS specifications themselves, and all implementations of it (mainly in the form of libraries such as OpenSSL), had to be changed.
That's the bad news. OpenVPN depends on protocols that have been under intense fire lately. The good news is, because e-commerce, on-line banking and scores of other critical Internet applications do as well, at the time of this writing, the IETF has responded very rapidly to make the necessary revisions to the SSL/TLS protocol specifications, and major vendors and other SSL/TLS implementers appear to be poised to update their SSL/TLS libraries accordingly. Hopefully, by the time you read this, that particular issue will have been resolved.
Obviously, by even publishing this article, I'm betting on the continued viability of SSL/TLS and, therefore, of OpenVPN. But, I'd be out of character if I didn't speak frankly of these problems! You can find links to more information on these SSL/TLS issues in the Resources section.
Getting OpenVPN
OpenVPN is already a standard part of many Linux distributions. Ubuntu, Debian, SUSE and Fedora, for example, each has its own “openvpn” package. To install OpenVPN on your distribution of choice, chances are all you'll need to do is run your distribution's package manager.
If your distribution lacks its own OpenVPN package, however, you can download the latest source code package from www.openvpn.net. This package includes instructions for compiling and installing OpenVPN from source code.
Conclusion
Now that you've got some idea of the uses of VPN, different protocols that can be used to build VPN tunnels, different Linux tools available in this space and some of the merits of OpenVPN, we're ready to roll up our sleeves and get OpenVPN running in both server and client configurations, in either “bridging” or “routing” mode.
But, that will have to wait until next month—I'm out of space for now. I hope I've whetted your appetite. Until next time, be safe!
Resources
Mick Bauer's Paranoid Penguin, January 2005, “Linux VPN Technologies”:www.linuxjournal.com/article/7881
Wikipedia's Entry for IPsec: en.wikipedia.org/wiki/IPsec
Home Page for Openswan, an IPsec Implementation for Linux Kernels:en.wikipedia.org/wiki/IPsec
Home Page for Strongswan, Another Linux IPsec Implementation:www.strongswan.org
Home Page for pptp-linux (not recommended): pptpclient.sourceforge.net
Poptop, the PPTP Server for Linux (not recommended): poptop.sourceforge.net/dox
Tools and Papers Related to Moxie Marlinspike's SSL Attacks (and Others):www.thoughtcrime.org/software.html
“Major SSL Flaw Find Prompts Protocol Update”, by Kelly Jackson Higgins, DarkReading: www.darkreading.com/security/vulnerabilities/showArticle.jhtml?articleID=221600523
Official OpenVPN Home Page: www.openvpn.net
Ubuntu Community OpenVPN Page:https://help.ubuntu.com/community/OpenVPN
Charlie Hosner's “SSL VPNs and OpenVPN: A lot of lies and a shred of truth”:www.linux.com/archive/feature/48330
Mick Bauer (darth.elmo@wiremonkeys.org) is Network Security Architect for one of the US's largest banks. He is the author of the O'Reilly book Linux Server Security, 2nd edition (formerly called Building Secure Servers With Linux), an occasional presenter at information security conferences and composer of the “Network Engineering Polka”.
Taken From: http://www.linuxjournal.com/article/10667

System Administration - Overview

Taming the Beast

From Issue #191
March 2010

The right plan can determine the difference between a large-scale system administration nightmare and a good night's sleep for you and your sysadmin team.

As the appetite for raw computing power continues to grow, so do the challenges associated with managing large numbers of systems, both physical and virtual. Private industry, government and scientific research organizations are leveraging larger and larger Linux environments for everything from high-energy physics data analysis to cloud computing. Clusters containing hundreds or even thousands of systems are becoming commonplace. System administrators are finding that the old way of doing things no longer works when confronted with massive Linux deployments. We are forced to rethink common tasks because the tools and strategies that served us well in the past are now crushed by an army of penguins. As someone who has worked in scientific computing for the past nine years, I know that large-scale system administration can at times be a nightmarish endeavor, but for those brave enough to tame the monster, it can be a hugely rewarding and satisfying experience.

People often ask me, “How is your department able to manage so many machines with such a small number of sysadmins?” The answer is that my basic philosophy of large-scale system administration is “keep things simple”. Complexity is the enemy. It almost always means more system management overhead and more failures. It's fairly straightforward for a single experienced Linux sysadmin to single-handedly manage a cluster of a thousand machines, as long as all of the systems are identical (or nearly identical). Start throwing in one-off servers with custom partitioning or additional NICs, and things start to become more difficult, and the number of sysadmins required to keep things running starts to increase.

An arsenal of weapons in the form of a complete box of system administration tools and techniques is vital if you plan to manage a large Linux environment effectively. In the past, you probably would be forced to roll your own large-scale system administration utilities. The good news is that compared to five or six years ago, many open-source applications now make managing even large clusters relatively straightforward.

Monitoring

System administrators know that monitoring is essential. I think Linux sysadmins especially have a natural tendency to be concerned with every possible aspect of their systems. We love to watch the number of running processes, memory consumption and network throughput on all our machines, but in the world of large-scale system administration, this mindset can be a liability. This is especially true when it comes to alerting. The problem with alerting on every potential hiccup is that you'll either go insane from the constant flood of e-mail and pages, or even worse, you'll start ignoring the alerts. Neither of those situations is desirable. The solution? Configure your monitoring system to alert only on actionable conditions—things that cause an interruption in service. For every monitoring check you enable, ask yourself “What action must be taken if this check triggers an alert?” If the answer is “nothing”, it's probably better not to enable the check.

Monitoring Tools

If you were asked to name the first monitoring application that comes to mind, it probably would be Nagios. Used by just about everyone, Nagios is currently the king of open-source monitoring tools.

Zabbix sports a slick Web interface that is sure to make any manager happy. Zabbix scales well and might be posed to give Nagios a run for its money.

Ganglia is one of those must-have tools for Linux environments of any size. Its strengths include trending and performance monitoring.

I think it's smart to differentiate monitoring further into critical and noncritical alerts. E-mail and pager alerts should be reserved for things that require immediate action—for example, important systems that aren't pingable, full filesystems, degraded RAIDs and so on. Noncritical things, like NIS timeouts, instead should be displayed on a Web page that can be viewed when you get back from lunch. Also consider writing checks that automatically correct whatever condition they are monitoring. Instead of your script sending you an e-mail when Apache dies, why not have it try restarting httpd automatically? If you go the auto-correcting “self-healing” route, I'd recommend logging whatever action your script takes so you can troubleshoot the failure later.

When selecting a monitoring tool in a large environment, you have to think about scalability. I have seen both Zabbix and Nagios used to monitor in excess of 1,500 machines and implement tens of thousands of checks. Even with these tools, you might want to scale horizontally by dividing your machines into logical groups and then running a single monitoring server per group. This will increase complexity, but if done correctly, it will also prevent your monitoring infrastructure from going up in flames.

Configuration Management

In small environments, you can maintain Linux systems successfully without a configuration management tool. This is not the case in large environments. If you plan on running a large number of Linux systems efficiently, I strongly encourage you to consider a configuration management system. There are currently two heavyweights in this area, Cfengine and Puppet. Cfengine is a mature product that has been around for years, and it works well. The new kid on the block is Puppet, a Ruby-based tool that is quickly gaining popularity. Your configuration management tools should, obviously, allow you to add or modify system or application configuration files to a single system or groups of machines. Some examples of files you might want to manage are /etc/fstab, ntpd.conf, httpd.conf or /etc/password. Your tool also should be able to manage symlinks and software packages or any other node attributes that change frequently.

Configuration Management Tools

Cfengine is the grandfather of configuration management systems. The project started in 1993 and continues to be actively developed. Although I personally find some aspects of Cfengine a little clunky, I've been using it successfully for many years.

Puppet is a highly regarded Ruby-based tool that should be considered by anyone considering a configuration management solution.

Regardless of which configuration management tool you use, it's important to implement it early. Managing Linux configurations is something that should be set up as the node is being installed. Retrofitting configuration management on a node that is already in production can be a dangerous endeavor. Imagine pushing out an incorrect fstab or password file, and you get an idea of what can go wrong. Despite the obvious hazards of fat-fingering a configuration management tool, the benefits far outweigh the dangers. Configuration management tools provide a highly effective way of managing Linux systems and can reduce system administration overhead dramatically.

As an added bonus, configuration management systems also can be used as a system backup mechanism of sorts. Granted, you don't want to store large amounts of data in a tool like Cfengine, but in the event of system failure, using a configuration managment tool in conjunction with your node installation tools should allow you to get the system into a known good state in a minimal amount of time.

Provisioning

Provisioning is the process of installing the operating system on a machine and performing basic system configuration. At home, you probably boot your computer from a DVD to install the latest version of your favorite Linux distro. Can you imagine popping a DVD in and out of a data center full of systems? Not appealing. A more efficient approach is to install the OS over the network, and you typically do this with with a combination of PXE and Kickstart. There are numerous tools to assist with large-scale provisioning—Cobbler and Spacewalk are two—but you may prefer to roll your own. Your provisioning tools should be tightly coupled to your configuration management system. The ultimate goal is to be able to sit at your desk, run a couple commands, and see a hundred systems appear on the network a few minutes later, fully configured and ready for production.

Provisioning Tools

Rocks is a Linux distribution with built-in network installation infrastructure. Rocks is great for quickly deploying large clusters of Linux servers though it can be difficult to use in mixed Linux distro environments.

Spacewalk is Red Hat's open-source systems management solution. In addition to provisioning, Spacewalk also offers system monitoring and configuration file management.

Cobbler, part of the Fedora Project, is a lightweight system installation server that works well for installing physical and virtual systems.

Hardware

When it's time to purchase hardware for your new Linux super cluster, there are many things to consider, especially when it comes to choosing a good vendor. When selecting vendors, be sure to understand their support offerings fully. Will they come on-site to troubleshoot issues, or do they expect you to sit for hours on the phone pulling your hair out while they plod through an endless series of troubleshooting scripts? In my experience, the best, most responsive shops have been local whitebox vendors. It doesn't matter which route you go, large corporate or whitebox vendor, but it's important to form a solid business relationship, because you're going to be interacting with each other on a regular basis.

The odds are that old hardware is more likely to fail than newer hardware. In my shop, we typically purchase systems with three-year support contracts and then retire the machines in year four. Sometimes we keep machines around longer and simply discard a system if it experiences any type of failure. This is particularly true in tight budget years.

Purchasing the latest, greatest hardware is always tempting, but I suggest buying widely adopted, field-tested systems. Common hardware usually means better Linux community support. When your network card starts flaking out, you're more likely to find a solution to the problem if 100,000 other Linux users also have the same NIC. In recent years, I've been very happy with the Linux compatibility and affordability of Supermicro systems. If your budget allows, consider purchasing a system with hardware RAID and redundant power supplies to minimize the number of after-hours pages. Spare systems or excess hardware capacity are a must for large shops, because the fact of the matter is regardless of the quality of hardware, systems will fail.

Backups

Rethink backups. More than likely, when confronted with a large Linux deployment, you're going to be dealing with massive amounts of data. Deciding what data to back up requires careful coordination with stakeholders. Communicate with users so they understand backup limitations. Obviously, written policies are a must, but the occasional e-mail reminder is a good idea as well. As a general rule, you want to back up only absolutely essential data, such as home directories, unless requirements dictate otherwise.

Serial Console Access

Although it may seem antiquated, do not underestimate the value of serial console access to your Linux systems. When you find yourself in a situation where you can't access a system via SSH or other remote-access protocol, a good-old serial console potentially could be a lifesaver, particularly if you manage systems in a remote data center. Equally important is the ability to power-cycle a machine remotely. Absolutely nothing is more frustrating than having to drive to the data center at 3am to push the power button on an unresponsive system.

Many hardware devices exist for power-cycling systems remotely. I've had good luck with Avocent and APC products, but your mileage may vary. Going back to our “keep it simple” mantra, no matter what solution you select, try to standardize one particular brand if possible. More than likely, you're going to write a wrapper script around your power-cycling utilities, so you can do things like powercycle node.example.com, and having just a single hardware type keeps implementation more straightforward.

System Administrators

No matter how good your tools are, a solid system administration team is essential to managing any large Linux environment effectively. The number of systems managed by my group has grown from about a dozen Linux nodes eight years ago to roughly 4,000 today. We currently operate with an approximate ratio of 500 Linux servers to every one system administrator, and we do this while maintaining a high level of user satisfaction. This simply wouldn't be possible without a skilled group of individuals.

When hiring new team members, I look for Linux professionals, not enthusiasts. What do I mean by that? Many people might view Linux as a hobby or as a source of entertainment, and that's great! But the people on my team see things a little differently. To them, Linux is an awesomely powerful tool—a giant hammer that can be used to solve massive problems. The professionals on my team are curious and always thinking about more efficient ways of doing things. In my opinion, the best large-scale sysadmin is someone who wants to automate any task that needs to be repeated more than once, and someone who constantly thinks about the big picture, not just the single piece of the puzzle that they happen to be working on. Of course, an intimate knowledge of Linux is mandatory, as is a wide range of other computing skills.

In any large Linux shop, there is going to be a certain amount of mundane, low-level work that needs to be performed on a daily basis: rebooting hung systems, replacing failed hard drives and creating new user accounts. The majority of the time, these routine tasks are better suited to your junior admins, but it's beneficial for more senior people to be involved from time to time as they serve as a fresh set of eyes, potentially identifying areas that can streamlined or automated entirely. Senior admins should focus on improving system management efficiency, solving difficult issues and mentoring other team members.

Conclusion

We've touched a few of the areas that make large-scale Linux system administration challenging. Node installing, configuration management and monitoring are all particularly important, but you still need reliable hardware and great people. Managing a large environment can be nerve-racking at times, but never lose sight of the fact that ultimately, it's just a bunch of Linux boxes.

Jason Allen is CD/SCF/FEF Department Head at Fermi National Accelerator Laboratory, which is managed by Fermi Research Alliance, LLC, under Management and Operating Contract (DE-AC02-07CH11359) with the Department of Energy. He has been working with Linux professionally for the past 12 years and maintains a system administration blog at savvysysadmin.com.


Taken From: http://www.linuxjournal.com/article/10665