Increase the VMWare Boot Screen Delay
If you’ve wanted to try out a bootable CD or USB flash drive in a virtual machine environment, you’ve probably noticed that VMWare’s offerings make it difficult to change the boot device. We’ll show you how to change these options.
You can do this either for one boot, or permanently for a particular virtual machine.
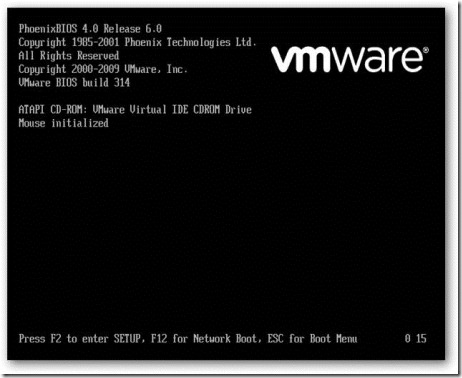
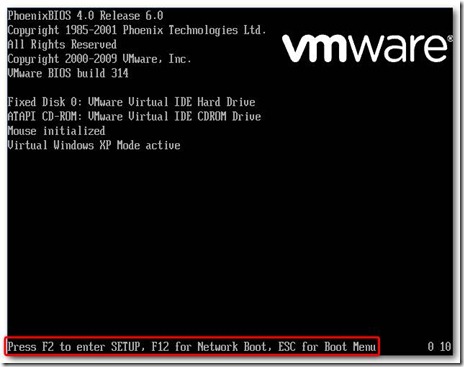
Even experienced users of VMWare Player or Workstation may not recognize the screen above – it’s the virtual machine’s BIOS, which in most cases flashes by in the blink of an eye.
If you want to boot up the virtual machine with a CD or USB key instead of the hard drive, then you’ll need more than an eye’s-blink to press Escape and bring up the Boot Menu. Fortunately, there is a way to introduce a boot delay that isn’t exposed in VMWare’s graphical interface – you have to edit the virtual machine’s settings file (a .vmx file) manually.
Editing the Virtual Machine’s .vmx
Find the .vmx file that contains the settings for your virtual machine. You chose a location for this when you created the virtual machine – in Windows, the default location is a folder called My Virtual Machines in your My Documents folder.
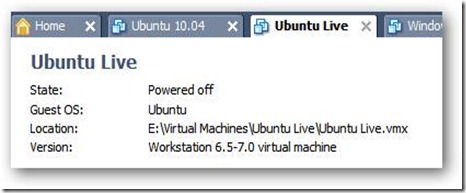
In VMWare Workstation, the location of the .vmx file is listed on the virtual machine’s tab.
If in doubt, search your hard drive for .vmx files. If you don’t want to use Windows default search, an awesome utility that locates files instantly is Everything.
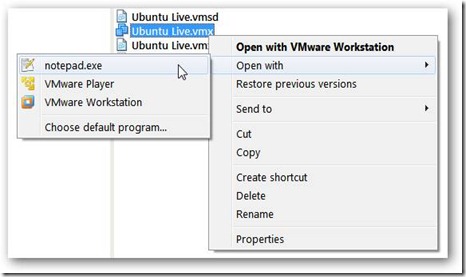
Open the .vmx file with any text editor.
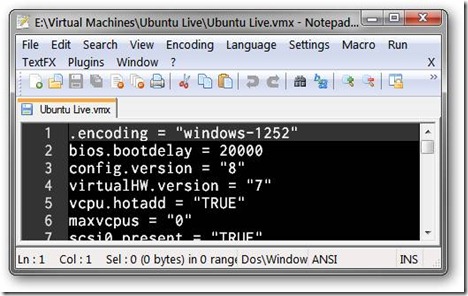
Somewhere in this file, enter in the following line… save the file, then close out of the text editor:
bios.bootdelay = 20000
This will introduce a 20 second delay when the virtual machine loads up, giving you plenty of time to press the Escape button and access the boot menu. The number in this line is just a value in milliseconds, so for a five second boot delay, enter 5000, and so on.
Change Boot Options Temporarily
Now, when you boot up your virtual machine, you’ll have plenty of time to enter one of the keystrokes listed at the bottom of the BIOS screen on boot-up.
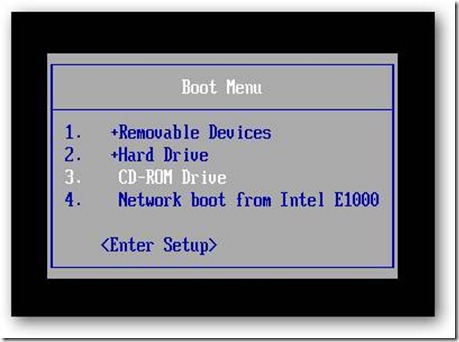
Press Escape to bring up the Boot Menu. This allows you to select a different device to boot from – like a CD drive.
Your selection will be forgotten the next time you boot up this virtual machine.
Change Boot Options Permanently
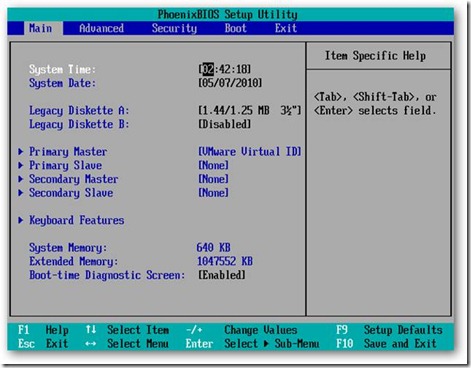
When the BIOS screen comes up, press F2 to enter the BIOS Setup menu.
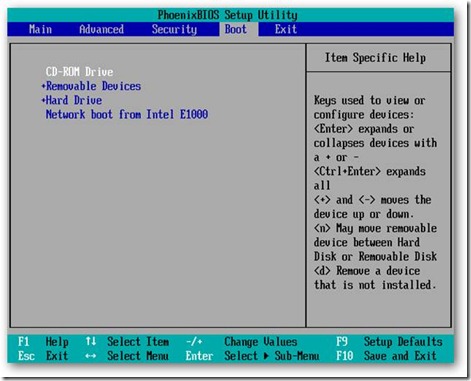
Switch to the Boot tab, and change the ordering of the items by pressing the “+” key to move items up on the list, and the “-” key to move items down the list. We’ve switched the order so that the CD-ROM Drive boots first.
Once you make this change permanent, you may want to re-edit the .vmx file to remove the boot delay.
Boot from a USB Flash Drive
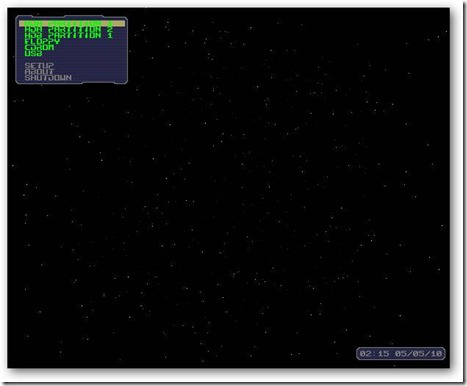
One thing that is noticeably missing from the list of boot options is a USB device. VMWare’s BIOS just does not allow this, but we can get around that limitation using the PLoP Boot Manager that we’ve previously written about. And as a bonus, since everything is virtual anyway, there’s no need to actually burn PLoP to a CD.
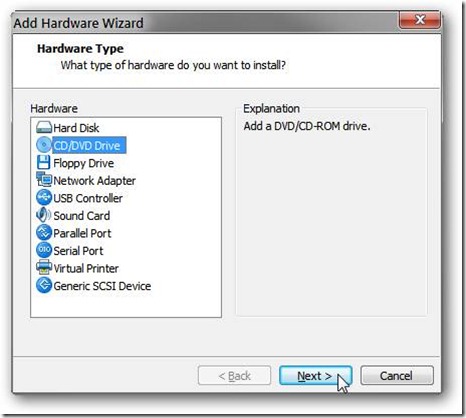
Open the settings for the virtual machine you want to boot with a USB drive. Click on Add… at the bottom of the settings screen, and select CD/DVD Drive. Click Next.
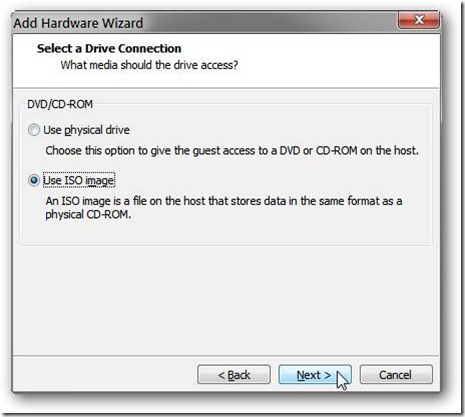
Click the Use ISO Image radio button, and click Next.
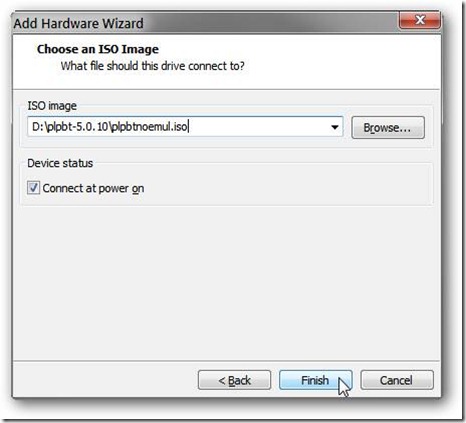
Browse to find plpbt.iso or plpbtnoemul.iso from the PLoP zip file. Ensure that Connect at power on is checked, and then click Finish.
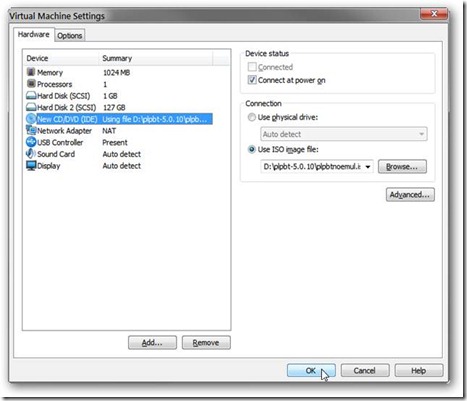
Click OK on the main Virtual Machine Settings page.
Now, if you use the steps above to boot using that CD/DVD drive, PLoP will load, allowing you to boot from a USB drive!
Conclusion
We’re big fans of VMWare Player and Workstation, as they let us try out a ton of geeky things without worrying about harming our systems. By introducing a boot delay, we can add bootable CDs and USB drives to the list of geeky things we can try out.
The Plop Boot Manager is a small program with unbelievable many features.
Here is a list of features, but you can do more...
- USB boot without BIOS support (UHCI, OHCI and EHCI)
- CD/DVD boot without BIOS support (IDE)
- PCMCIA CardBus support to enable boot from USB PC-Cards
- Floppy boot
- Different profiles for operating systems
- Define up to 16 partitions
- No extra partition for the boot manager
- Hidden boot, maybe you have a rescue system installed and the user should not see that there is another system installed
- Boot countdown
- Hide partitions
- Password protection for the computer and the boot manager setup
- Backup of partition table data
- Textmode user interface 80x50
- Graphical user interface 640x480, 800x600, 1024x786, 1280x1024
- MBR partition table edit
- Start of the boot manager from harddisk, floppy, USB, CD, DVD
- Starting from Windows boot menu
- Starting from LILO, GRUB, Syslinux, Isolinux, Pxelinux (network)
- It can be used as PCI option ROM in your BIOS
- Access the whole USB hard disk (up to 2TB) even when the bios has a 128 GiB limit
- You can run the boot manager over the network
- Start the networkcard bootrom from the boot manager to boot from the network
Based On: http://www.howtogeek.com/howto/16876/how-to-increase-the-vmware-boot-screen-delay/
