How to setup a USB 3G Modem on Raspberry PI using usb_modeswitch and wvdial
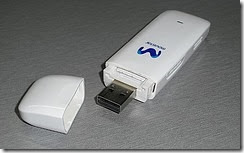
Setting up a USB 3G/4G modem on a Raspberry Pi is not a simple task. There are many guides available using the now defunctsakis3g script, but getting my modem to work required a bit more understanding.
The main problem is that most USB modems act as two devices - a USB storage device and a USB modem. When plugged in to the Raspberry PI the device is usually in USB storage mode. There is a program calledusb_modeswitch that we can use to do the switching
The other missing part is a way to connect to the cellular network with the USB modem from the Raspberry. For this we will use the classic pppand wvdial programs.
Requirements
- Raspberry PI computer
- Raspbian OS installed
- USB 3G Modem
- 5V 1A power supply for the Raspberry PI
________________________________________
1. Install required software
- Connect your Raspberry PI to the internet via LAN or Wifi
- Open a terminal window and enter:
sudo apt-get update
sudo apt-get install ppp wvdial
sudo aptitude install usb-modeswitch
2. Get the USB switching codes
- We need to get the codes of the USB device in USB storage mode and USB modem mode.
- Connect your USB modem and reboot the Raspberry PI without LAN or Wifi connection
- Once rebooted open a terminal window and enter:
lsusb
- The output will look similar to the screenshot below. Your modem should be listed as one of the USB devices. Note the numbers underlined. These are the device vendor and product codes.
- Make a note of these numbers. In this case it is 19d2:2000
- This value will later be used in the DefaultProduct value
- Then we need to soft reboot the Rapberry PI with the modem connected.
- Open a terminal window and enter:
sudo reboot
- Once rebooted open a terminal window and enter:
lsusb
- The output will look similar to the screenshot below. Your modem should be listed and if you are lucky the second set of numbers would have changed. This is usb_modeswitch doing it's job and switching the device to USB modem mode.
- Make a note of the new numbers. In this case it is 19d2:2002
- This value will be used later in the TargetProduct value
3. Create custom usb_modeswitch config file
- We need to create a custom config file for usb_modeswitch on the Raspberry PI because on a cold boot the device is not always active yet when usb_modeswitch runs on startup and the device is left in USB storage mode.
- We will extract some more information for our usb_modeswitch config file so that we can do the switching manually.
- Open a terminal window and enter the following replacing the codes 19d2 and 2000 with the codes you noted in step 2. Also note the added backslash.
cd /tmp
tar -xzvf /usr/share/usb_modeswitch/configPack.tar.gz 19d2\:2000
- Now open the extracted file with a text editor like leafpad replacing the codes noted in step 2.
nano 19d2:2000
- The content of the file should look something similar to the screenshot below.
- The parts we are interested in are shown in blue.
- Now open the /etc/usb_modeswitch.conf file and add the information obtained above to the file.
- Open a terminal window and enter:
sudo nano /etc/usb_modeswitch.conf
- Then add the following replacing the codes and MessageContent values with those of your device and save.
DefaultVendor=0x19d2
DefaultProduct=0x2000
TargetVendor=0x19d2
TargetProduct=0x2002
MessageContent="5553424312345678000000000000061e000000000000000000000000000000"
MessageContent2="5553424312345679000000000000061b000000020000000000000000000000"
MessageContent3="55534243123456702000000080000c85010101180101010101000000000000"
4. Create the wvdial config file
- The next step is to create a config file for wvdial so you can connect to your service provider.
- Open a terminal window and enter:
sudo nano /etc/wvdial.conf
- Replace the content of the file with the following.
[Dialer 3gconnect]
Init1 = ATZ
Init2 = ATQ0 V1 E1 S0=0 &C1 &D2 +FCLASS=0
Init3 = AT+CGDCONT=1,"IP","internet"
Stupid Mode = 1
Modem Type = Analog Modem
ISDN = 0
Phone = *99#
Modem = /dev/gsmmodem
Username = { }
Password = { }
Baud = 460800
For the portuguese mobile operators configurations just check: http://myhowtosandprojects.blogspot.pt/2012/04/configuracoes-3g-e-mms-portugal.html
- Replace internet with your service provider's APN
- Replace the Phone number if you need to dial a different code to connect.
- Replace Username and Password if needed. To leave the username and password as blank use { }
5. Connect to the internet
- To connect we need to make sure the device is in modem mode.
- First get the actual modem state (CD-ROM):
lsusb
Bus 001 Device 002: ID 0424:9512 Standard Microsystems Corp.
Bus 001 Device 001: ID 1d6b:0002 Linux Foundation 2.0 root hub
Bus 001 Device 003: ID 0424:ec00 Standard Microsystems Corp.
Bus 001 Device 004: ID 19d2:2000 ZTE WCDMA Technologies MSM MF627/MF628/MF628+/MF636+ HSDPA/HSUPA
- Open a terminal and enter:
sudo usb_modeswitch -c /etc/usb_modeswitch.conf
to change the from the CD-ROM mode to the modem mode
Now check that the mode switch occured:
lsusb
Bus 001 Device 002: ID 0424:9512 Standard Microsystems Corp.
Bus 001 Device 001: ID 1d6b:0002 Linux Foundation 2.0 root hub
Bus 001 Device 003: ID 0424:ec00 Standard Microsystems Corp.
Bus 001 Device 005: ID 19d2:0031 ZTE WCDMA Technologies MSM MF110/MF627/MF636
- Then connect to the internet with:
wvdial 3gconnect
6. Problems
If you have problems with the “wvdial”, you shoul run
wvdialconf
this will scan your system for modems, if it finds one, it will do some tests to determine your modem’s parameters, and write them to a template config in /etc/wvdial.conf :
Editing `/etc/wvdial.conf'.
Scanning your serial ports for a modem.
ttyUSB0<*1>: ATQ0 V1 E1 -- failed with 2400 baud, next try: 9600 baud
ttyUSB0<*1>: ATQ0 V1 E1 -- failed with 9600 baud, next try: 9600 baud
ttyUSB0<*1>: ATQ0 V1 E1 -- and failed too at 115200, giving up.
ttyUSB1<*1>: ATQ0 V1 E1 -- OK
ttyUSB1<*1>: ATQ0 V1 E1 Z -- OK
ttyUSB1<*1>: ATQ0 V1 E1 S0=0 -- ERROR
ttyUSB1<*1>: ATQ0 V1 E1 &C1 -- ERROR
ttyUSB1<*1>: ATQ0 V1 E1 &D2 -- ERROR
ttyUSB1<*1>: ATQ0 V1 E1 +FCLASS=0 -- OK
ttyUSB1<*1>: Modem Identifier: ATI -- Manufacturer: ZTE INCORPORATED
ttyUSB1<*1>: Speed 9600: AT -- OK
ttyUSB1<*1>: Max speed is 9600; that should be safe.
ttyUSB1<*1>: ATQ0 V1 E1 +FCLASS=0 -- OK
ttyUSB2<*1>: ATQ0 V1 E1 -- OK
ttyUSB2<*1>: ATQ0 V1 E1 Z -- OK
ttyUSB2<*1>: ATQ0 V1 E1 S0=0 -- ERROR
ttyUSB2<*1>: ATQ0 V1 E1 &C1 -- ERROR
ttyUSB2<*1>: ATQ0 V1 E1 &D2 -- ERROR
ttyUSB2<*1>: ATQ0 V1 E1 +FCLASS=0 -- OK
ttyUSB2<*1>: Modem Identifier: ATI -- Manufacturer: ZTE INCORPORATED
ttyUSB2<*1>: Speed 9600: AT -- OK
ttyUSB2<*1>: Max speed is 9600; that should be safe.
ttyUSB2<*1>: ATQ0 V1 E1 +FCLASS=0 -- OK
Found a modem on /dev/ttyUSB1.
Modem configuration written to /etc/wvdial.conf.
ttyUSB1<Info>: Speed 9600; init "ATQ0 V1 E1 +FCLASS=0"
ttyUSB2<Info>: Speed 9600; init "ATQ0 V1 E1 +FCLASS=0"
You config template should look something like this:
[Dialer Defaults]
Init1 = ATZ
Init2 = ATQ0 V1 E1 +FCLASS=0
Modem Type = Analog Modem
; Phone = <Target Phone Number>
ISDN = 0
; Password = <Your Password>
; Username = <Your Login Name>
Modem = /dev/ttyUSB1
Baud = 9600
go to step 4 and change:
[Dialer 3gconnect]
Init1 = ATZ
Init2 = ATQ0 V1 E1 +FCLASS=0
Init3 = AT+CGDCONT=1,"ip","internet"
Stupid Mode = 1
Modem Type = Analog Modem
ISDN = 0
Phone = *99#
Modem = /dev/ttyUSB1
Username = tmn
Password = tmn
Baud = 9600
and then try again:
wvdial 3gconnect
Related Info:
- http://forum.zwame.pt/showthread.php?t=286792 (TMN CFG)
- http://raspberrytuga.blogspot.pt/2013/05/ligando-uma-pen-banda-larga-ao.html (Alternative method (TMN): gnokii)
- http://ubuntuforums.org/showthread.php?t=1147685
- http://ellanos.wordpress.com/2010/05/07/configurando-un-modem-zte-mf626-en-debian-squeeze-2/
- http://lgallardo.com/en/2009/12/17/automontaje-del-modem-zte-mf626-en-debian/
- https://en.wikipedia.org/wiki/WvDial
![clip_image002[5] clip_image002[5]](http://lh4.ggpht.com/-wmn_Oj8PZe4/UqZnNPXJ0JI/AAAAAAAADf0/EZit80LWhi4/clip_image002%25255B5%25255D_thumb%25255B1%25255D.gif?imgmax=800)

![clip_image002[7] clip_image002[7]](http://lh5.ggpht.com/-Cyyp2PJenLM/UqZnO1wniZI/AAAAAAAADgU/soBOZ-02Ykc/clip_image002%25255B7%25255D_thumb%25255B1%25255D.gif?imgmax=800)


