PIX Firewall Emulation
GNS3 is also capable of emulating PIX firewalls. Once again, you’ll need to provide your own PIX image. If you want to run more than a restricted license, you’ll also need to have a valid serial number and activation keys.
Configuring Qemuwrapper and Cisco PIX image
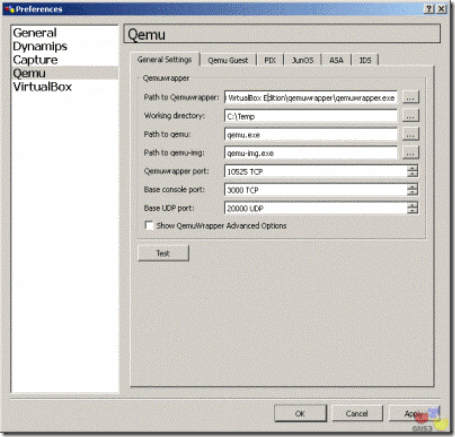
First, go to Preferences on the Edit menu in GNS3. Click on Qemu in the left pane. The default path to the Qemuwrapper should be fine. You may want to specify a different working directory. Note that Qemuwrapper is shipped with a compiled version of Pemu, therefore you do not need Qemu to emulate PIX.
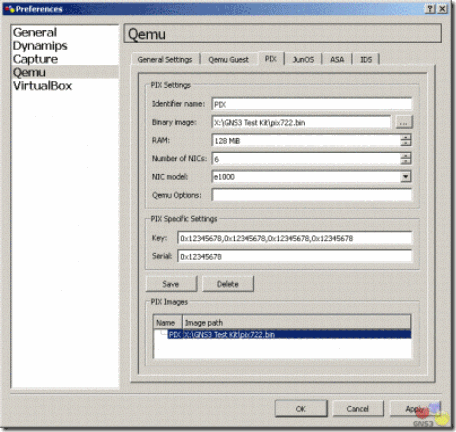
On PIX tab, use the button next to Binary image to specify the location of your PIX operating system image. You may also change other settings like RAM or the number of interfaces. Once you are finished with the settings, click on Save.
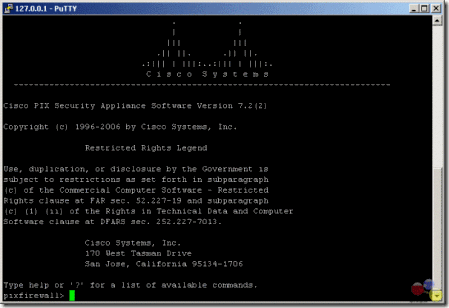
You may use the default Key and Serial number, if necessary. This will provide a restricted license with limited features. You will need a valid serial number and activation keys to access additional features. The graphic below on the left is a restricted image. Failover, VPN-DES, and VPN-3DES-AES are disabled. You are also limited to 6 physical interfaces and 25 VLANs. The graphic below on the right is unrestricted. With an unrestricted license, these features are enabled along with support for additional interfaces and VLANs.
If you have a serial number and valid activation keys, you may move from a restricted license to an unrestricted license. Type in the activation keys separated by commas with no spaces. Use all lower case. Be sure your serial number is converted to hexadecimal. It is usually in decimal in a show version command. Use a calculator to convert from decimal to hexadecimal if necessary.
Using Cisco PIX
Click OK to return to the GNS3 main interface. Drag a PIX firewall icon from the Nodes Types pane into the workspace. Right-click FW1 and choose Start, then right-click on FW1 again and choose Console.
Once you console into your PIX firewall, issue a show version command. If the activation keys do not show up properly, then issue the following command from privileged mode (enable mode):
pixfirewall# activation-key 0x12345678 0x12345678 0x12345678 0x12345678
The command is issued on one line with spaces between the activation keys. Save the configuration using either the write command orcopy run start. Stop the device and restart it. Congratulations! Your PIX firewall is up and running.
Interfaces on the PIX are Ethernet interfaces. To connect to other devices, you’ll need to use either Ethernet or FastEthernet interfaces. You may not connect to a serial interface.
You may connect to other PIX firewalls, routers, and switches. You may not connect to a cloud. Consequently, to connect to a real network or to a Virtual PC, you’ll need to connect from the PIX to a switch, and then from the switch to your Cloud.
CPU usage with PIX
Just as with routers, CPU usage is an issue when emulating PIX firewalls on your computer. You will note that your CPU usage is most likely 100%. There are no idle-pc values available for PIX firewalls at this time. Instead, you may use third-party software to control your CPU usage. There are a variety of products on the market. The one that I use for Windows is called BES and is a free download.
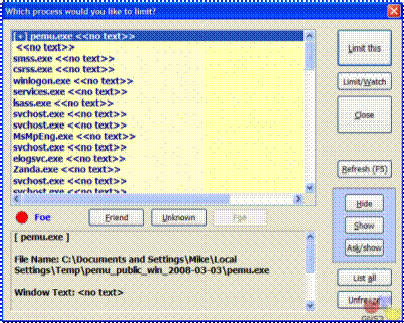
Complete documentation is available on the Web site along with the program download. Once you start your PIX firewall, start BES. Click the Target button. Choose the pemu.exe process and click the Limit this button. A confirmation screen will appear.
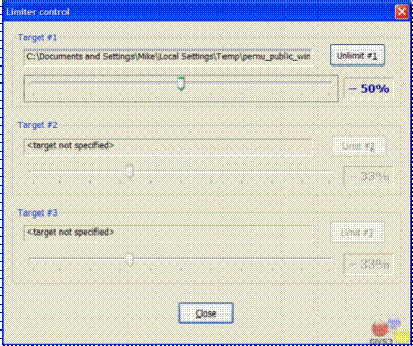
Click the Control button to control how much CPU limiting will be used. I’ve set mine to reduce CPU usage by 50%. If you are running multiple firewalls, you will want to limit each one. This program may also limit other processes running on your Windows computer.
For Linux, use cpulimit. You may learn more about cpulimit at the following Web site: http://cpulimit.sf.net. On ubuntu you can use Synaptic Package Manager or Ubuntu Software Centre to download and install cpulimit.
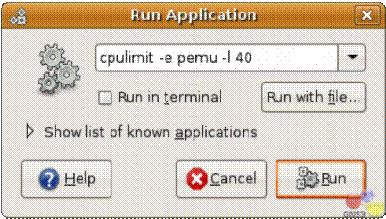
To run cpulimit, press F2 while holding the ALT key down (ALT+F2) in Ubuntu to open a Run Application box. Type the following in the box:
cpulimit –e pemu –l 40
This will limit the application pemu to 40% CPU usage.
Still in your Ubuntu, choose System Monitor under Administration on the System menu. Click the Resources tab. You should see that pemu process is running at 40% of your CPU usage.
Taken From: http://www.gns3.net/gns3-pix-firewall-emulation/

No comments:
Post a Comment