This simple hack turns your Raspberry Pi into a powerful FM transmitter! It has enough range to cover your home, DIY drive-in movie, a high school ball game, or even a bike parade (depending on the stragglers).
PiFM software not only boldly enhances the capability of your Pi, but does so with nothing more than a single length of wire. This hack starts with the absolute minimum you need to run a Raspberry Pi — an SD card, a power source, and the board itself — and adds one piece of wire. It’s the coolest Pi device we’ve ever seen with so few materials.
PiFM was originally created by Oliver Mattos and Oskar Weigl, and revised by Ryan Grassel. We’d like to thank the whole PiFM community for inspiration. MAKE’s contribution to the project, the PirateRadio.py script, now enables playback without using the command line, and handles all the most common music file formats automatically. It was written by MAKE Labs engineering intern Wynter Woods. You can find the source code here.
NOTE: The Raspberry Pi’s broadcast frequency can range between 1Mhz and 250Mhz, which may interfere with government bands. We advise that you limit your transmissions to the standard FM band of 87.5MHz–108.0MHz (see Step 3) and always choose a frequency that’s not already in use, to avoid interference with licensed broadcasters.
Steps
- 1. Make the antenna.
- 2. Flash the SD card and add music.
- 3. Edit the config file.
- 4. Start it up!
- 5. How the PiFM software works.
- 6. Going further.
Step #1: Make the antenna.
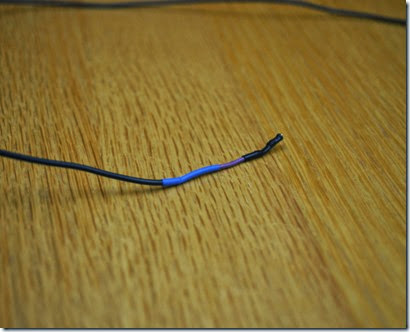
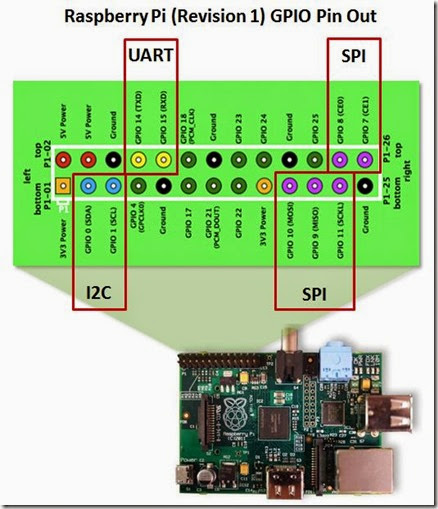
· Technically, all you need for an antenna is a piece of wire. For an optimal antenna, you could attach a 75cm wire to pin 4, with a 75cm power cable pointed in the other direction. (That would effectively make a half-wave dipole antenna at 100MHz, near the middle of the FM band.) We just used 40cm of 12 AWG solid wire, since things started tipping over when the wire got longer.
· Cut and strip a female jumper wire. Solder it to one end of your antenna, and insulate with heat-shrink tubing.
· Dab hot glue around the joint for support, and stick it on pin 4 of the GPIO pins of your Raspberry Pi. The glue makes the antenna more rigid so it stands up better.
· NOTE: If you have the Raspberry Pi Starter Kit and you're in a hurry, you can just use a male jumper wire plugged into the Cobbler breakout board! (Both are included in the kit.) It will work, but the range will be roughly half of what you'd get with 40cm of 12 AWG solid copper.
Step #2: Flash the SD card and add music.
· To save you time configuring everything, MAKE Labs made a disk image. Download ithere. (Advanced users who just want the source can find the link in the intro.)
· The original PiFM code proved the concept with impressive results. The MAKE image takes the work out of partitioning the card into system and data partitions. It also auto-mounts the data partition. It uses a fraction of the CPU of the original code and enables playback from MP3, FLAC, and more. And it runs the PirateRadio.py script on startup, so your music starts broadcasting immediately once the transmitter boots up. Ultimately, this will save you a lot of time. But you can't just drag the files to your SD card; it must be flashed to work.
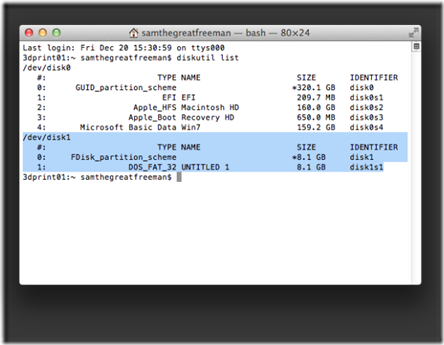
· Flash the image to your SD card. If you're not familiar with the process, it’s easy. Good tutorials can be found here. You can use Win32DiskImager on Windows, or the Command Line Tools (1) instructions if you're on OSX. I'll assume Linux users have moved on already.
· For OSX and Linux users, simply open up the PirateRadio partition and get started. Windows users, follow our instructions for connecting to your Pi via SSH using WinSCP.
· To add music, simply add your artist or album folders to the root of the “Pirate Radio” partition of the SD card. Your music files can be nested within these folders, so there's no need to dump all your music into one mess on the main directory.
Step #3: Edit the config file.
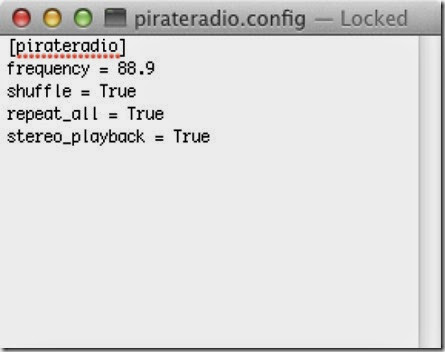
· You can set the frequency you want to broadcast on in the pirateradio.config file. Open it up in a text editor. You should see something like: [pirateradio] frequency = 108.2 shuffle = True repeat_all = True
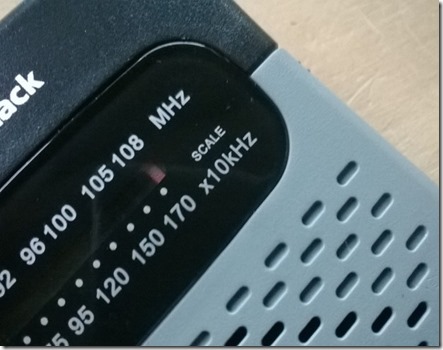
· Set frequency to the station you want to broadcast on. Useable FM frequencies are typically from 87.5MHz to 108.0MHz. (108.2 was the highest our test radio could reach, and it didn't have any competition from other stations.)
· Set shuffle to True to shuffle files, or to False to play files alphabetically.
· Set repeat_all to True if you want to loop forever through your playlist.
Step #4: Start it up!
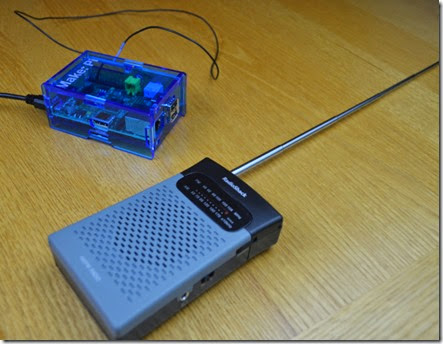
Tune your FM radio (or you Mobile Phone) to your frequency of choice and plug in the Raspberry Pi. It will take about 15 seconds to warm up. Once it does, you should hear your music loud and clear.
Step #5: How the PiFM software works.
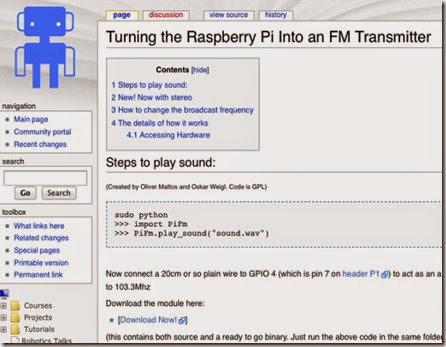
· From the PiFM wiki: "It uses the hardware on the Raspberry Pi that is actually meant to generate spread-spectrum clock signals on the GPIO pins to output FM radio energy. This means that all you need to do to turn the Raspberry Pi into a (ridiculously powerful) FM transmitter is to plug in a wire as the antenna (as little as 20cm will do) into GPIO pin 4 (aka GPCLK0) and run the code."
· Frequency modulation "is done by adjusting the frequency using the fractional divider." For example, for a target broadcast frequency of 100MHz, the signal is fluctuated between 100.025Mhz and 99.975Mhz, which makes the audio signal.
· The Python code defaults to 87.9 FM with shuffle and repeat turned off. It scans the SD card for music files and builds a playlist based on the options in the config file. It then passes each file along to a decoder based on the filetype. Each file is then re-encoded into a mono format the PiFM radio can handle. This lets you play more than just WAV files: use your MP3, FLAC, M4A, AAC, or WMA files too.
Step #6: Going further.
· Tuck everything in the acrylic case that comes with your Raspberry Pi Starter Kit and you're good to go. Or, if you want something cooler or more subversive, try building an awesome housing of your own. MAKE Labs manager Sam Freeman drew up this little number, a cool radio tower; download it at thingiverse.com/makelabs.
· Add RadioShack's handy USB battery pack so you can carry your station wherever you need to take over the airwaves. (It fits inside the radio tower, too.)
· NOTE: If you have trouble with range, double-check which pin your antenna is plugged into. At MAKE Labs we spent a few hours puzzled by our antenna's performance, only to discover it was one pin over!
Publicado em 06/03/2014
Complete instructions for this episode of Weekend Projects can be found at http://makezine.com/projects/raspberr...
Using a readymade disk image and one simple solder connection, turn your Raspberry Pi into a streaming pirate radio.
This project was originally created by Oliver Mattos and Oskar Weigl. It was revised by Ryan Grassel and extended by MAKE Labs engineering intern Wynter Woods. Go team!
NOTE: The Raspberry Pi's broadcast frequency can range between 1Mhz and 250Mhz, which may interfere with government bands. We advise that you limit your transmissions to the standard FM band of 87.5MHz--108.0MHz and always choose a frequency that's not already in use, to avoid interference with licensed broadcasters.
Taken From: http://makezine.com/projects/make-38-cameras-and-av/raspberry-pirate-radio/
How does This Hack Works / Problems
@StavrosKorokithakis Raspberry Pi has clock generators, that can output square wave to the GPIO pins. If you program clock generator to the desired frequency you'll get the signal, and when you change the frequency, the signal becomes a frequency modulated (FM) radio. Bad points of this approach are: 1) square wave is very noisy -- plenty of harmonics and other frequencies are transmitted, 2) RasPi can output a lot of RF power, blocking some other transmissions in the very wide frequency spectrum.
http://raspberrypi.stackexchange.com/questions/7725/how-does-the-rf-fm-gpio-transmitter-hack-work
There's no such thing as square radio waves it's a mixture of multiple sinusoidal waves that make up the squares.
So your FM radio will work but it can only tune into the main sinusoidal component of your signal the rest are nasty harmonic distortions that pollute the entire FM band and beyond to Air Band. Building a radio receiver is very easy with the right transistor like the BF199, however getting a circuit to operate at high frequencies with little or no tuning drift and good reception is difficult.
As I had said earlier the RX/TX boards from eBay have everything you need to broadcast and receive digital signals in one direction you just need to wire it up to the Pi.
http://www.raspberrypi.org/forums/viewtopic.php?t=68201
Square Waves: http://en.wikipedia.org/wiki/Square_wave

1 comment:
Online Cisco Training, Online Linux Training, Online Ethical Hacking Training, Online CCNP Training, Online CCNA Training, Online MCSE Training, Online CCIE Training India, MCITP Training, Online VMware Training and more offered by Zoom Technologies by highly proficient CISCO certified experts - Hyderabad, India.
Post a Comment