Showing posts with label install. Show all posts

Wednesday, August 4, 2010

KDE 4 on Windows

Have you ever found yourself working on Windows—for whatever reason—and reached for one of your favorite applications from the free software world only to remember that it is not available on Windows?

It is not a problem for some of the best-known free software applications, such as Firefox, Thunderbird, OpenOffice.org, GIMP or Pidgin. However, for some popular Linux applications, such as those from the KDE desktop software project, cross-platform support only recently became a possibility. KDE relies on the Qt toolkit from Nokia, which has long been available under the GPL for operating systems such as Linux that use the X Window System, but it was available under proprietary licenses for Windows only until the most recent series, Qt4. With the release of a GPL Qt for Windows, KDE developers started work on porting the libraries and applications to Windows, and the KDE on Windows Project was born. The project tracks the main KDE releases on Linux and normally has Windows versions of the applications available shortly after.

Installation

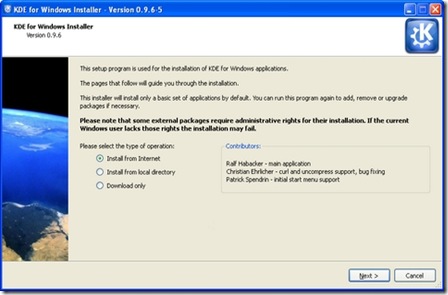
It is easy to try out KDE applications on Windows. Simply go to the project Web site (windows.kde.org), download and run the installer (Figure 1). You'll be presented with a few choices to make, such as the installation mode (a simple “End User” mode with a flat list of applications or the “Package Manager” mode that is categorized like many of the Linux package managers). You also are given the option of whether to install packages made with the Microsoft compiler or those made with a free software alternative—as many users are likely neither to care about nor understand this option, it may have been better to hide it in an advanced tab.

clip_image001

Figure 1. KDE on Windows Installer Welcome Screen

Next, you are presented with a choice of download mirrors, followed by the choice of which version of KDE software to install. It's hard to imagine why you wouldn't simply want the latest stable release, but the installer gives you a few options and, oddly, seems to preselect the oldest by default.

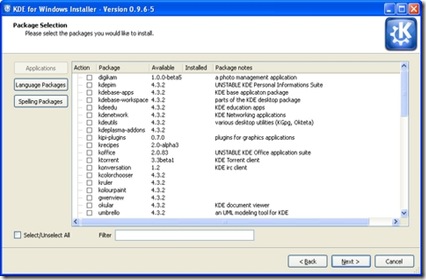
In the next step, you are presented with a list of applications and software groups available to install, or you can select everything (Figure 2). The installer then takes care of downloading and installing the software, and you don't need to make any further interventions. I did find that the speed of the various mirrors varied greatly; some were up to ten times faster than others. If you're short of time and things seem to be going slowly, it may be worth canceling the download and trying another mirror. The installer is intelligent enough to re-use what you already have downloaded, so you don't really lose anything in this way. When the installation is complete, your new KDE applications are available in a KDE Release subsection of the Windows application menu.

clip_image002

Figure 2. The installer provides a simple list of applications available for installation.

The main KDE 4 distribution for Linux is split into large modules—for example, Marble, a desktop globe application, is part of the KDE Education module with many other applications for subjects ranging from chemistry to astronomy. This works fine on Linux, where most of what you need is installed with your chosen distribution. But, if you're on Windows and want a desktop globe but have no interest in chemistry or physics, there are clear benefits in preserving your download bandwidth and hard-drive space by not downloading everything else. Patrick Spendrin, a member of both the KDE on Windows and Marble projects, says they recognize this issue: “as one can see, we are already working on splitting up packages into smaller parts, so that each application can be installed separately.” Many modules already have been split, so you can install the photo management application digiKam, individual games and key parts of the KDE software development kit separately from their companion applications. The productivity suite KOffice will be split up in a similar way in the near future, and Patrick hopes that the Education module will follow shortly afterward.

Overall, the installation process will feel familiar and easy if you've used Linux in the past. However, if you have used only Windows, the process of using a single installer to install whatever applications you want may seem a little strange. After all, most applications for Windows are installed by downloading a single self-contained executable file that installs the application and everything it needs to run in one go. The KDE on Windows installation process reflects the fact that KDE applications share a lot of code in common libraries.

Patrick explains that individual self-contained installers simply would not make sense at this stage: “the base libraries for a KDE application are around 200MB, so each single application installer would be probably this size.” A version of Marble, however, is available from its Web site as a self-contained installer—the map widget is pure Qt, so it is possible to maintain both a Qt and KDE user interface wrapping that widget. The pure Qt version is small enough to be packaged in this way.

As Torsten Rahn, Marble's original author and core developer puts it, having a standalone installer for the full KDE version of Marble “would increase the time a user needs to download and install Marble; installing the Qt version takes less than a minute.” It might be possible in the future to package a common runtime environment and provide applications as separate executables, similar to the approach taken by Java applications, but Patrick notes that this would take time, as “it would be a lot different from the current Linux-like layout.” In any case, the current approach has some advantages, because it makes you aware of other available applications and allows you to try them out simply by marking an extra check box.

First Impressions

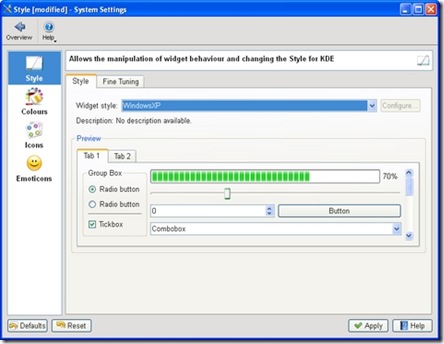
The KDE 4 Windows install comes with a slimmed-down version of the System Settings configuration module (Figure 3), which will be familiar to you if you've used KDE 4 on Linux. Here, you can adjust KDE 4 notifications and default applications in addition to language and regional settings. However, these apply only to the KDE applications, so you can encounter slightly odd situations. For example, if you open an image from Windows Explorer, it will be shown by the Windows Picture and Fax Viewer, but if you open the same file from KDE 4's Dolphin file manager, it will be opened with the KDE image viewer, Gwenview. Of course, you can use the Windows control panel to make Windows prefer KDE applications for opening images and documents and change the file associations for Dolphin so that it will use other Windows programs that you have installed, but you will need to make adjustments in both places to get consistent behavior.

clip_image003

Figure 3. The KDE System Settings module lets you adapt the look and feel of KDE applications to match your system.

System Settings also allows you to choose a selection of themes for your KDE applications, including some that tie in well with the Classic and Luna themes in Windows XP. At present, KDE 4 doesn't include special themes for Windows Vista or Windows 7. However, Windows users are accustomed to using mismatching software from many different vendors, and the KDE applications fit in as well as anything else.

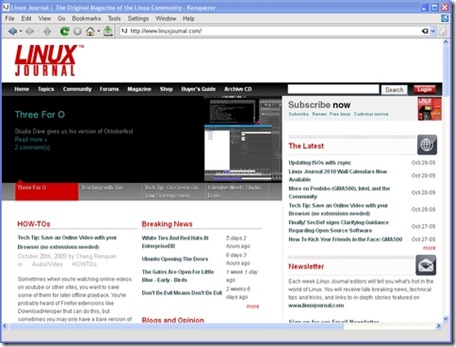
Most of the applications I tried seemed just fine, at least to start with. Konqueror, for example, correctly displayed the selection of major Web sites I visited (Figure 4). However, after using the applications for a while, I began to notice a less-than-perfect integration with the Windows environment. Okular, the KDE document viewer, used the default Windows dialog for open and save, with common Windows folders, such as Desktop and My Documents, available on the left-hand panel. However, other applications, such as KWord, used the KDE file dialog which, in common with the Dolphin file manager, has links on the left-hand panel to Home and Root. These labels probably will not mean a lot to a Windows user unfamiliar with a traditional Linux filesystem layout, and it would be nice to see Dolphin and KDE dialogs modified to show standard Windows folders, such as Desktop and My Documents instead.

clip_image004

Figure 4. KDE's Konqueror Web browser handled all the major sites I tried.

State of the Applications

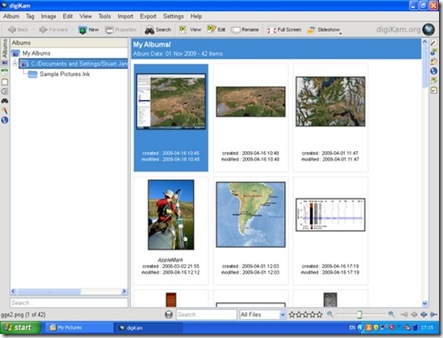
digiKam, the photo management application, is one of the real highlights of the KDE world on Linux (Figure 5). On Windows, it started fine, found all my images and allowed me to view a full-screen slideshow. I was able to use its powerful editing tool to crop a photo and adjust the color levels of an image, but when saving the modifications, I received an error that the save location was invalid. digiKam was attempting to prepend a forward slash (as found in a Linux filesystem) to the save location, so that it read “/C:/Documents and Settings...”. A small error, but one that makes practical use of the application difficult.

clip_image005

Figure 5. digiKam, the KDE photo manager, worked quite well, finding and organizing my photos.

KOffice2, still experimental on Linux, seemed to run quite well on Windows. I was able to create a document, save it in OpenDocument format and then open it in Okular. Windows users who primarily use Microsoft Office and don't want to use another office suite might consider Okular as a lightweight OpenDocument viewer.

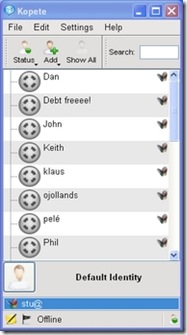
One of my favorite KDE applications on Linux is Kopete, the universal messaging application (Figure 6). I was able to log in to my Windows Live Messenger account and chat to my contacts, but the XMPP protocol (used by Google Talk) wasn't available. Integration with KDE's secure password storage system, KWallet, also seemed imperfect, as I had to go through two rounds of unlocking the wallet before Kopete appeared to have access to the account passwords.

clip_image006

Figure 6. Kopete works well with the Windows Live Messenger service but currently lacks XMPP support on Windows.

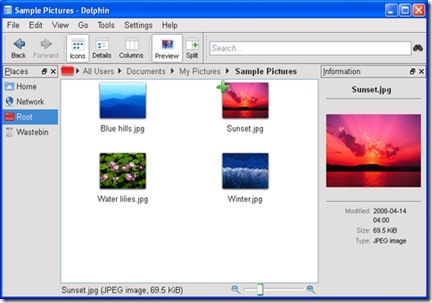
Dolphin, the file manager, seemed to work well (Figure 7), and its bread-crumb navigation structure made rapid switches between folders easy. It felt faster than Windows Explorer at loading thumbnails of images, and the preview pane provides excellent file overviews without having to open a dedicated application. If I spent a lot of time on Windows, I would be tempted to try Dolphin as an Explorer replacement. As mentioned previously, Konqueror also handled everything I threw at it.

clip_image007

Figure 7. The Dolphin file manager is an attractive and easy-to-use replacement for Explorer.

One notable application missing from the KDE installer is Amarok, the popular music player. The Amarok Web site explains that the Windows port is highly experimental and has been omitted from the KDE 4.3 release of the KDE on Windows installer, although it was available on Windows with KDE 4.2. In fact, no music or video player was available from the KDE installer for version 4.3, which is a shame, as the Phonon technology developed by KDE and integrated into Qt should make it easier than ever before to make such applications truly cross-platform.

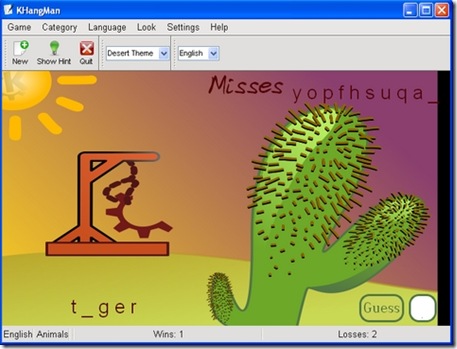
KDE 4 comes with a great selection of simple games built in, including the likes ofHangman, Battleships and a few more exotic options, such as Mahjongg (Figures 8 and 9). Windows includes its own applications for playing many of these games, but the KDE alternatives were highly impressive with beautiful artwork. I encountered few problems that would give any indication that they hadn't been designed for Windows in the first place—only some problems saving partially completed games due to differences between the Linux and Windows filesystem structures.

clip_image008

Figure 8. KMahjongg is beautifully presented and very usable on Windows.

clip_image009

Figure 9. KHangMan comes with a selection of nice themes and worked flawlessly.

Going All the Way: Plasma on Your Desktop

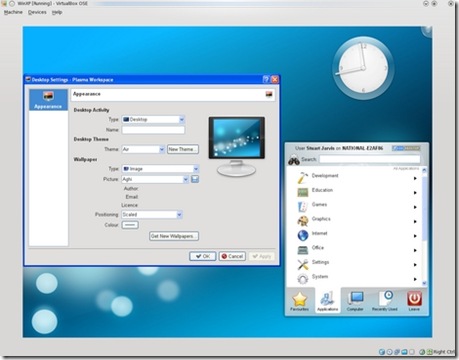
The desktop shell in KDE 4 on Linux is provided by Plasma, a flexible, integrated replacement for the separate desktop, widget and taskbar applications of KDE 3. It is possible to run Plasma as the desktop shell on Windows, but some major features are missing—such as a taskbar—and you need to make some changes to the Windows Registry to try it out. In fact, trying Plasma on Windows really is not a good idea on any machine that you care about, because once you have made the switch, you cannot easily revert it from within your KDE Plasma desktop session. The safest way to try Plasma on Windows is to use a new (and disposable) user account in Windows running in a virtual machine. If you do try it (see the Replacing the Windows Desktop Shell with KDE's Plasma sidebar for instructions), you'll be presented with a pretty KDE desktop (Figure 10) to which you can add a few of your favorite widgets, such as a clock or the KDE menu, run a few KDE applications and, well, that's about it. Windows programs are entirely inaccessible. Although there is a certain wow factor to having an almost complete KDE 4 desktop on your Windows machine, using it is not really practical in any serious way at present.

clip_image010

Figure 10. The KDE Plasma desktop shell running on Windows—attractive, but not yet very functional.

Replacing the Windows Desktop Shell with KDE's Plasma

First, this is a really bad idea and may make your Windows system unusable. If you must follow these instructions, use at least a spare user account and preferably a disposable install in a virtual machine. You have been warned.

If that has not put you off and you still want to see how Plasma looks on Windows, you need to download and run Autoruns for Windows from Microsoft (technet.microsoft.com/en-us/sysinternals/bb963902.aspx).

Next, simply unzip the downloaded archive and run autoruns.exe (not autorunsc.exe).

In the main program window that appears, you then have to select the Logon tab and find the entry that references explorer.exe. Double-click on that to open the registry editor and change the key to replace explorer.exe with the full path to plasma-desktop.exe (if you accepted the default KDE install options, this is probably C:\Program Files\KDE\bin\plasma-desktop.exe).

Log out and back in again. You should be presented with a pretty but largely nonfunctional Plasma desktop.

You'll probably have to press the computer reset button to escape.

Can KDE Succeed on Windows?

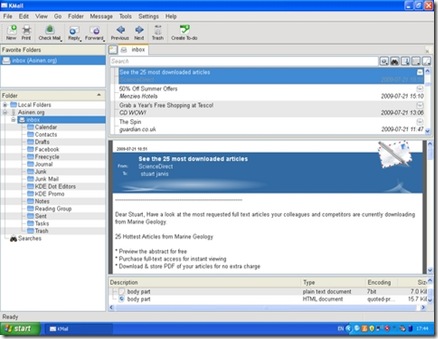
Some of the KDE applications are competing for your attention against better-known alternatives that you easily can install from a single executable file. KDE's Konqueror Web browser, although a fine application, finds itself in a very crowded market for Windows browsers with Internet Explorer already installed and the likes of Firefox, Opera, Safari and Google Chrome all available as alternatives. The potential for some other applications to become popular on Windows is, however, much higher. Kopete faces only Pidgin and the proprietary Trillian messenger as serious competition in the market for multiprotocol messaging clients. Okular is a lightweight but well featured alternative to Adobe Reader. Marble is almost in a class of its own—the nearest competitor perhaps being Google Earth. Kontact, the Personal Information Management suite, also has potential as a compelling cross-platform alternative to existing solutions (Figure 11). Mozilla Thunderbird is a clear competitor, but it lacks comprehensive calendar functionality. Benjamin Dietrich, working in IT support at a German university, who currently has to support many different mail applications across the various computing platforms, believes Kontact could “provide one solution, once it is as mature as it is on Linux”. However, a way to distribute Kontact as a self-contained installer easily would add to its appeal: “a single binary installer would be perfect.”

clip_image011

Figure 11. KMail, part of the KDE Kontact Personal Information Management suite, was able to connect to my mail server and download my e-mail.

The spread of KDE applications to Windows also has had benefits for the wider KDE Project. Amarok's integration with the Last.fm music service was largely put together by a developer who used Windows rather than Linux. It is unlikely that he would have become involved if it had not been possible at the time to run Amarok on Windows. Getting exposure to users on Windows also gives KDE the potential to attract users to trying KDE 4 on Linux and should make the transition for such users easier if they already know some of the applications.

Conclusion

The KDE on Windows Project still is quite young, and there are plenty of rough edges in many of the applications and some notable gaps in the application line-up. However, the installation process works well and is straightforward for anyone who has used a package manager on Linux. Although the installation process is different from that of most Windows applications, the installer is sufficiently well designed that it should not cause problems for most Windows users. The recent and continuing work to split up applications so that users can install exactly what they want also lowers the barriers to trying out KDE applications in Windows. Some of the applications have great potential to fill gaps in the Windows application world, particularly as free software alternatives to proprietary applications. As the project Web site freely admits, many of the applications may not yet be ready for day-to-day use, but they are well worth checking out and will only get better.

Stuart Jarvis is a scientist and longtime KDE user. He divides his time between digging up some of the world's finest mud and regretting ill-judged experiments with pre-release software.

Taken From: http://www.linuxjournal.com/article/10639
Wednesday, December 16, 2009

Installing Magento - Shopping Cart

Magento HOWTO


# Install Apache With It's Documentation #####

$ sudo apt-get install apache2 apache2-doc

# Start Apache (it should already be started) #####
$ sudo /etc/init.d/apache2 start


# Test Apache #####

Type on Mozilla Firefox: http://127.0.0.1/
It souhld read: It works!

Note: The message "It works!" can be found at the /var/www
directorie, which is apaches's root directory, wich is were
we will install Magento.


# Instaling MySQL and PHP necessary Dependencies #####


$ sudo apt-get install mysql-server mysql-client
Type in mySQL's root password in the upcoming textbox.

$ sudo apt-get install libapache2-mod-php5 libapache2-mod-perl2

$ sudo apt-get install php5 php5-cli php5-common php5-curl php5-dev php5-gd php5-imap php5-ldap

$ sudo apt-get install php5-mhash php5-mysql php5-odbc curl libwww-perl imagemagick

$ apt-get install php5-mcrypt

# Creating Magento MySQL Database #####

$ mysql -u root -p

mysql> create database magento;

mysql> exit


# Extract Magento #####

$ cd /home/user/Desktop/magento

$ unzip magento.zip


# Installing Magento in Apache #####

# Copiar o Magento para /var/www (apache root dir)
$ sudo cp -vr magento /var/www


# Give Apache Ownership Over SugarCRM Files (apache-user: www-data) #####

$ sudo chown www-data -vR /var/www/magento*


# Configuring php.ini #####

sudo gedit /etc/php5/apache2/php.ini


;memory_limit = 16M
memory_limit = 64M


# Restart Apache #####

$ sudo /etc/init.d/apache2 restart


# Delete Apache's Test Page #####

$ sudo rm -rf /var/www/index.html


# Configuring Magento #####

Type on Mozilla Firefox:
http://127.0.0.1/magento/install.php
and configure Magento acording to the presented instructions.


Other Shopping Carts Reviews

http://webtecker.com/2008/04/22/8-best-open-source-shopping-cart-solutions/
http://www.siteground.com/shopping_cart_reviews.htm


Friday, April 10, 2009

Download, Store and Install Packages in Ubuntu Automaticly

I normaly like to have the packages I install stored, to use later on. This is helpfull you don't have an internet conection or have a slow one, or need to install the same stuff on multiple machine.

So I have made a couple off scripts in bash language, which I had never used before, so these migth no be the best scripts in the world but they get the jobe done.

The first script (download_and_store) to download and store in folders all of my favorite apps, and another that installs every apps (install_all) on those folders.


download_and_store
--------------------------------------------------------------------------------------------------

#!/bin/bash

## List of packages to download ####
L_PACKAGES_TO_DOWNLOAD="

vlc
mplayer
amarok
wireshark
k3b

"
################################

D_APTGET_CACHE="/var/cache/apt/archives"

echo "Where will you want to store the packages"
read D_DOWNLOADED_PACKAGES

# clean apt-get's cache
apt-get clean

# create the root directory for the downloaded package ##
mkdir -p $D_DOWNLOADED_PACKAGES


for i in $L_PACKAGES_TO_DOWNLOAD ; do ## go through all the packages on the list

## download apt-get packages whithout instaling them (apt-get cache) ##
apt-get install -d $i

## create the dir for the downloaded package ##
mkdir $D_DOWNLOADED_PACKAGES/$i

## move de downloaded package on apt-get chache to the created dir ##
mv $D_APTGET_CACHE/*.deb $D_DOWNLOADED_PACKAGES/$i

# clean apt-get's cache
apt-get clean

done


install_all
----------------------------------------------------------------------

#!/bin/bash
for i in $( ls -p | grep "/" ); do ## go through every dir
echo ">>>>>>>>>>>>>>>>>>>>>"
cd $i ## enter a dir (where the packages and dependecies are)
echo Dir Actual: $(pwd)
dpkg -i *.deb ## install all debs (package and its dependencies)
cd ..
echo "<<<<<<<<<<<<<<<<<<<<<" done


Now for the demonstration, lets use download_and_store to download all of you favorite apps.

# create a file for download_and_store #####
$ sudo gedit download_and_store

paste the script above, and change the list L_PACKAGES_TO_DOWNLOAD, to include you favorite packages (these are separeted by a space or newline).

# give the script permitions to execute #####
$ sudo chmod 777 /path_to_it/download_and_store

# execute download_and_store
$ cd /path_to_it
$ ./download_and_store
Where will you want to store the packages
/home/my_user/Desktop/saved_apps --> you chose this dir

Now just wait...

Once its over you will have in /home/my_user/Desktop/saved_apps a folder for each application, for example vlc, you wil have a dir named vlc whith the vlc package and all of it's dependencies.

============================
Now, lets use install_all to install all of your downloaded apps.

# create a file for install_all #####
$ sudo gedit /home/my_user/Desktop/saved_apps/install_all

as you can see install_all must be in the root dir you inputed earlier ( /home/my_user/Desktop/saved_apps), this script will install all he can find in the dirs below.

# give the script permitions to execute #####
$ sudo chmod 777 /home/my_user/Desktop/saved_apps/install_all

# execute download_and_store
$ cd /home/my_user/Desktop/saved_apps/
$ ./install_all

Now wait...

There you apps should all be installed.

These scripts are very basic, these are my first in bash programing, and aren't fully tested, but if you can get an idea from them, or even improve them I'm happy.

Tuesday, January 27, 2009

Installing the SMF Forum on Linux

# Install Apache With It's Documentation #####
$ sudo apt-get install apache2 apache2-doc

# Start Apache (it should already be started) #####
$ sudo /etc/init.d/apache2 start


# Test Apache #####

Type on Mozilla Firefox: http://127.0.0.1/
It souhld read: It works!

Note: The message "It works!" can be found at the /var/www
directorie, which is apaches's root directory, wich is were
we will install SMF.


# Instaling MySQL and PHP necessary Dependencies #####

$ sudo apt-get install mysql-server mysql-client
Type in mySQL's root password in the upcoming textbox.

$ sudo apt-get install libapache2-mod-php5 libapache2-mod-perl2

$ sudo apt-get install php5 php5-cli php5-common php5-curl php5-dev php5-gd php5-imap php5-ldap

$ sudo apt-get install php5-mhash php5-mysql php5-odbc curl libwww-perl imagemagick


# Extract SMF #####

$ unzip smf_1-1-7_install.zip


# Installing SMF in Apache #####

# Copy SMF to /var/www (apache root dir)
$ sudo cp -vr smf_1-1-7_install /var/www


# Give Apache Ownership Over SMF Files (apache-user: www-data) #####

$ sudo chown www-data -vR /var/www/smf_1-1-7_install/*


# Restart Apache #####

$ sudo /etc/init.d/apache2 restart


# Delete Apache's Test Page #####

$ sudo rm -rf /var/www/index.html


# Configuring SMF #####

Type on Mozilla Firefox:
http://127.0.0.1/smf_1-1-7_install/install.php
and configure SMF acording to the presented instructions.


Now your forum is on:

http://127.0.0.1/smf_1-1-7_install/index.php
or
http://127.0.0.1/smf_1-1-7_install/

Thursday, January 8, 2009

Installing a Web Application (SugarCRM) on a WebHost

The web application in this example is SugarCRM (SugarCE-5.0.0f) which I already shown how to install on you own host here. Now I'm going to show you how to install it on a WebHost (like BlueHost or others). Installing a web application on a web host is a bit trickier because what you can do on the webhost is very limited.

Im going to assume that you have SugarCRM working on you computer using the howto about installing SugarCRM on your own webhost you can find here. We are going to use this as a basis of comparison between the configs you have localy and the ones on the webhost. You may not need this.


Lets Start...

Create on the webhost the folder SugarCRM, using an FTP client like gftp.

Upload a file php.info (below) on to the folder SugarCRM on the webhost in order to obtain information about the instaled modules and php.ini (/etc/php5/apache2/php.ini) configuration, since you can't access them directly.


Copy the phpinfo.php to your local SugarCRM folder at the apache root (/var/www), not because you are limited but to make it easyer to compare with the webhost config

$ cp /path_to_phpinfo/phpinfo.php /var/www/SugarCRM


Check if the webhost as the apache modules you need

On the browser execute:

http//www.your_domain_on_the_webhost.com/SugarCRM/phpinfo.php

and check the "Loaded Modules" for the needed modules, if you dont now the modules you need execute also:

http://127.0.0.1/SugarCRM/phpinfo.php

and compare the modules you have localy to the the ones on the webhost, the modules you have locally migth not all be needed but if your webhost has them it will work for sure. If there are missing modules contact you webhost and ask them to install them.

Extracting SugarCRM

$ unzip SugarCE-5.0.0f.zip

From now on we are going to prepare on our local machine SugarCRM, in order to upload to the webhost all thats necessary, to minimize the problems.

Defining the read and write permissions on some of SugarCRM's files

$ cd /path_to_extracted_sugar/SugarCE-Full-5.0.0f

$ sudo chmod 766 config.php

$ sudo chmod 766 custom

$ sudo chmod -R 766 data

$ sudo chmod -R 766 cache

$ sudo chmod -R 766 modules


Creating the the SugarCRM sessions directory, seen that by default SugarCRM sessions directory woul be /var/lib/php/session to wich on the webhost we won't have access.

$ cd /path_to_extracted_sugar/SugarCE-Full-5.0.0f

$ mkdir session_save

$ sudo chmod 770 session_save


Configuring php.ini via .htaccess

Seen that we dont have access to php.ini on the webhost (/etc/php5/apache2/php.ini), we are going have to put the configurations we need on the file .htaccess, notice that the configurations on .htaccess only affects the directory where it is and those bellow it.

In order to now what to put on .htaccess, what I did was, execute the phpinfo.php on my local SugarCRM folder and the Webhost, like this:

http:/www.your_domain_on_the_webhost.com/SugarCRM/phpinfo.php (Webhost SugarCRM)

http://127.0.0.1/phpinfo.php (Local SugarCRM)

And saw the differences between the different variables in "Configuration - PHP Core" (php.ini config), and changed the ones in the webhost that were different to the value the local ones had. They not all be needed but if it work locally on the web host should work to. The result was the following .htaccess:

.htaccess - put in /path_to_extracted_sugar/SugarCE-Full-5.0.0f
--------------------------------------------------------------------

php_value memory_limit 50M
php_value upload_max_filesize 10M
php_value allow_call_time_pass_reference On
php_value allow_url_fopen On
php_value display_errors On
php_value enable_dl On
php_value magic_quotes_gpc On
php_value register_long_arrays On
php_value safe_mode Off
php_value session.save_path /home/my_ftp_user_name/SugarCRM/session_save

The last value php_value session.save_path you have to ask to you webhost, where on in their machine is the top folder you access via FTP, which in my case is /home/my_user_name/, the rest is same (SugarCRM/session_save). Or you can always try to gess it /home/your_ftp_user_name.


Nowing that after the upload of SugarCRM to the webhost in order for SugarCRM to work, like any other webapp, the must be owned by the apache user. Now the problem is, that if apache owns the the files you wont be able to access the if there's some kind of problem, or even delete them.

My solution for this problem is giving the same read,write, execute permitions that the owner has, to the group and being a part of this group, like this you will have the same permitions you had before apache became the owner of the files.

In order to do that we are going to use the following script:

usertogroup
---------------------
#!/bin/ksh
echo "Enter Base Directory: "
read source_dir
for file in `find $source_dir`
do
#full=`ls -ld $file |awk '{print $1}'`
owner=`ls -ld $file | cut -c2-4`
#echo "$full $file ----------------> chmod g+$owner $file"
chmod g+$owner $file
done

$ sudo chmod 777 usertogroup

$ sh usertogroup
Enter Base Directory:
/path_to_extracted_sugar/SugarCE-Full-5.0.0f


Now that we have SugarCRM prepared in our computer, lets upload the contents off /path_to_extracted_sugar/SugarCE-Full-5.0.0f to the SugarCRM
folder that we created before, using an FTP client like gFTP.

The folowing steps you have to ask the webhost to do the following:

- Change the owner of all of the SugarCRM files to the apache user

- Add our username to the group that the file belongs to.


Now you should be able to configure SugarCRM, by executing the following in the browser:

http://www.your_domain_on_the_webhost.com/SugarCRM/install.php

and configure SugarCRM, once configure you can access SugarCRM's main page by executing the following in the web browser:

http://www.your_domain_on_the_webhost.com/SugarCRM/index.php

OR

http://www.your_domain_on_the_webhost.com/SugarCRM

And thats it, now you sould have SugarCRM up and running.

Monday, July 14, 2008

SugarCRM 5.0.0f on Ubuntu 8.04 (Hardy Heron)

SugarCRM HOWTO


# Install Apache With It's Documentation #####
$ sudo apt-get install apache2 apache2-doc

# Start Apache (it should already be started) #####
$ sudo /etc/init.d/apache2 start


# Test Apache #####

Type on Mozilla Firefox: http://127.0.0.1/
It souhld read: It works!

Note: The message "It works!" can be found at the /var/www
directorie, which is apaches's root directory, wich is were
we will install SugaCRM.


# Instaling MySQL and PHP necessary Dependencies #####

$ sudo apt-get install mysql-server mysql-client
Type in mySQL's root password in the upcoming textbox.

$ sudo apt-get install libapache2-mod-php5 libapache2-mod-perl2

$ sudo apt-get install php5 php5-cli php5-common php5-curl php5-dev php5-gd php5-imap php5-ldap

$ sudo apt-get install php5-mhash php5-mysql php5-odbc curl libwww-perl imagemagick


# Creating SugarCRM MySQL Database #####

$ mysql -u root -p

mysql> create database sugarcrm;

mysql> exit


# Extract SugarCRM #####

$ cd /home/jose/Desktop/SugarCRM

$ unzip SugarCE-5.0.0f.zip


# Installing SugarCRM in Apache #####

# Copiar o SugarCRM para /var/www (apache root dir)
$ sudo cp -vr SugarCE-Full-5.0.0f /var/www


# Give Apache Ownership Over SugarCRM Files (apache-user: www-data) #####

$ sudo chown www-data -vR /var/www/SugarCE-Full-5.0.0f/*


# Write Permitions for Apache on Some of SugarCRM Files #####

$ cd /var/www/SugarCE-Full-5.0.0f

$ sudo chmod 766 config.php

$ sudo chmod 766 custom

$ sudo chmod -R 766 data

$ sudo chmod -R 766 cache

$ sudo chmod -R 766 modules


# Restart Apache #####

$ sudo /etc/init.d/apache2 restart


# Delete Apache's Test Page #####

$ sudo rm -rf /var/www/index.html


# Configuring php.ini #####

sudo gedit /etc/php5/apache2/php.ini


;memory_limit = 16M
memory_limit = 50M

;upload_max_filesize = 2M
upload_max_filesize = 10M


# Configuring SugarCRM #####

Type on Mozilla Firefox:
http://127.0.0.1/SugarCE-Full-5.0.0f/install.php
and configure SugarCRM acording to the presented instructions.

Tuesday, July 1, 2008

PXE Magic - Boot OS from the Network (with Menus)

PXE Magic: Flexible Network Booting with Menus
April 1st, 2008 by Kyle Rankin in

* SysAdmin

Set up a PXE server and then add menus to boot kickstart images, rescue disks and diagnostic tools all from the network.

It's funny how automation evolves as system administrators manage larger numbers of servers. When you manage only a few servers, it's fine to pop in an install CD and set options manually. As the number of servers grows, you might realize it makes sense to set up a kickstart or FAI (Debian's Fully Automated Installer) environment to automate all that manual configuration at install time. Now, you boot the install CD, type in a few boot arguments to point the machine to the kickstart server, and go get a cup of coffee as the machine installs.

When the day comes that you have to install three or four machines at once, you either can burn extra CDs or investigate PXE boot. The Preboot eXecution Environment is an open standard developed by Intel to allow machines to boot over a network instead of from local media, such as a floppy, CD or hard drive. Modern servers and newer laptops and desktops with integrated NICs should support PXE booting in the BIOS—in some cases, it's enabled by default, and in other cases, you need to go into your BIOS settings to enable it.

Because many modern servers these days offer built-in remote power and remote terminals or otherwise are remotely accessible via serial console servers or networked KVM, if you have a PXE boot environment set up, you can power on remotely, then boot and install a machine from miles away.

If you have never set up a PXE boot server before, the first part of this article covers the steps to get your first PXE server up and running. If PXE booting is old hat to you, skip ahead to the section called PXE Menu Magic. There, I cover how to configure boot menus when you PXE boot, so instead of hunting down MAC addresses and doing a lot of setup before an install, you simply can boot, select your OS, and you are off and running. After that, I discuss how to integrate rescue tools, such as Knoppix and memtest86+, into your PXE environment, so they are available to any machine that can boot from the network.
PXE Setup

You need three main pieces of infrastructure for a PXE setup: a DHCP server, a TFTP server and the syslinux software. Both DHCP and TFTP can reside on the same server. When a system attempts to boot from the network, the DHCP server gives it an IP address and then tells it the address for the TFTP server and the name of the bootstrap program to run. The TFTP server then serves that file, which in our case is a PXE-enabled syslinux binary. That program runs on the booted machine and then can load Linux kernels or other OS files that also are shared on the TFTP server over the network. Once the kernel is loaded, the OS starts as normal, and if you have configured a kickstart install correctly, the install begins.
Configure DHCP

Any relatively new DHCP server will support PXE booting, so if you don't already have a DHCP server set up, just use your distribution's DHCP server package (possibly named dhcpd, dhcp3-server or something similar). Configuring DHCP to suit your network is somewhat beyond the scope of this article, but many distributions ship a default configuration file that should provide a good place to start. Once the DHCP server is installed, edit the configuration file (often in /etc/dhcpd.conf), and locate the subnet section (or each host section if you configured static IP assignment via DHCP and want these hosts to PXE boot), and add two lines:

next-server ip_of_pxe_server;
filename "pxelinux.0";

The next-server directive tells the host the IP address of the TFTP server, and the filename directive tells it which file to download and execute from that server. Change the next-server argument to match the IP address of your TFTP server, and keep filename set to pxelinux.0, as that is the name of the syslinux PXE-enabled executable.

In the subnet section, you also need to add dynamic-bootp to the range directive. Here is an example subnet section after the changes:

subnet 10.0.0.0 netmask 255.255.255.0 {
range dynamic-bootp 10.0.0.200 10.0.0.220;
next-server 10.0.0.1;
filename "pxelinux.0";
}

Install TFTP

After the DHCP server is configured and running, you are ready to install TFTP. The pxelinux executable requires a TFTP server that supports the tsize option, and two good choices are either tftpd-hpa or atftp. In many distributions, these options already are packaged under these names, so just install your distribution's package or otherwise follow the installation instructions from the project's official site.

Depending on your TFTP package, you might need to add an entry to /etc/inetd.conf if it wasn't already added for you:

tftp dgram udp wait root /usr/sbin/in.tftpd
/usr/sbin/in.tftpd -s /var/lib/tftpboot

As you can see in this example, the -s option (used for tftpd-hpa) specified /var/lib/tftpboot as the directory to contain my files, but on some systems, these files are commonly stored in /tftpboot, so see your /etc/inetd.conf file and your tftpd man page and check on its conventions if you are unsure. If your distribution uses xinetd and doesn't create a file in /etc/xinetd.d for you, create a file called /etc/xinetd.d/tftp that contains the following:

# default: off
# description: The tftp server serves files using
# the trivial file transfer protocol.
# The tftp protocol is often used to boot diskless
# workstations, download configuration files to network-aware
# printers, and to start the installation process for
# some operating systems.
service tftp
{
disable = no
socket_type = dgram
protocol = udp
wait = yes
user = root
server = /usr/sbin/in.tftpd
server_args = -s /var/lib/tftpboot
per_source = 11
cps = 100 2
flags = IPv4
}

As tftpd is part of inetd or xinetd, you will not need to start any service. At most, you might need to reload inetd or xinetd; however, make sure that any software firewall you have running allows the TFTP port (port 69 udp) as input.
Add Syslinux

Now that TFTP is set up, all that is left to do is to install the syslinux package (available for most distributions, or you can follow the installation instructions from the project's main Web page), copy the supplied pxelinux.0 file to /var/lib/tftpboot (or your TFTP directory), and then create a /var/lib/tftpboot/pxelinux.cfg directory to hold pxelinux configuration files.
PXE Menu Magic

You can configure pxelinux with or without menus, and many administrators use pxelinux without them. There are compelling reasons to use pxelinux menus, which I discuss below, but first, here's how some pxelinux setups are configured.

When many people configure pxelinux, they create configuration files for a machine or class of machines based on the fact that when pxelinux loads it searches the pxelinux.cfg directory on the TFTP server for configuration files in the following order:

*

Files named 01-MACADDRESS with hyphens in between each hex pair. So, for a server with a MAC address of 88:99:AA:BB:CC:DD, a configuration file that would target only that machine would be named 01-88-99-aa-bb-cc-dd (and I've noticed it does matter that it is lowercase).
*

Files named after the host's IP address in hex. Here, pxelinux will drop a digit from the end of the hex IP and try again as each file search fails. This is often used when an administrator buys a lot of the same brand of machine, which often will have very similar MAC addresses. The administrator then can configure DHCP to assign a certain IP range to those MAC addresses. Then, a boot option can be applied to all of that group.
*

Finally, if no specific files can be found, pxelinux will look for a file named default and use it.

One nice feature of pxelinux is that it uses the same syntax as syslinux, so porting over a configuration from a CD, for instance, can start with the syslinux options and follow with your custom network options. Here is an example configuration for an old CentOS 3.6 kickstart:

default linux
label linux
kernel vmlinuz-centos-3.6
append text nofb load_ramdisk=1 initrd=initrd-centos-3.6.img
↪network ks=http://10.0.0.1/kickstart/centos3.cfg

Why Use Menus?

The standard sort of pxelinux setup works fine, and many administrators use it, but one of the annoying aspects of it is that even if you know you want to install, say, CentOS 3.6 on a server, you first have to get the MAC address. So, you either go to the machine and find a sticker that lists the MAC address, boot the machine into the BIOS to read the MAC, or let it get a lease on the network. Then, you need to create either a custom configuration file for that host's MAC or make sure its MAC is part of a group you already have configured. Depending on your infrastructure, this step can add substantial time to each server. Even if you buy servers in batches and group in IP ranges, what happens if you want to install a different OS on one of the servers? You then have to go through the additional work of tracking down the MAC to set up an exclusion.

With pxelinux menus, I can preconfigure any of the different network boot scenarios I need and assign a number to them. Then, when a machine boots, I get an ASCII menu I can customize that lists all of these options and their number. Then, I can select the option I want, press Enter, and the install is off and running. Beyond that, now I have the option of adding non-kickstart images and can make them available to all of my servers, not just certain groups. With this feature, you can make rescue tools like Knoppix and memtest86+ available to any machine on the network that can PXE boot. You even can set a timeout, like with boot CDs, that will select a default option. I use this to select my standard Knoppix rescue mode after 30 seconds.
Configure PXE Menus

Because pxelinux shares the syntax of syslinux, if you have any CDs that have fancy syslinux menus, you can refer to them for examples. Because you want to make this available to all hosts, move any more specific configuration files out of pxelinux.cfg, and create a file named default. When the pxelinux program fails to find any more specific files, it then will load this configuration. Here is a sample menu configuration with two options: the first boots Knoppix over the network, and the second boots a CentOS 4.5 kickstart:

default 1
timeout 300
prompt 1
display f1.msg
F1 f1.msg
F2 f2.msg

label 1
kernel vmlinuz-knx5.1.1
append secure nfsdir=10.0.0.1:/mnt/knoppix/5.1.1
↪nodhcp lang=us ramdisk_size=100000 init=/etc/init
↪2 apm=power-off nomce vga=normal
↪initrd=miniroot-knx5.1.1.gz quiet BOOT_IMAGE=knoppix
label 2
kernel vmlinuz-centos-4.5-64
append text nofb ksdevice=eth0 load_ramdisk=1
↪initrd=initrd-centos-4.5-64.img network
↪ks=http://10.0.0.1/kickstart/centos4-64.cfg

Each of these options is documented in the syslinux man page, but I highlight a few here. The default option sets which label to boot when the timeout expires. The timeout is in tenths of a second, so in this example, the timeout is 30 seconds, after which it will boot using the options set under label 1. The display option lists a message if there are any to display by default, so if you want to display a fancy menu for these two options, you could create a file called f1.msg in /var/lib/tftpboot/ that contains something like:

----| Boot Options |-----
| |
| 1. Knoppix 5.1.1 |
| 2. CentOS 4.5 64 bit |
| |
-------------------------

Main | Help
Default image will boot in 30 seconds...


Notice that I listed F1 and F2 in the menu. You can create multiple files that will be output to the screen when the user presses the function keys. This can be useful if you have more menu options than can fit on a single screen, or if you want to provide extra documentation at boot time (this is handy if you are like me and create custom boot arguments for your kickstart servers). In this example, I could create a /var/lib/tftpboot/f2.msg file and add a short help file.

Although this menu is rather basic, check out the syslinux configuration file and project page for examples of how to jazz it up with color and even custom graphics.
Extra Features: PXE Rescue Disk

One of my favorite features of a PXE server is the addition of a Knoppix rescue disk. Now, whenever I need to recover a machine, I don't need to hunt around for a disk, I can just boot the server off the network.

First, get a Knoppix disk. I use a Knoppix 5.1.1 CD for this example, but I've been successful with much older Knoppix CDs. Mount the CD-ROM, and then go to the boot/isolinux directory on the CD. Copy the miniroot.gz and vmlinuz files to your /var/lib/tftpboot directory, except rename them something distinct, such as miniroot-knx5.1.1.gz and vmlinuz-knx5.1.1, respectively. Now, edit your pxelinux.cfg/default file, and add lines like the one I used above in my example:

label 1
kernel vmlinuz-knx5.1.1
append secure nfsdir=10.0.0.1:/mnt/knoppix/5.1.1 nodhcp
↪lang=us ramdisk_size=100000 init=/etc/init 2
↪apm=power-off nomce vga=normal
↪initrd=miniroot-knx5.1.1.gz quiet BOOT_IMAGE=knoppix

Notice here that I labeled it 1, so if you already have a label with that name, you need to decide which of the two to rename. Also notice that this example references the renamed vmlinuz-knx5.1.1 and miniroot-knx5.1.1.gz files. If you named your files something else, be sure to change the names here as well. Because I am mostly dealing with servers, I added 2 after init=/etc/init on the append line, so it would boot into runlevel 2 (console-only mode). If you want to boot to a full graphical environment, remove 2 from the append line.

The final step might be the largest for you if you don't have an NFS server set up. For Knoppix to boot over the network, you have to have its CD contents shared on an NFS server. NFS server configuration is beyond the scope of this article, but in my example, I set up an NFS share on 10.0.0.1 at /mnt/knoppix/5.1.1. I then mounted my Knoppix CD and copied the full contents to that directory. Alternatively, you could mount a Knoppix CD or ISO directly to that directory. When the Knoppix kernel boots, it will then mount that NFS share and access the rest of the files it needs directly over the network.
Extra Features: Memtest86+

Another nice addition to a PXE environment is the memtest86+ program. This program does a thorough scan of a system's RAM and reports any errors. These days, some distributions even install it by default and make it available during the boot process because it is so useful. Compared to Knoppix, it is very simple to add memtest86+ to your PXE server, because it runs from a single bootable file. First, install your distribution's memtest86+ package (most make it available), or otherwise download it from the memtest86+ site. Then, copy the program binary to /var/lib/tftpboot/memtest. Finally, add a new label to your pxelinux.cfg/default file:

label 3
kernel memtest

That's it. When you type 3 at the boot prompt, the memtest86+ program loads over the network and starts the scan.
Conclusion

There are a number of extra features beyond the ones I give here. For instance, a number of DOS boot floppy images, such as Peter Nordahl's NT Password and Registry Editor Boot Disk, can be added to a PXE environment. My own use of the pxelinux menu helps me streamline server kickstarts and makes it simple to kickstart many servers all at the same time. At boot time, I can not only indicate which OS to load, but also more specific options, such as the type of server (Web, database and so forth) to install, what hostname to use, and other very specific tweaks. Besides the benefit of no longer tracking down MAC addresses, you also can create a nice colorful user-friendly boot menu that can be documented, so it's simpler for new administrators to pick up. Finally, I've been able to customize Knoppix disks so that they do very specific things at boot, such as perform load tests or even set up a Webcam server—all from the network.

Resources

tftp-hpa: www.kernel.org/pub/software/network/tftp

atftp: ftp.mamalinux.com/pub/atftp

Syslinux PXE Page: syslinux.zytor.com/pxe.php

Red Hat's Kickstart Guide: www.redhat.com/docs/manuals/enterprise/RHEL-4-Manual/sysadmin-guide/ch-kickstart2.html

Knoppix: www.knoppix.org

Memtest86+: www.memtest.org

Kyle Rankin is a Senior Systems Administrator in the San Francisco Bay Area and the author of a number of books, including Knoppix Hacks and Ubuntu Hacks for O'Reilly Media. He is currently the president of the North Bay Linux Users' Group.


Taken From: Linux Journal, nº 168 April 2008 - PXE Magic: Flexible Network Booting with Menus, by Kyle Rankin

Live CD From Your In Installation / Running System - Ubuntu - Easy Way

In the previous posts I have shown howto remaster an Ubuntu LiveCd, which could also be used to make a LiveCd from your running system with some minor modifications, but the method I will be showing is fully automatic and effortless, and it works i tested it under ubuntu 8.04 and worked like a charm.

You can also use this, to customize an Ubuntu LiveCd if you install it on your hard drive and them use this method.


First off all you have to get remastersys:

$ wget http://www.mirrorservice.org/sites/download.sourceforge.net/pub/sourceforge/r/re/remastersys/remastersys_2.0-5_all.deb

$ sudo dpkg -i remastersys_2.0-5_all.deb


Now you just have to use remastersys either in the "Bash Shell" or via its "Gui":


-----------
Bash Sell
-----------

You have basically you have three options:


backup - backs up your system including your /home folder with
your users on it.

dist - omits the /home folder thus making it a distributable cd
that you can give to your friends.

clean - removes the temporary folder that was created, including the
new iso so burn it and copy it elsewhere before you run
"sudo remastersys clean"


If you want to make a LiveCd you choices are either 'backup' or 'dist', I'm going for 'dist':

$ sudo remastersys dist

Now the process starts and you have to do is wait, be sure have enough space in your system because remastersys is going to make /home/remastersys dir and work there.

When it all ends, you have an iso off your LiveCd, that you can burn with K3B or other, at:

/home/remastersys/remastersys/customdist.iso

Now burn it or move it and clean all the temp files remastersys created under /home/remastersys, using the following command:

$ sudo remastersys clean


-----------
Gui
-----------

To run the remastersys gui, which is very basic, just type:

$ sudo remastersys-gui

The gui presents you, with the following options:

Back Complete System including User Data
Make a Distributable copy to share with friends
Modify the remastersys config file to customize options
Remove temporary files
About Remastersys Backup
Quit Remastersys Backup

If you want to make a LiveCd you choices are either 'Back Complete System including User Data' (backup) or 'Make a Distributable copy to share with friends' (dist), I'm going for 'Make a Distributable copy to share with friends'.

Now the process starts and you have to do is wait, be sure have enough space in your system because remastersys is going to make /home/remastersys dir and work there.

When it all ends, you have an iso off your LiveCd, that you can burn with K3B or other, at:

/home/remastersys/remastersys/customdist.iso

Now burn it or move it and clean all the temp files remastersys created under /home/remastersys, execute the remastersys gui once again:

$ sudo remastersys-gui

and chose:

Remove temporary files


Happy LiveCD Making.

Wednesday, June 27, 2007

Nessus Instalation and Configuration

Nessus is a vulnerability scaner composed of two parts, the server and the client frontend.
The first step is to install the server and the client with the folowing comands:


# apt-get install nessusd

# apt-get install nessus


Now you need to add a user to nessus or else it wont connect to the server, even if you try your login and password on the machine where the server is instaled.


# sudo nessus-adduser

Password:
Using /var/tmp as a temporary file holder
Add a new nessusd user
----------------------

Login : my_login
Authentication (pass/cert) [pass] :
Login password :
Login password (again) :
User rules
----------
nessusd has a rules system which allows you to restrict the hosts
that my_login has the right to test. For instance, you may want
him to be able to scan his own host only.
Please see the nessus-adduser(8) man page for the rules syntax

Login : my_login
Password : ***********
DN :
Rules :

Is that ok ? (y/n) [y] y
user added.


On the "Authentication (pass/cert) [pass] :" just press enter.
Now you just need to start the nessus server, with the folowing command:


# /etc/init.d/nessusd start


And start the client with:


# nessus


input the login and password you added before, select the plugins you want to use in the vulnerability scan and input the target of scan and press "Start the scan"

Thursday, May 24, 2007

Linux (Ubuntu) Network Install

Introduction

Some days ago I had to install Ubuntu Breezy – a GNU/Linux flavour based on Debian and powered by apt-get – on four machines and I had only one CD-Rom available. And doing some fast calculations you can find out that it’s faster to install through a 100Mbps LAN (~12.5 Mb/s highest peek) than using a normal 52x CD-Rom.

Initially, the idea was to load the boot sector directly from the onboard network card. Unfortunately, I wasn’t able to do so (it skipped network boot as if it didn’t detect anything) and I decided to stick with that sometimes useful floppy disk and include a small boot sector that had the drivers included.

Ready to start?

Setting up the server

First off, you'll need a server where your clients will be connecting. That server must have a small FTP, HTTP and DHCP server and, obviously, an Ubuntu installation CD available. The DHCP allows your clients to connect to your network and the HTTP/FTP server will deliver installation files and package repositories.

Our FTP server will be tftpd-hpa. On Ubuntu/Debian this is a matter of

CODE:
  1. root@server$ apt-get install package-name

and that’s it, everything gets installed and set up. Let’s install everything at once:

CODE:
  1. root@server$ apt-get install tftpd-hpa apache2 dhcp3-server

Now it’s time to copy the content of the Ubuntu cd. Just do

CODE:
  1. root@server:/var/lib/tftpboot$ mkdir ubuntu
  2. root@server:/var/lib/tftpboot$ mount -o loop /var/lib/tftpboot/ubuntu-5.10-install-i386.iso /var/lib/tftpboot/ubuntu

In order to get an ISO of your installation CD, you can do (astonish yourself)

CODE:
  1. root@server$ cat /dev/hdb > ubuntu-5.10-install-i386.iso

where hdb is your CD-Rom device. It can be anything else other than hdb so you’d better figure out with dmesg (root@server # dmesg) or doing whatever suits you.

Make a symlink from apache's root to the mounted ISO

CODE:
  1. root@server:/var/www # ln -s /var/lib/tftpboot/ubuntu/

configure the DHCP server according to your network:

CODE:
  1. root@server:~ # cat /etc/dhcp3/dhcpd.conf
  2. ping-check = 1;
  3. filename = "ubuntu/install/netboot/pxelinux.0";
  4. subnet 192.168.1.0
  5. netmask 255.255.255.0 {
  6. range 192.168.1.10 192.168.1.254;
  7. }
CODE:
  1. root@server:~ # /etc/init.d/dhcp3-server restart
  2. Stopping DHCP server: dhcpd3.
  3. Starting DHCP server: dhcpd3.

And now run the clients. If you were able to see the Ubuntu boot prompt, that’s it. Now you just have to carry on with the installation. Otherwise, if you didn’t see anything and the boot continued as usual – just like happened to me – then keep reading this tutorial.The alternative is, like I said before, using a boot disk with the drivers. Etherboot has what we’re looking for. Download the latest version and read the README file. Then you just have to find out which network card you have and follow the very quick instructions.


taken from: http://mywheel.net/blog/index.php/ubuntu-network-install/

For other distros it's probably the same except for the packages download, here we used apt-get for downloading the needed packages, in other distros you may have some other way of downloading the packages like yum or you can always can go the internet and search for it.

Thursday, May 10, 2007

Instalar drivers da Nvidia em Ubuntu Feisty

A instalação foi realizada no meu notebook. A placa de vídeo aqui é uma NVIDIA GeForce 6150 256MB

Faça uma cópia de segurança do aquivo xorg.conf antes de iniciar a instalação.

$ sudo cp /etc/X11/xorg.conf /etc/X11/xorg.conf_bkp

1- Removendo pacotes antigos

$ sudo apt-get --purge remove nvidia-glx nvidia-settings nvidia-kernel-common

2- Instalando pacotes necessários

Certifique-se de ter habilitado os repositórios universe e multiverse

$ sudo apt-get install linux-restricted-modules-$(uname -r) build-essential xserver-xorg-dev

3- Baixe o driver aqui!

Esse é o ultimo release do driver

Mais informações sobre o driver aqui!

www.nvidia.com

4- Edite o arquivo linux-restricted-modules-common

$ sudo gedit /etc/default/linux-restricted-modules-common

Altere a linha DISABLED_MODULES=”"

Para DISABLED_MODULES=”nv”

5- Entrando em modo texto

Precione as teclas Ctrl + Alt + F1 e efetue o login. Não se assuste esse é o lado negro da força.

Após logado no modo texto vamos parar o gdm.

6 - Parando o gdm

$ sudo /etc/init.d/gdm stop

7- Executando o driver

Entre no diretório em que o foi salvo o aquivo .run

Transforme o aquivo em executável e em seguida execute o aquivo .run

$ sudo chmod +x NVIDIA-Linux-x86-1.0-9755-pkg1.run

A instalação e bem tranquila e só responder Ok em quase todas as perguntas. Só responda não na pergunta em que ele diz não ter um kernel compilado no sistema, se você aceitaria fazer o download desse kernel no site da nvidia.

$ sudo sh ./NVIDIA-Linux-x86-1.0-9755-pkg1.run

8 - Reinicie o sitema

$ sudo shutdown -r now

Pronto driver instalado!

9- Verificando a instalação

O primeiro sintoma que ocorreu no pc após a instalação do driver foi uma tela preta com o logo da nvidia antes de iniciar o gdm.

No menu Aplicações->Ferramentas do Sistema aparecerá a opção NVIDIA X Server Settings.

No terminal digite:

$ glxinfo | grep direct

Deve retornar

$ direct rendering: yes


retirado de: http://dfthiagodf.wordpress.com/2007/03/27/instalando-driver-nvidia-no-ubuntu-feisty/