Create a Cisco ASA VM in VMware Fusion
DISCLAIMER: The information provided herein is for general informational and educational purposes only.
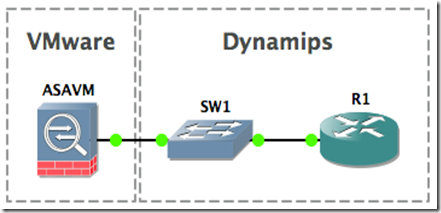
This post provides a solution on how to create a Cisco ASA device in VMware Fusion for the Mac. Why do this? Well, the most documented method to integrate the Cisco ASA with GNS3 is by having it run on the QEMU hypervisor. Since VMware Fusion 6 can integrate with GNS3 (check out my previous post), we now have another hypervisor option to bring the Cisco ASA into the GNS3 environment.
The following components were used for this tutorial:
· Fedora 20 LXDE Spin (32-bit PC Edition)
1. Create the ASAVM directory
This will be the working directory for our project. You can create the folder (directory) in the GUI, but I will use the command line method in my example. Run the following command from Terminal:
$ mkdir $HOME/Documents/ASAVM
2. Copy/Move the Cisco ASA image file to the ASAVM directory
Again, feel free to copy/move the file in the GUI, but I will use the command line method. In my example, I will copy the file from myDownloads/Labs directory to the Documents/ASAVM directory. Run the following command from Terminal:
$ cp $HOME/Downloads/Labs/asa842-k8.bin $HOME/Documents/ASAVM
3. Create the repack.v4.1.sh script file
Web forum member dmz is the author of the script that allows us to run the Cisco ASA 8.4(2) software on virtualization hypervisors. The script essentially unpacks the original ASA software binary file, performs patch operations, and repacks the files (and optionally creates a bootable ISO image file). Many thanks to dmz for providing the script as I'm sure this was a very difficult process to reverse engineer and debug. Visit the web forum post at 7200emu.hacki.at for more information.
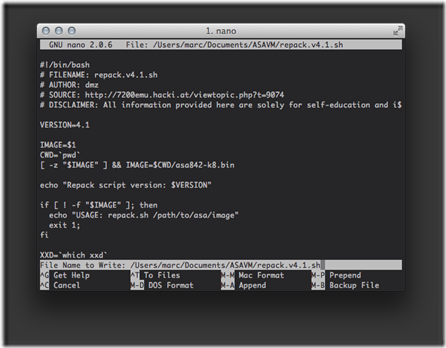
Create the repack.v4.1.sh script file with the nano text editor. Run the following command from Terminal:
$ nano $HOME/Documents/ASAVM/repack.v4.1.sh
Copy the code from GitHub and paste (command + v) the contents into the text editor window.
Save (control + o) the file, press the enter key to confirm, then exit (control + x) the nano text editor.
4. Verify the contents of the ASAVM directory
We should have two files in the ASAVM directory. Run the following command from Terminal to verify:
$ ls -lh $HOME/Documents/ASAVM
total 49160
-rw-r--r-- 1 marc staff 24M Jan 8 18:50 asa842-k8.bin
-rw-r--r-- 1 marc staff 4.2K Jan 8 18:51 repack.v4.1.sh
5. Create the Fedora Linux virtual machine (VM)
Why do we need to create a Linux VM? The repack.v4.1.sh script needs to be run in Linux in order to complete the required operations for the creation of the bootable Cisco ASA ISO image file.
Create the Fedora Linux VM with the following steps:
1. Open the VMware Fusion application.
2. Select File -> New... from the menu.
3. Select Install from disc or image.
4. Click the Continue button.
5. Click the Use another disc or disc image... button.
6. Navigate to and select the Fedora-Live-LXDE-i686-20-1.iso disc image.
7. Click the Open button.
8. Click the Continue button.
9. On the Choose Operating System screen, select Linux -> Fedora.
10. Click the Continue button.
11. Click the Finish button.
12. Click the Save button to save the virtual machine in the default Virtual Machines folder.
The Fedora Linux virtual machine will now automatically boot into the live disc environment which runs in the virtual machine's vRAM, rather than loading from the virtual hard disk drive.
6. Set the password for the liveuser
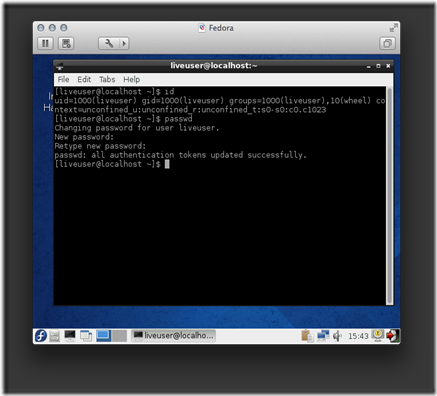
We are currently logged in as the liveuser standard user account. The user account has no password by default, so we will set a password for it. This step is a prerequisite for upcoming tasks. Run the following command from LXTerminal:
[liveuser@localhost]$ passwd
Changing password for user liveuser.
New password: Pa$$worD1
Retype new password: Pa$$worD1
passwd: all authentication tokens updated successfully.
7. Start the SSH Server
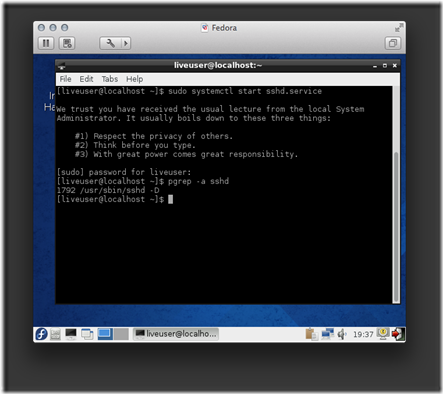
Our next task is to start the SSH Server daemon as we will need to enable remote access to the Linux VM. Run the following command fromLXTerminal:
[liveuser@localhost]$ sudo systemctl start sshd.service
...
[sudo] password for liveuser: Pa$$worD1
Verify the daemon process has started and is running. Run the following command from LXTerminal:
[liveuser@localhost]$ pgrep -a sshd
1792 /usr/sbin/sshd -D
8. Download and install software packages
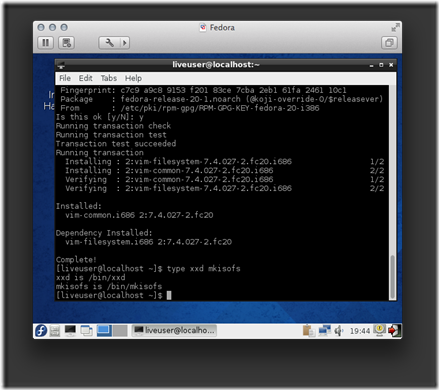
A couple of packages will need to be installed for the repack.v4.1.sh script to be able to create the bootable Cisco ASA ISO image file. Run the following command from LXTerminal:
[liveuser@localhost]$ sudo yum -y install vim-common mkisofs
...
Installed:
vim-common.i686 2:7.4.027-2.fc20
Dependency Installed:
vim-filesystem.i686 2:7.4.027-2.fc20
Complete!
Verify the packages have been successfully installed by running the following command from LXTerminal:
[liveuser@localhost]$ type xxd mkisofs
xxd is /bin/xxd
mkisofs is /bin/mkisofs
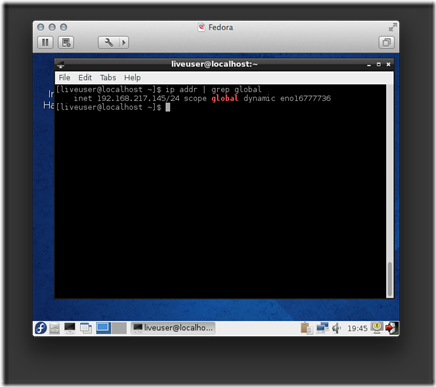
9. Get the IP configuration for the Fedora Linux VM
Your virtual machine will likely have a different dynamic IP address, so make sure to substitute the value in upcoming examples. Run the following command from LXTerminal:
[liveuser@localhost]$ ip addr | grep global
inet 192.168.217.145/24 scope global dynamic eno16777736
10. Transfer files from the Mac host to the Fedora Linux VM
Now that we have the IP address for the Linux VM guest, we can establish a scp connection and transfer the files from our Mac host to the remoteLinux VM guest. Run the following commands from Terminal:
$ cd $HOME/Documents/ASAVM
$ scp * liveuser@192.168.217.145:Documents
The authenticity of host '192.168.217.145 (192.168.217.145)' can't be established.
RSA key fingerprint is 62:38:a6:32:6b:d4:90:4a:7c:d8:10:b3:0c:85:d1:a5.
Are you sure you want to continue connecting (yes/no)? yes
Warning: Permanently added '192.168.217.145' (RSA) to the list of known hosts.
liveuser@192.168.217.145's password: Pa$$worD1
asa842-k8.bin 100% 24MB 24.0MB/s 00:01
repack.v4.1.sh 100% 4308 4.2KB/s 00:00
11. Create a SSH session to the Fedora Linux VM
Instead of continually entering commands in LXTerminal, within the virtual machine console, we will now simply establish a ssh session and enter the commands in our local Mac Terminal application. Run the following command from Terminal:
$ ssh liveuser@192.168.217.145
liveuser@192.168.217.145's password: Pa$$worD1
12. Run the repack.v4.1.sh script on the Fedora Linux VM (via SSH)
Run the following commands from Terminal:
[liveuser@localhost]$ cd $HOME/Documents
[liveuser@localhost]$ chmod +x repack.v4.1.sh
[liveuser@localhost]$ sudo ./repack.v4.1.sh ./asa842-k8.bin
[sudo] password for liveuser: Pa$$worD1
Repack script version: 4.1
Detected syslinux/cdrtools - ISO will be created
1359344+0 records in
1359344+0 records out
1359344 bytes (1.4 MB) copied, 2.4332 s, 559 kB/s
23697936+0 records in
23697936+0 records out
23697936 bytes (24 MB) copied, 97.922 s, 242 kB/s
/tmp/tmp.OFsCQZsGYc /home/liveuser/Documents
gzip: /home/liveuser/Documents/asa842-initrd-original.gz: decompression OK, trailing garbage ignored
114476 blocks
114476 blocks
114476 blocks
/home/liveuser/Documents
/tmp/tmp.KctycopD9w /home/liveuser/Documents
I: -input-charset not specified, using utf-8 (detected in locale settings)
Size of boot image is 4 sectors -> No emulation
21.05% done, estimate finish Wed Jan 8 22:46:41 2014
42.01% done, estimate finish Wed Jan 8 22:46:41 2014
63.01% done, estimate finish Wed Jan 8 22:46:41 2014
83.97% done, estimate finish Wed Jan 8 22:46:41 2014
Total translation table size: 2048
Total rockridge attributes bytes: 0
Total directory bytes: 2048
Path table size(bytes): 26
Max brk space used 0
23823 extents written (46 MB)
/home/liveuser/Documents
13. Verify the result
Four new files have been created in the directory. Run the following command from Terminal to confirm:
[liveuser@localhost]$ ll -h
-rw-r--r--. 1 root root 23M Jan 8 22:46 asa842-initrd.gz
-rw-r--r--. 1 root root 23M Jan 8 22:46 asa842-initrd-original.gz
-rw-r--r--. 1 liveuser liveuser 24M Jan 8 22:20 asa842-k8.bin
-rw-r--r--. 1 root root 1.3M Jan 8 22:44 asa842-vmlinuz
-rw-r--r--. 1 root root 47M Jan 8 22:46 asa.iso
-rwxr-xr-x. 1 liveuser liveuser 4.3K Jan 8 22:20 repack.v4.1.sh
We are finished with the interactive Linux portion, so close the ssh session to the the Fedora Linux VM. Run the following command fromTerminal:
[liveuser@localhost]$ exit
logout
Connection to 192.168.217.145 closed.
14. Transfer the asa.iso file from the Fedora Linux VM to the Mac
Run the following command from Terminal:
$ scp liveuser@192.168.217.145:Documents/asa.iso $HOME/Documents/ASAVM
liveuser@192.168.217.145's password: Pa$$worD1
asa.iso 100% 47MB 23.3MB/s 00:02
Verify the asa.iso file has been transferred to the local Mac file system. Run the following command from Terminal:
$ ls -lh $HOME/Documents/ASAVM
total 144456
-rw-r--r-- 1 marc staff 47M Jan 13 18:04 asa.iso
-rw-r--r-- 1 marc staff 24M Jan 13 17:48 asa842-k8.bin
-rw-r--r-- 1 marc staff 4.2K Jan 13 17:50 repack.v4.1.sh
The use of the Fedora Linux VM is complete. We can now shut down the Fedora Linux virtual machine in VMware Fusion.
15. Create the Cisco ASA virtual machine (VM)
We are ready to create the base Cisco ASA VM with the following steps:
1. Open the VMware Fusion application.
2. Select File -> New... from the menu.
3. Select Install from disc or image.
4. Click the Continue button.
5. Click the Use another disc or disc image... button.
6. Navigate to and select the asa.iso disc image.
7. Click the Open button.
8. Click the Continue button.
9. On the Choose Operating System screen, select Linux -> Other Linux 2.6x kernel.
10. Click the Continue button.
11. Click the Customize Settings button.
12. Name the virtual machine package as ASAVM.
13. Click the Save button to save the virtual machine in the default Virtual Machines folder.
16. Edit the virtual hardware for ASAVM
Make the following modifications in the Settings window:
| Component | Value |
| Processors | 1 processor core |
| Memory | 1024 MB |
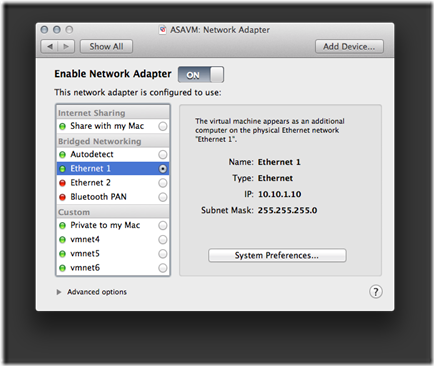
| Network Adapter | Bridged Networking: Ethernet1 |
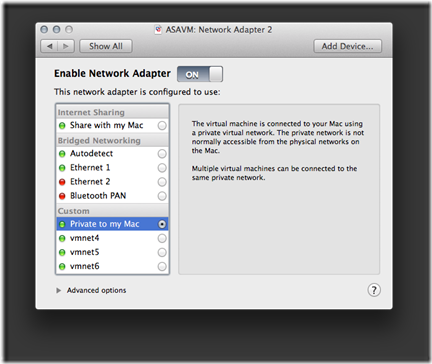
| Network Adapter 2 | Custom: Private to my Mac |
| Hard Disk (IDE) | 0.50 GB |
| CD/DVD (IDE) | asa.iso |
| Sound Card | Remove Sound Card |
| USB & Bluetooth | Remove USB Controller |
| Printer | Remove Printer Port |
# 16.1 Virtual Network Adapters
I've only tested Bridged Networking with a wired (i.e., no Wi-Fi) Ethernet connection. As newer Mac laptops don't have a physical Ethernet port, the StarTech USB31000S (Black) | USB31000SW (White) is a viable solution. For my labs that use a Cisco ASA as an Internet edge device, I define the first virtual network adapter as the logical outside interface that connects to the physical network.
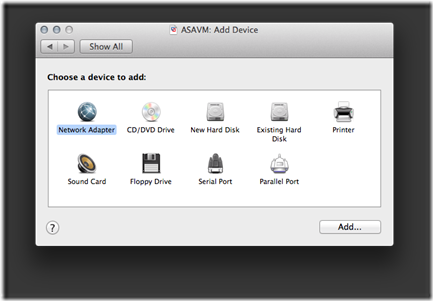
The virtual machine includes a single virtual network adapter by default. On the main Settings screen for the virtual machine, click the Add Device... button to add another Network Adapter device.
The second virtual network adapter will be set to Private to my Mac (VMnet1). For my labs that use a Cisco ASA as an edge device, I define the second virtual network adapter as the logical inside interface that connects to the virtual GNS3 network.
# 16.2 Virtual Hard Disk
Set the values for the following attributes of the virtual hard disk:
· Disk size: 0.50 GB
· Bus type: IDE
· Check Pre-allocate disk space
· Uncheck Split into multiple files
· Click the Apply button.
17. Edit the ASAVM configuration file
Close the VMware Fusion application before executing the steps in this section.
Some settings can't be configured with the GUI, so we will need to directly edit the ASAVM .vmx (virtual machine configuration) file. My ASAVM virtual machine is located in the default VMware Fusion folder (directory), so I would edit the file with the following command from Terminal:
$ nano $HOME/Documents/Virtual\ Machines.localized/ASAVM.vmwarevm/ASAVM.vmx
# 17.1 Virtual Network Adapters
As you recall, we have two virtual network adapters configured for ASAVM. An issue is the model type is incorrect, so the Cisco ASA software won't recognize them upon boot. We can rectify this with the following steps:
· Locate the line with the ethernet0.present = "TRUE" statement.
· Insert a line directly below it with the ethernet0.virtualDev = "e1000e" statement.
...
ethernet0.present = "TRUE"
ethernet0.virtualDev = "e1000e"
ethernet0.connectionType = "custom"
ethernet0.wakeOnPcktRcv = "FALSE"
ethernet0.addressType = "generated"
ethernet0.linkStatePropagation.enable = "TRUE"
...
The previous steps will need to be repeated (substitute the vNIC index number) for every virtual network adapter attached to the virtual machine. So to complete my configuration, I would also insert the statement for my second virtual network adapter.
...
ethernet1.present = "TRUE"
ethernet1.virtualDev = "e1000e"
ethernet1.connectionType = "hostonly"
ethernet1.wakeOnPcktRcv = "FALSE"
ethernet1.addressType = "generated"
...
# 17.2 Virtual Serial Port
Just like with a physical Cisco ASA appliance, we can connect to our ASAVM with a console port connection. This is very similar to how we interface with our virtual routers in GNS3 (Dynamips). The following steps will create a virtual serial port that will allow us to emulate a console port connection via telnet.
· Locate the line with the serial0.present = "FALSE" statement.
· Change the value from FALSE to TRUE to enable it.
· Add some more statements to define the properties of the virtual component.
...
serial0.present = "TRUE"
serial0.yieldOnMsrRead = "TRUE"
serial0.fileType = "network"
serial0.fileName = "telnet://127.0.0.1:3456"
...
We are finished configuring the .vmx file, so lets save (control + o) the file, press the enter key to confirm, then exit (control + x) the nano text editor.
18. Start ASAVM
Reopen the VMware Fusion application and start the ASAVM virtual machine. Press the enter key at the boot: prompt, within the ASAVM virtual console, to load the ASA.
19. Virtual console port connection to ASAVM
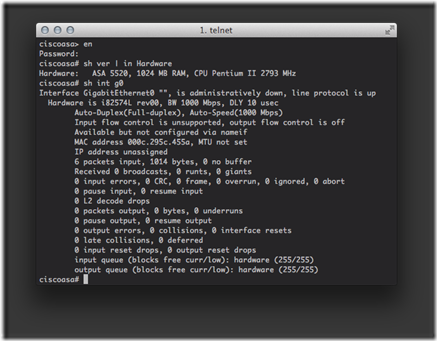
Remember we need to emulate a console port connection via telnet, so enter the following command from Terminal:
$ telnet 127.0.0.1 3456
20. Lab integration
Your virtual machine should be up and running, but a network device serves little purpose unless it's actually connected to a network. Check out my Implement a Multivendor OSPF Lab with GNS3 and VMware Fusion post for a practical example.
Posted 14th January by Marc Weisel
Labels: Cisco GNS3 Linux Mac SSH VMware
Taken From: http://binarynature.blogspot.pt/2014/01/create-cisco-asa-vmware-fusion.html
More Info at: http://7200emu.hacki.at/viewtopic.php?t=9074

1 comment:
good blog...
structured cabling companies
structured cabling solutions
Post a Comment